

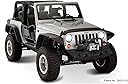
🛻 Elevate your Jeep’s edge with Bushwacker’s ultimate flat style fender flares—where rugged meets refined.
Bushwacker’s 4-piece flat style fender flare set for 2007-2018 Jeep Wrangler JK 2-Door combines proprietary Dura-Flex 2000 TPO material for superior impact absorption and flexibility with precision CAD-engineered fitment. Featuring a matte black textured finish, these flares increase tire clearance for larger wheels, install easily with included hardware, and offer 100% UV protection to prevent fading. Backed by a limited lifetime warranty, they deliver durable, stylish protection that enhances both on- and off-road performance.
| Asin | B0030UQO0M |
| Auto Part Position | Front |
| Automotive Fit Type | Vehicle Specific Fit |
| Best Sellers Rank | #2,240,128 in Automotive (See Top 100 in Automotive) #2,586 in Automotive Fender Flares |
| Brand Name | Bushwacker |
| Color | OEM textured black |
| Compatible With Vehicle Type | Car |
| Customer Reviews | 4.0 4.0 out of 5 stars (133) 4.0 out of 5 stars |
| Fit Type | Vehicle Specific Fit |
| Global Trade Identification Number | 00090689112347 |
| Included Components | Flares, Hardware, Instructions |
| Installation Type | Bolt-On |
| Item Type Name | Jeep Flat Style Fender Flare - Set of 4 for 2007-2018 Jeep Wrangler JK 2-Door Model |
| Item Weight | 25.7 pounds |
| Manufacturer | Bushwacker |
| Manufacturer Part Number | 10919-07 |
| Manufacturer Warranty Description | Limited Lifetime Warranty |
| Material Type | tpo |
| Model Number | 10919-07 |
| Number Of Items | 1 |
| Number Of Packs | 4 |
| Oem Equivalent Part Number | 10919-07 |
| Unit Count | 4 Count |
| Upc | 090689112347 |
User
A few quirks but all around good.
Let me start by saying that, while I am an avid jeep-est (whatever you want to call it), I got these mostly for the looks. I am running a 2015 2 door rubicon on 35" tires (stock rims w 1.5" spacers) and a 2.5" aev lift, and while I had previously had no problems with tire rub, these obviously provide quite a bit more clearance, to the point where it almost makes my 35" tires look a bit small (could easily fit 37"s which I am considering). Overall I really like the look though. I am also a huge researcher and kind of cheep, so obviously I spent a lot of time weighing my options (these, cheaper knock offs, aluminum, steel etc). The main stream big names we ruled out pretty quickly based on the high costs (though I do rely like the poison spyder steal ones based on the beefy construction that you can literally stand on. And if money wasn't a factor I would have gotten those). I also quickly ruled out the knockoffs all around (even though they look and probably are very similar) based on experience: Every single cheap or knock off part I have bought for my jeep thus far (there have been many) have either failed or been replaced in the last year alone (am on my 3rd winch in the last year, for example, before buying a nice warn). Also while I agree with others that these are still a little pricey for what they are, they o come with a great warranty, are well made and as far as the major looks and performance upgrade they provide actually quite a deal comparatively.... Anyways, install: was honestly not very difficult, nor did it take more than the most basic of tools (couple ratchets, screw driver, knife, and something to cut with if using the old fender innards which I did) but it did take quite a while as there are a lot of steps involved (I split it up but woul say roughly 5-6hrs). Cutting the inner fenders: I think people have made way to big a deal of this as it wasnt hard or nearly exact as you would expect (just watch the video) but I used a small dremmel to cut but something as simple as a box knife would work as well. And the cleanness of the lines etc dosnt much matter as it is covered by a half inch or so lip on the new flares. Anyways, in the end they look great, make my jeep look biggier/tougher and allow for much more tire clearance, fit and finish are good and weren't very difficult to install. Also, while they are a little pricey for big hunks of plastic, they are quality and the bang for your buck is there. Negatives would be that they take quite a while to install, and may make your tires look small with all that extra room. Oh and I would also suggest to Bushwacker and you to be careful as the provide the exact number of every part, which dosnt leave much room for error. Luckally everything went well for me but it would be nice if they included a couple extra feet of stickey tape and a few extra screws and clips as loosing anything could be quite frustrating... Pictures attached. Cheers!ps. one more thing I just thought of. Which while not necessary I did buy a $12 pair of clip pliers (like the guy used in the video I watched) and I was happy that I did as it made the disassembly of the old flairs go much quicker than it otherwise would have plus they will be useful in the future with other projets. Link: https://www.amazon.com/gp/product/B01NCROVAE/ref=oh_aui_detailpage_o00_s00?ie=UTF8&psc=1
User
ABSOLUTELY THE WORST NIGHTMARE INSTALLATION EVER
ABSOLUTELY THE WORST NIGHTMARE INSTALLATION EVER!!!!! Oh yes, they look great when done and feel plenty sturdy, but my certified mechanic hated them so much after spending three hours on just one fender, that he refused to do the rest! I did the remaining ones and it took me SEVEN hours!!! Worst engineering I’ve ever seen! If I ever meet the engineer, it’ll get ugly! From what I understand, all of the flat fenders are this horrible to install, not just this company.
User
Once you see how easy it is
after reading MANY reviews of how difficult the install was, I was hesitant to order. Finally I decided to get them and had a friend lined up to help. I've got to say...don't let anyone, or any review discourage you from getting these. The install was nothing, 4 hours and it was done. The friend I had lined up only had to assist me twice and that was to hold up the rear fender liner to mark it. The most difficult part was getting through the first cut of the liners. Once you see how easy it is, all hesitations go out the window and the rest are a breeze! I used a pneumatic cut off wheel to trim the liners and it worked perfect...no messy edges, no melted plastic, just a perfect line. I can honestly say...DON'T WASTE YOUR TIME WITH THE INCLUDED INSTRUCTIONS. Watch the YouTube video from AutoCustoms, it is very detailed and goes step by step. (I watched it at least a dozen times the day before install) Everything went together great, the fenders came out awesome...very sturdy and solid. The day after install we took the Jeep rock climbing and they really proved their worth over the stocks. The 35" tire tucked in nicely during full articulation. Great product, looks great...worth every penny!
User
Flares look great & add clearance! Install is long... but very doable
Installed these on my 2014 JK and they look awesome! Very happy with this purchase!Pros:1. Flares look great!2. Seem to be sturdy and well made3. Added flex and avoids fender rubbing4. Although tedious & time consuming, install was really not that bad. It is close to bolt on - take your fenders off, measure and cut your splash shields, install the new flares. See below for install tips.Cons:1. Pricey - however most good flares are and relatively speaking these are a lot less than metal flares!2. A very obvious improvement Bushwacker could/should make to simplify the install is to provide some sort of paper template for the splash shields to ensure they are cut accurately instead of having every single person go through the trial and error themselves! This is the place where you might screw up and until you've done one, it's unclear exactly where to cut - so why they don't do this, I really don't understand.3. Several other steps of the install could/should have been done by Bushwacker and saved me over an hour (see #2 below).4. Included b&w instructions are hard to decipher. Bushwacker should print them in color (you can find the online color pdf but better yet watch the video mentioned below!)The most common complaint on other reviews is around the install - it took me 7 hours total by myself. Here's my suggestions to get through it:1. Watch the Bushwacker Fender Flare Install youtube video by AutoCustoms.com. Watch it again if anything is not clear. Excellent step-by-step explanation that will answer most questions & save a lot of time.2. Do the following things the night before the install a) Install the rubber edge trim on all 4 flares, b) install the speed clips - this means you also need to trim all the extra plastic on the inner pieces so you can get the clips on, and c) install the front fender lights. These steps took me a little over an hour and at the end of the next day I was really glad I had done them the night before (and a little annoyed that I had to do them).3. Have proper tools available - spend $10 to get a specialized tool to pop the body clips off (Wilmar clip removal or similar), a quality utility blade, an awl or something similar to align the fender holes, two long extensions to help install the lights, and some kind of electric cutting device for cutting the splash shields. I used an angle grinder - a hacksaw would have worked but taken 2-3 times as long.4. Be especially careful on front splash shield cuts. Rear fender shields were easy for me to get right after watching the video and holding the original shields against the body. Front was tricker so I was conservative and didn't cut enough - I had to cut them twice but better than cutting too much.5. Getting the fenders to align to allow the final screws to go into the inner supports was the most time consuming step of the install for me - it took me an hour on the first flare. On the others I marked the speed clip holes with the white grease pencil so I could see when they were aligned; this helped me do this step in 1/2 the time or less.Good luck!
User
Great Product!!! Id buy again!
If you have basic knowledge of tools, a whole day to install and some basic mechanical inclination, you can install this product! They look great and completely changed the stance of my 2014 JK. Yes....you have some details to follow. I read many reviews and took the advice of others and watched the video by AutoCustoms on Youtube many times as well had a laptop set up and followed the video step by step as I was preparing and installing. I printed the instructions off the 4wheelparts site (in color) but they still aren't that great. The best advice I read was to do some pre-install prep work like installing the running lights. This was challenging, I used the tape on the finger method ( see the reviews in Amazon). Install all the metal clips on the various pieces required, install all of the rubber seals around the flares. Take your time and make sure you do it correctly. Separate and count all of your hardware and prepare it for use. I installed on a Saturday and took the week before to get ready. Pay attention to the video for marking and cutting the splash shields. Yes, it is important that the splash shields be cut as directed but you don't have to be perfect. once you get the first one done, the rest will fly by. Take your time on the first one. Mock up the flare by hand and notice the overlap of the flare and the splash shield....Lining up the screw holes for on the underside of the flare towards the end can be irritating but some prep before hand will make it easier. Leave the screws with some threads left, pull your adhesive strips and have someone push in on the flare as you are tightening. keeps flare tight against the adhesive and the metal.My one concern is the running lights are secured from the inside of the hollow flare...if you have a running light go out,I'm assuming you have to take the flare off which will ruin your adhesive seal. I guess ill cross that bridge when it happens!Well built, looks great! Id buy and install again.
User
High quality fender replacement
Very pleased with the quality of these fenders and the price from this seller is better than everyone else (I got them on sale). Installation of the fronts was pretty challenging from cutting the stock liners to getting all of the fasteners, clips and plastic supports aligned. You really need to follow the instructions in their video. The rears went on super fast, partially because I didn't use the stock liners but they also have a better fit to the fenders than the front. The fronts do have some slight gaps where the fenders angle down towards the rear. They provide a weatherstripping seal but the gap from the fender is great enough that the seal didn't adhere to the metal in some spots. Not terrible and it looks fine but disappointing for the price compared to other fenders.Overall I'm very pleased with the quality and look of these fenders. Only time will tell on the durability side. They could easily pass as a stock item if you didn't know better.
User
Ugh, Good looking product but major disappointment with install and quality
Let me start off by saying, I'm giving this 2 stars because these flares look great, but that's about it. Had I known before I bought them how poor the manufacturing and how terrible the installation would have been, I never would have bought them. I feel kind of sick that I spent $600+ on these. Matter of fact, I did start a return through Amazon for them after becoming so incredibly frustrated with the quality during install but since I already had 6 hours into the install on just 2 of them, I decided to just stick it out and finish installing them.PROS: Looks good but if you can find something similar elsewhere, do not buy these. In fact, unless you have your heart set on this set of fenders, just stay away.CONS: Where do I begin? The molded plastic pre-drilled hole areas didn't match up to the body holes, I had to do all of the clean up on all of the holes with a razor because all of the pre-drilled areas had massive amounts of left over plastic still attached to them. I understand this happens sometimes with molded plastic products but ALL of the holes needed to be cleaned up! Installation instructions could be considered a book, there are like 50 steps for each fender (THESE ARE DEFINITELY NOT BOLT-ON-AND-GO!). The instructions are a joke, in and of themselves, photocopied black and white pictures so small they're barely decipherable and the text instructions aren't much better. There are YouTube videos (that I watched prior to install) showing and making it look like the process of putting these Fenders on are the easiest thing since slicing softened butter...but even they showed similar issues to what I experience, they just didn't talk about it...wondering if they were paid by Bushwacker to make it look easy. The light assembly was torturous, we tried the suggested "use a couple of socket extensions to put through the body to hold the nut in place while tightening the screw"....LOL! Ended up just wrapping tape to my index finger to stick down inside the body to attach the nut to the screw bolt. Cutting the stock well covers to fit was actually the EASIEST part.All-in-all, I ended up keeping these because I had so much of my precious time invested in installing them (12 hours total) by the time I was realizing all of these issues. They are not coming off and I don't want to return these and end up having to do the same thing over again with another product, ugh.They look good, not worth $600+, but they'll do...
User
Incredibly hard to install
The product description states: "Installs easily with no drilling or cutting." This is a blatant lie. You have to cut AND drill to install these. The instructions require it.In a nutshell, they look good, feel strong and do their job just fine. I put them on several weeks ago on a weekend, and it turned into a two-day project (about 9 hours, total, minus the cussing). About 1/3 of the way through, I simply lost interest. As nice as they look, and for what they add to the Jeep in terms of clearance and "ruggedness", I just wanted to be done, and had I been able to stop and reverse what I'd done, I would have. I think it was as I was lying on my back, sweat in my eyes, shoulders aching, trying to use a pick to pry the speed-clips to center (that I couldn't see) without screwing up the plastic too much. No luck, and I left a nice 14" scratch in the plastic.There's nothing wrong with them, and they seem completely capable of being good fenders. The others' advice here is paramount. You MUST take your time and go slowly. Use grease pencils to mark parts - what they are, where they go. Be prepared with a plastic-cutting tool (do NOT use a Dremel and cut-off wheel. The hot plastic does leave nasty looking scars). Have a good set of new drill bits, sandpaper, a good flashlight, plenty of patience, plenty of rest.On, they look good, the clearance is great. Simply remember that though this is not a particularly challenging install, it is not a simple matter of pulling off old ones and putting on new ones. There's holding, measuring, tracing, cutting, reassembling. It's pretty critical to look at each picture closely, and having another set of arms makes the task go more easily. Also, someone to discuss what you're reading in the instructions and seeing in the photos.It's stupid-simple, really. Fender flares? Couldn't be easier, right? Well, be prepared for the install. Then, enjoy the heck out of them!As one last side note - my local Jeep dealer offers install of these for $500. If I had known more about the install, I would have certainly taken that route -- well worth the cost.
User
all you need is in this flare kit
Flares look great all parts where with the kit took about 5 hours to install
User
Très bon achat!
Aucun probleme avec ce produit, installation assez facile et le résultat est génial.
User
Easy install
Fit on good, easy install, but the blinker lights didn’t work for me.
User
Save your money and buy a better brand
Very cheap and won’t last
User
Five Stars
Fit was perfect. Look is amazing :)
Trustpilot
2 weeks ago
3 days ago