


🔧 Revive Your iPad: A Touch of Perfection!
This Screen Replacement for iPad 6 (6th Gen 2018) is designed for seamless compatibility with models A1893 and A1954. It includes a full repair kit for easy installation, features a scratch-resistant tempered glass surface, and maintains home button functionality, ensuring your device looks and performs like new.
| Material Type | Tempered Glass |
| Unit Count | 1.0 Count |
| Number of Items | 1 |
| Item Dimensions L x W | 7.87"L x 5.12"W |
| Finish Type | Glossy |
| Water Resistance Level | Not Water Resistant |
| Screen Surface Description | Glossy |
| Clarity | 1.00 |
| Screen Size | 9.7 Inches |
| Compatible Phone Models | iPad 6th Gen(A1893 A1954) |
| Special Features | Scratch Resistant |
| Compatible Devices | iPad 6th Gen(A1893 A1954) |
| Item Hardness | 9H |
J**I
Review
Good qualityValue for your money. Fit perfectly.
L**5
Replaced my old one for 2 weeks now, works like new
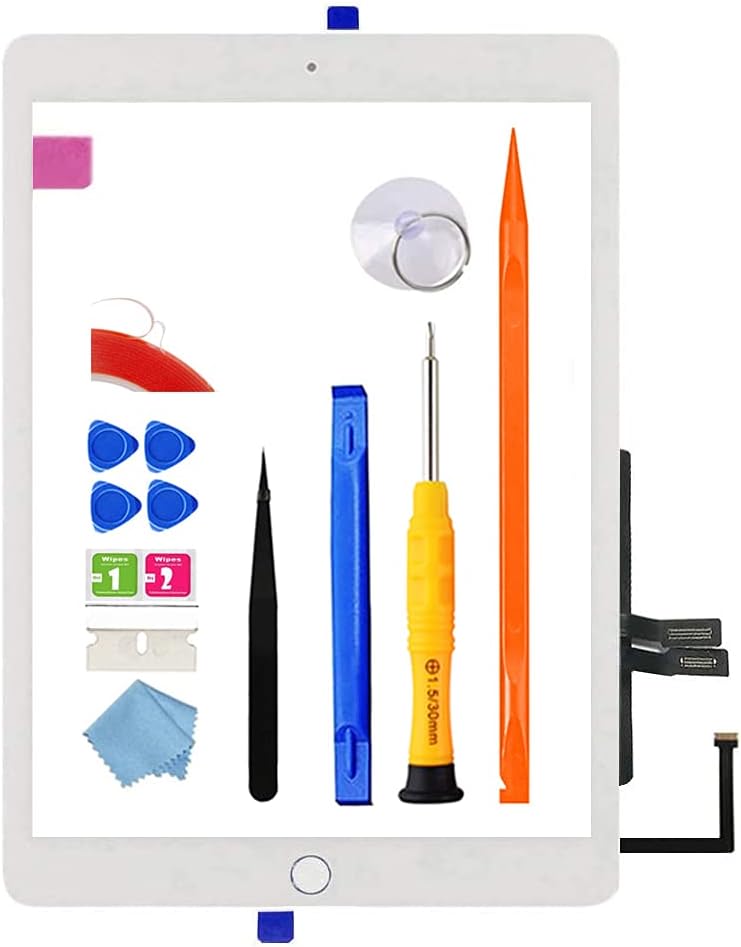
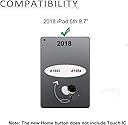
Installation is very simple. The most difficult part is to pry the old glass off. It took me over half an hour, and I had to shatter the old glass totally to remove it. I bought this one with the home button to be safe. After I finish, I realized that I should hv bought the ones without it. No wonder most people are selling them with no home button. I resused the old one, so that my credentials are kept. It's very easy to get off and stick to the new one.In general, you can follow the instructions in the package. One tricky part is the longest flat wire that goes from glass to the pad. It's glued on by a tiny tape. All other connectors are clipped on, so you can pry them open withthe pastic pryer came in the kit, but for this one, u need to peel off the tape, and pull it out. prying will bend the connectors.After you are done, before you glue the glass back to make it permanant, it is suggested that you test if it works.The LCD may not light up. Don't panic, the pad needs to be hard restarted. push and hold both power and home button for 10 sec, and it'll restart to light the LCD up.Aviold my pitfalls listed above, and good luck, u may finish in a hour.
R**N
touchscreen not working normally after install
The media could not be loaded. This replacement screen was a nightmare to install. Firstly, the printed directions were absolutely horrible. They were vague at best. I had to watch a video from a youtuber to get it installed properly. There was broken glass everywhere and the suction cup was absolutely useless. Also, the tools to separate the broken glass from the chassis did not work at all. I used a razor blade to separate the broken screen from the ipad. I made sure not to cut any cables as shown in the youtube video I watched, which was excellent by the way. Unfortunately, I lost home functionality mainly due to my inexperience as I broke the zif connector for the home button cable, but also because the printed directions didn't explain AT ALL which way the zif connector was hinged. Anyway, I could live with that if everything else worked fine. The adhesive tape does NOT hold. I didn't try the included glue because there were NO instructions on how to install it and I didn't want to risk getting glue everywhere. The worst part is this, there is a horizontal band across my ipad that no longer registers touch input. I included a video showing this. This is not acceptable! Do NOT buy this! You'd be better off paying a pro to replace a broken screen because at least you get a warranty for a couple of months!
J**.
Great replacement but wrong color
This is the third replacement screen I ordered within two months time - first was from another company and it had so many dead zones it was impossible to use the ipad, second was also a different company and wasn't the right size, so I finally ordered from JPUNG. Very glad I did - the JPUNG screen works perfectly without any dead zones. However, the adhesion isn't the best - there is one edge where the screen comes slightly above the rim of ipad edge and it won't stay down. JPUNG includes a roll of extra sticky super thin double-sided tape (in anticipation of this issue?) but we sadly did not tape down the edges and assumed the factory adhesion would be enough. Now that the screen is in place, we don't want to pull it up to adhere a 2" section of thin tape with the risk of cracking it and ordering a 4th screen. Other issue is I absolutely ordered a white screen, knowing it would take two days longer to arrive than the black screen, just so my ipad could look like the original. When it arrived as planned, it was the black screen, and the faulty dead-zone screen had just shattered while we took it off in anticipation of opening the JPUNG box. At that point, it had been 6 weeks of either not having a usable ipad, or having a dead-zone screen, and I was so frustrated that we installed the black anyway. So now I have a redneck-looking ipad with a black-edge screen and the original white home button (I wanted to keep the fingerprint touch). First world problems, I know. If this screen cracks, I'll absolutely buy a JPUNG again simply because there are no dead zones.
E**E
Works great! Here are a few tips.
This device is fairly simple to install a new screen compared to most. All tools are provided and there and numerous videos on YouTube that provide step by step instructions. Keeping the original home button is very doable, just be gentle removing it.(Seems obvious, but make sure you have a well lit, clean space available & wear latex gloves.)From my experience, these steps are essential for proper installation:*After removing cracked screen, thoroughly clean all glass shards, residue etc. New screen won’t lie flat and may even crack during installation if not.* Make sure to fold cable onto glass and ensure it’s firmly attached. If not the screen will have dead zones.*Use the provided double sided tape, the adhesive that comes pre-applied isn’t strong enough and will loosen within a month.*Also, be extremely careful with the LED. It’s very delicate, scuffs or fluid can damage it and replacing it is costly.
M**H
works but.....
We watched the video because there are no instructions in the package. The video is edited to show clips of only some parts of the process; the video of how to remove the old screen is a joke. Like other reviewers, we had to shatter the old screen and pick it out piece by piece - it took over an hour, and was hazardous.Other parts of the video simply aren't there - including how the ipad was taken apart, after the screen was removed, where hidden screws were, etc. Eventually, we got it all together and lo and behold it worked . The kid working alongside said it was a great learning experience, though we expected it would fail in the end.Time is money and based on the amount of time this took we would've saved money with a repair shop - but, it was interesting (if frustrating) and turned into a learning opportunity and a new, working screen on an ipad.PS - tons of extra parts in the kit with zero explanation or appearance in the video. I have no idea what they are or why.
Trustpilot
3 weeks ago
1 month ago
1 week ago
2 days ago