Desertcart purchases this item on your behalf and handles shipping, customs, and support to Slovakia.
⛽ Upgrade your ride with precision fuel control — don’t let inefficiency hold you back!
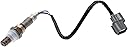
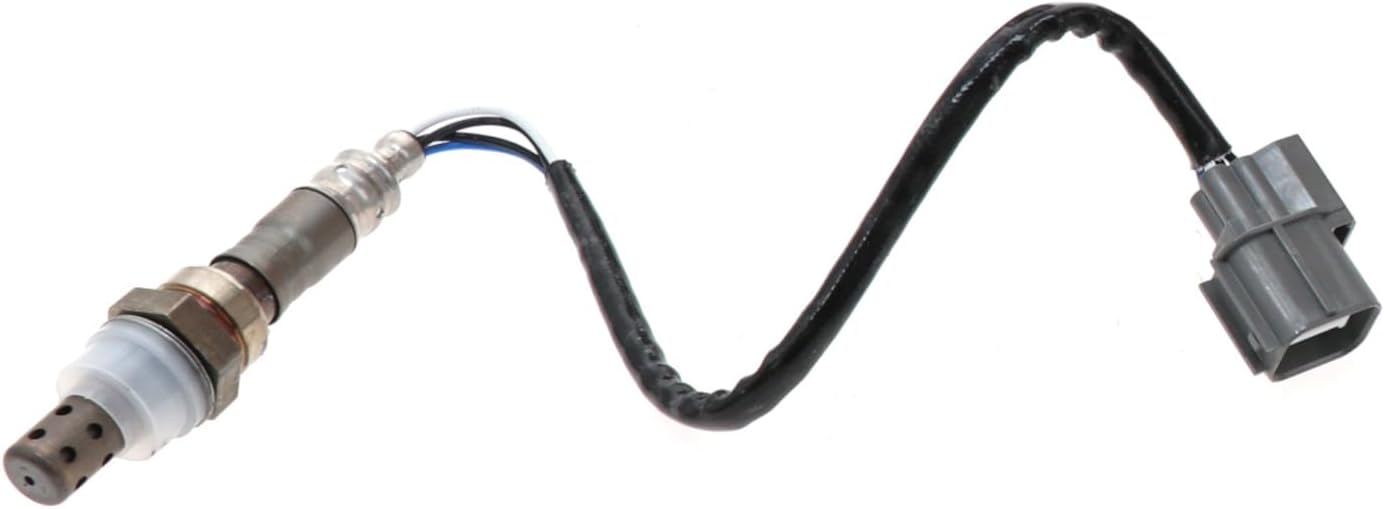
The Denso 234-9005 Oxygen Sensor is a high-accuracy air/fuel ratio sensor designed for 2001-2005 Honda Civics, 2002-2004 Honda CR-Vs, and 2002-2004 Acura RSX models. Manufactured to strict OE standards, it ensures a perfect first-time fit and enhances engine performance by optimizing fuel consumption and reducing emissions. Built with durable stainless steel and zirconium, it withstands temperatures up to 850°C, delivering long-lasting reliability. Highly rated by users, this sensor is a must-have upgrade for maintaining your vehicle’s efficiency and compliance.


| ASIN | B000C5UFVM |
| Best Sellers Rank | #92,230 in Automotive ( See Top 100 in Automotive ) #159 in Automotive Replacement Oxygen Sensors |
| Brand | Denso |
| Brand Name | Denso |
| Customer Reviews | 4.5 out of 5 stars 1,257 Reviews |
| Global Trade Identification Number | 00042511110403 |
| Included Components | Air/Fuel Ratio Sensor |
| Item Dimensions | 5.75 x 2.19 x 1.88 inches |
| Item Type Name | ACCESSORIES |
| Item Weight | 0.25 Pounds |
| Item dimensions L x W x H | 5.75 x 2.19 x 1.88 inches |
| Manufacturer | Denso |
| Material | Stainless Steel, Zirconium |
| Material Type | Stainless Steel, Zirconium |
| Measurement Accuracy | [High] |
| Model | 234-9005 |
| Mounting Type | Surface Mount |
| Output Type | Analog, Push Pull |
| Part Number | 234-9005 |
| Specific Uses For Product | Replacement Air/Fuel Ratio Sensor |
| Style | Replacement Part |
| Style Name | Replacement Part |
| UPC | 042511110403 |
| Unit Count | 1.0 Count |
| Upper Temperature Rating | 850 Degrees Celsius |
| Warranty Description | LIMITED WARRANTY |
C**Y
ABSOLUTELY, worth it, sux that it costs so much
Had a code 1166, purchased a $50 sensor to save $. what a mistake. As soon as I started crv and checked the cel lite up with codes 1163,1164...( 4 codes ). cleared code, started again, immediate codes. Put old sensor in and eventually the 1166 code pops up, but only the 1166 code. Bought this denso for alot more$$, but installed and no more codes, crv works great, no cel. Don't be stupid and try to save $$, this crv denso sensor is ridiculous expensive, even compared to other denso oxy sensors. Not sure why crv's sensors cost so much more in the denso company. Here is what I found interesting. This denso sensor is ASSEMBLED IN THE USA, USING FOREIGN PARTS. THIS IS PROBABLY WHY ITS SO EXPENSIVE. Anyway, the model stamp on 23 year old sensor was ez to read. The new sensor stamp showing its assembled here by denso and product code on new sensor is almost impossible to read, it took my daughter and a magnifying glass to see denso and the product #. And my daughter has awesome vision even reading all the super fine print on everything. scary that they hide the fact its a denso, and assembled in the USA. PLEASE, save yourself the time and effort, and spend the extra to fix your problem. Only complaint i have is threads weren't coated with anti seize. probably won't matter because it will last another 23 years anyway.
S**R
Works perfectly on Honda Civic Hybrid 2005 1.3L
The Check Engine Light on my my Honda Civic Hybrid 2005 1.3L came on while driving one day. So I took my car to autoZone and had the code read (did not feel like paying dearlership 80 bucks just to read a code). It was a P0135 code which means A/F Sensor 1 Heater System Malfunction. The probable causes were as generic as they come so I decide that just replacing the sensor made most sense. I have never changed a sensor before and did not have a clue on what needed to be done so I went to youtube and type "change oxygen sensor" and although not specific to my car I got the idea , still I figured if the dealership charges me about 100 bucks more to change the sensor I'll do it at the dearlership for peace of mind. I called the dealership and the price they quoted to replace the sensor was $500.00. Okay thats almost 400 bucks more than the part costs on Amazon so I am going to do this myself. If I am successful I keep about 400 bucks if I fail I wasted $120.00. I ordered the Denso 234-9005 A/F sensor and the TEKTON 4929 3/8-Inch Drive by 7/8-Inch Oxygen Sensor Socket from Amazon and orderd Liquid Wrench (very important to get specially for an older car) from a local car parts store (since the overnight shipping on the liquid wrench was 5 times the cost of the product itself). The next day I got the part (Amazon was prompt as usual) and it looked about the same the cable was maybe an inch longer and the color of the wires and protective sleeve were different. I was very nervous but decided to see if the old sensor would even come loose. In the video I watched on youtude the gentleman has removed the heat shield to me it seemed like I did not need to so I sprayed the existing broken sensor with liquid wrench (5 stars..:) and waited about 5 minutes. I slid the socket mentioned above over the wire but it seems like the sensor and wire was taller that the socket so I bent he cable at the sensor head and was able to grip the sensor nut with almost no effort the sensor turned and I removed it. I compared the thread size etc and all looked good. The sensor I bought from Amazon came with an anti-seize compound which I applied to the thread of the new sensor and installed it. I drove the car around the block and the harsh rough sounding engine noise was gone. The car was driving smoothly as before but the Check Engine Light remained on. I decided to just drive it and see what happens. After about 10 miles the Check engine Light reset itself and its been off for about 100 miles now. My MPG is back to normal which is around 40MPG as opposed to the 29MPG I was getting with sensor broken. I will probably update this review if it stays that way after about 10K+. FWIW while doing my research I came accross Part # W0133-1600700-ND which seemed to be the correct fit for my car too but cost $270+. I guess that is OEM and this is after market - I haven't a clue. I just know this Denso 234-9005 worked on my car. TIP: If anything the task I spent the most time on was disconnecting the electrical connector from the socket on the car. It turns out that the clasp that holds the connector in place is on the underside of the socket. However by gently fiddling around I realised that there is a clasp on the top that removes the whole socket and connector from the car. You then turn the thing around and now its really easy to disconnect the connector from the socket. Just be patient and work slowly make sure you have ample of light and PLEASE make sure you are doing this work when the car has completely cooled down or else you are sure to get burned if you are amateur like me..:)
M**S
Soooo easy, even a guy can do it! =) Fixed my issues on '04 CRV!
Engine light came on on my dash, so I purchased an OBD2 code reader to see what the trouble was. It showed two codes: P0134 and P0135. I purchased a mechanic's manual for my vehicle to see what the troubleshooting procedure was for those codes. My car was definitely running poorly, bad gas mileage, exhaust smelled like gunpowder, and car was idling funny at traffic lights. I determined the heated oxygen sensor needed to be replaced - my car has almost 200,000 miles on it and has never had the sensors replaced. I purchased this Denso 234-9005 sensor for my '04 Honda CRV from amazon after doing a bunch of research to make sure it was the right one. Iit was ton's cheaper than going to the Honda dealership (quoted around $350 there for the same part). In my research it appears that the Denso is the OEM part for Honda. Also purchased the socket drive rachet attachment tool that was recommended. When the parts arrived I did the replacement myself - girl power!!! Ladies, it was easy. You have to get under the vehicle, but you don't need to raise the vehicle, and it is very easy to get to (You Tube videos are a huge help). I didn't drive the car for several days before the repair so it would be nice and cold. I sprayed the old sensor with WD-40 the day before and let it soak. Gave it another spray a few hours before attempting the repair. It took a decent coaxing to get the old one off, but was easy enough. The sensor came with lube for the threads and really was a cinch to put in. The hardest part of it all was figuring out how to unplug the other end from the outlet. You must remove the screw that holds the assembly in place and then on the backside there was a place that had to be pressed in for the thing to release and slide apart. Once you get the old sensor unplugged it is super easy to plug the new one in and attach the assembly back into place with the screw. 15 minute repair. After the repair, I took the car for a drive down a nearby highway. Got up to 60mph and kept it there for a few minutes, then let off the gas and let the car coast for a minute or so. Turned around and did a bit of city driving, stopping at stop lights and such. Came home, parked, and then in about half hour drove to the grocery store and on the way home my Engine light went off. Yay!!!!! Car is ready for inspection!!! Just to make sure the codes were cleared, I plugged my OBD2 code reader back in and rescanned. It showed NO CODES!
T**N
Great Buy, Worked Well on My Honda Civic!
Just got a my new 2005 Honda Civic LX Coupe last week, and it had some problems that I was able to fix. I bought the car so I can work on things myself and save money. I used the BlueDriver OBDII Bluetooth Scan tool on the car because the check engine light was on. The codes said that my O2 Sensor was bad and needed to replace it. On the BlueDriver App it linked me to this O2 sensor so I bought it and rented a O2 sensor socket for a wrench at Advance Auto Parts. Installation was super simple. I had a hard time getting the old sensor off the car because it had like 108,000 miles worth of ware on it. However once I got it off I installed the new one and it went on like butter. Now if the check engine light is still on after you install the sensor, don’t worry, drive around with it on for a bit. It will turn off eventually. Took me like 30mins, if that, for the light to come off. Overall great buy for my Honda! P.S. The anti-seize (the red tube with the substance in it), make sure you put a little bit of that on the threads of the O2 sensor (the size of a grain of rice) and make sure it makes NO CONTACT with any other part of the sensor, it will mess the whole module up down the road.
K**R
Very Easy DIY
The only hard part about this was crawling under the vehicle. Buying this part through a Honda dealer is about $250, part only. Amazon charged $97.5 last week, it's $92.37 this week and $99 something 2 weeks ago. Not sure why the price changes every week, but Amazon is still the cheapest way to go. Auto Zone will read the code on your "check engine" light for free and tell you what the problem is. You need a special sensor wrench to change this sensor and you can borrow one for free at Auto Zone as well unless you feel like spending about $10 for a tool that you might never use again. I installed this on my '03 CRV and the part fit and worked perfectly. The factory original part is also a Denso. This part is almost identical except that the wires are about an inch longer and it doesn't have the rubber mounting thing on the wires. I removed the rubber mounting thing from the old part by cutting it length wise, slipped it over the wires on the new part and it worked fine. As has been mentioned by others, the trickiest part is figuring out how to unplug the electrical connection so you need a good flashlight. There is a little lever that you have to push down so that you can pull the 2 pieces apart. There is also another little lever that you need to push if you want to release the connector from the metal mounting bracket. After many years and many miles, the old sensor might be difficult to break free so you might need a breaker bar or a length of pipe over your wrench handle. All in all, this is a very simple repair that can save you big bucks over taking it in to the dealer.
M**E
Honda CRV O2 front sensor
This would be a five (5)star rating except that "love it" is hardly appropriate for an automotive replacement part. But, it was virtually the exact item needed to resolve the issue, right down to the brand. The price was comparatively good when compared to local dealers, and SUBSTANTIALLY better than the Honda dealers. Installation is relatively easy, EXCEPT that care must be taken to figure out the snap-in terminal, and how to disconnect it. This latter point is the doing of Honda, not the sensor mfr. Installation would otherwise have been about 10 minutes. To avoid breaking the terminal, take the extra 10 minutes to figure out how to properly disconnect/reconnect the wire harness.
R**R
Appears to be right product, but I received a return…
Update 12/5/23: After 9 months and I don't know how many miles... I'll say 4-5k miles... I've had no check engine light again and the car is running fine. So I'm upping my stars to 5, despite the issue below. The product is good. Maybe the issues I had below are indications of processes and procedures that need to be improved by somebody, but that's not really the focus of what we're really trying to review in these Amazon reviews. Update 2/26/23: I ordered another Air/Fuel sensor from Amazon to compare with the first one I received. Looking at the second pair of photos, you’ll see a sensor **bagged and sealed**, with a plastic protective piece over the threads and the hex nut with no deformities. So this doesn’t look like a Denso issue, but rather an “Amazon selling returned item as new” problem. First one is going back. Once I install this and verify operation/performance (i.e. no check engine light), I’ll do a final update of this review. Prior Review: It looks I was sent a return, even though I ordered new. See attached photo where the socket edges already have deformation from not being used with the proper tool. I’m not certain what color the sensor should be… black isn’t what I expected but I don’t have another new reference point. Why Denso does not seal boxes/packages of $100+ items is beyond me (or maybe they do and this is another evidence of a return)?! I’m not sure if I should use it, or go for the lottery of buying another and returning this one? Frustrating.
W**N
Buyer Beware Defective out of the box. It's amazon resale.
Item was defective. I guess I waited too long to install because I can no longer get a refund even though I installed it a week ago. Took the car to a mechanic and he told me it was defective. Heating element not working. 326 dollars later I now have the problem fixed. Now I guess I'm out the $167.47 I paid for this item even though it was defective out of the box. Buy at your own risk. It's from amazon resale so it has already been returned once.
E**I
Excelente calidad
Desapareció el error, y se apagó la lámpara mil del auto
O**N
Worked perfectly on our 2004 Honda Civic
Bought this part to replace the O2 sensor on my sons 2004 Honda Civic. We were getting a P0135 error code, and using a few videos from YouTube as reference, we were able to remove the old sensor using a TEKTON 47749 3/8-Inch Drive by 7/8-Inch (22 mm) Offset Oxygen Sensor Socket + a socket wrench, and a long piece of spare PVC piping as a breaker bar - since these things are hard to get off. After removing the old one and replacing it, we were able to clear the code using an ODBII sensor and now there's no check engine light on. Great product and shipped overnight with Prime.
J**E
Works perfect, fast delivery!
Installed on bank1 sensor1 on my 2004 Honda CRV which is supposed to be the Air/Fuel sensor(not O2 sensor) and worked perfect. The PO134 and 135 codes disappeared after a light drive, success ! Drives way smoother too.
F**L
Pieza indicada
Es el sensor indicado para Honda CRV 03, 2.4L, AWD ,el check engine se quitó ahora hay que checar que se haya corregido el problema y que ya no me queme gasolina como antes
J**K
Works Great
(Produce: Denso 234-9005 O2 Sensor (Upper) I drive a 2005 Civic LX. My Engine is a D17A1. This sensor worked great for me. Only been a few days but haven't seen my check engine light since I put this in. If you don't see an edit on this review, it's still working great for me. Also this was cheaper then anything I could find locally. (You'll need a 7/8 wrench for this)
Trustpilot
2 weeks ago
2 months ago