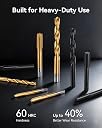
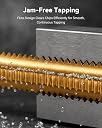
I don't normally (ever) write reviews, but I took a chance on the less expensive option, and it turned out well. I'm also going to write a review I wish I had come across when I was first discovering Helicoils and Time-serts. Fair warning: It will be long. tl;dr: this kit worked great on aluminum, but don't rush or force it! I'm a weekend warrior-type mechanic. I work on my dirt bike mainly, and have put in several Helicoils/Time-serts over the years but am by no means a professional. This task is conceptually scary, especially on engine blocks and especially the first time. But it's really pretty straightforward. The kit Comes in a solid box for long term storage. Instructions a very basic. Pieces all seem like quality to me. Drill bit worked great and looked basically perfect after I used it. Same for the thread tap. Of course the tapered end looks kinda blunt, because it is, and needs to be. You get a bunch of inserts, and a small hex tool for adjusting the collar on the insertion tool. Worked great, and seems like no loss of quality by saving some money with this. In all the reviews it looks to me like all the folks who broke tools or complain about bad quality didn't use any oil. The basics 1. The tools are only as good as the user. If you are the corner-cutting type (as I sometimes am) this task is probably not for you. Save yourself the frustration and take whatever it is to a professional. 2. If you don't have cutting oil, go get some. Do not attempt this without it...you will indeed break tools. 3. Proceed slowly and carefully. (Again, if you are in a hurry, move along.) 4. In addition to this kit you will need: a drill, cutting oil(!), a tap handle, RED thread locker, possibly some tape. Ok, the steps (most of these have a picture too): 1. Confirm the parts are correct in the kit...I guess some have had mix ups. The included drill bit should be larger than your bolt diameter but not by much. The outside diameter of the insert should be as wide as the width or the tap (thread cutter). Your bolt should almost fit into an uninstalled insert, but not quite. 2. Figure out how far to drill to be able to insert the insert. If a precision depth is needed, mark your drill bit with tape or a small zip-tie so you don't go too far. Same for your thread tap. 3. Drill out bad threads. Ideally your piece is set up firmly in a vice, if possible. Anything to minimize the possibility of drilling or threading crookedly. I used a little cutting oil during drilling to minimize friction. If drilling aluminum like I was, you don't need to go full speed and push hard, trying to drill it out in one quick go. At first the bit will catch on your bad threads, but will quickly go through them, so hold things steady and proceed slowly. You can clean up a bit with faster drilling as your hole gets deeper. 4. Clean the hole of shavings. Compressed air is your friend here. Another great friend to have is a can of contact cleaner or electrical circuitry cleaner. It cuts grease, leaves no residue, acts fast, and is safe on everything: metal, plastic, electronics, paint. Available at an auto parts store or here on Amazon. 5. Mount thread tap in tap handle, put some drops of cutting oil on the threads, and place into drilled hole. The tap has a tapered end, so initially it should sit in the hole and be easily removed before turning. At the beginning you will have the greatest chance of starting in crooked, so do your best to keep the tool perpendicular (in both directions) to the hole, turning slowly, and with slight pressure...just enough to feel it bite a little. If you get going a little crooked in the first couple 1/4 turns, that's okay, you should be able to keep a little pressure on the tap and steer it back to centered. The initial threads will be finalized using the full-size threads further up the tap. 6. Once you get maybe 1-2 full turns and it feels like the tap won't pull out or fall over if you let go, back out the tap a 1/4 or 1/2 turn (or all the way out) to free any shavings. Proceed very slowly, and with light-medium pressure when turning. And I mean in the turning direction, not in the into-the-hole direction for that pressure. You shouldn't need to apply any downward pressure once the threads have started. As you turn, there will be spots that require almost no pressure, and some spots that require a hair more pressure than you want it to, probably. ALWAYS back out and check if you hit a spot that feels really difficult. At no point should you be torquing on the tool to the point that it snaps. Again, oil is what makes a big difference here. Some people go a 1/4 turn and back out, I was going about a full turn and then backing out. That also depends on the material. If threading steel, definitely err on the side of smaller bites. After a few full turns, I would back all the way out and remove any shavings I could with a small pick, and add more oil. More oil is much better than not enough. 7. When you have cut enough full threads (past the tapered part of the tap) to place your insert where you need it (which is usually just below the surface of the part) clean out the hole with contact cleaner. Make sure to remove all the shavings and oil. Let it dry completely, which shouldn't take long with cc. 8. Mount the insert on the tool with the tab at the bottom in the slot of the tool. Adjust the collar on the insert insertion tool so that it stops at the surface of your part when the insert is at the right spot in the hole. One of my pics show this. Put RED thread locker on the outside of the insert. Place the insert into the hole and begin slowly turning the tool to thread the insert in. It should go in fairly easily, but will feel a little weird because the insert is actually unspooling a little as it resists going in. Do not crank on it with all your might. If you have doubts, back out and check your previous work. Is there a shaving in your way? If you have a very shallow hole, you may not get the entire insert in. You can cut off the extra if needed. If you don't have a minimum of 3 full threads in your hole, it's probably not going to hold. If your hole is deeper than the insert, be sure to use the collar to put your insert at the spot you need it. 9. Once the insert is in place, the tool should come out easily. The prongs on the end should not be bent, because you haven't been cranking hard on it trying to force things, right? 10. Insert the punch tool so it sits on the tang sticking into the center of the hole at the bottom of the insert. Give it a good whack with a hammer. More than a light, tentative tap, less than trying to embed the tang in the bottom of the hole. Turn the part over or blow out the hole to remove the tang. It should look like a "V". 11. Check that your bolt now threads in easily, then remove it and let your thread locker set. Grab your beverage of choice and be pleased with yourself for saving your part and learning a new skill! Congrats!