


🛋️ Elevate your space with timeless style and solid comfort — don’t miss out on the bed everyone’s upgrading to!
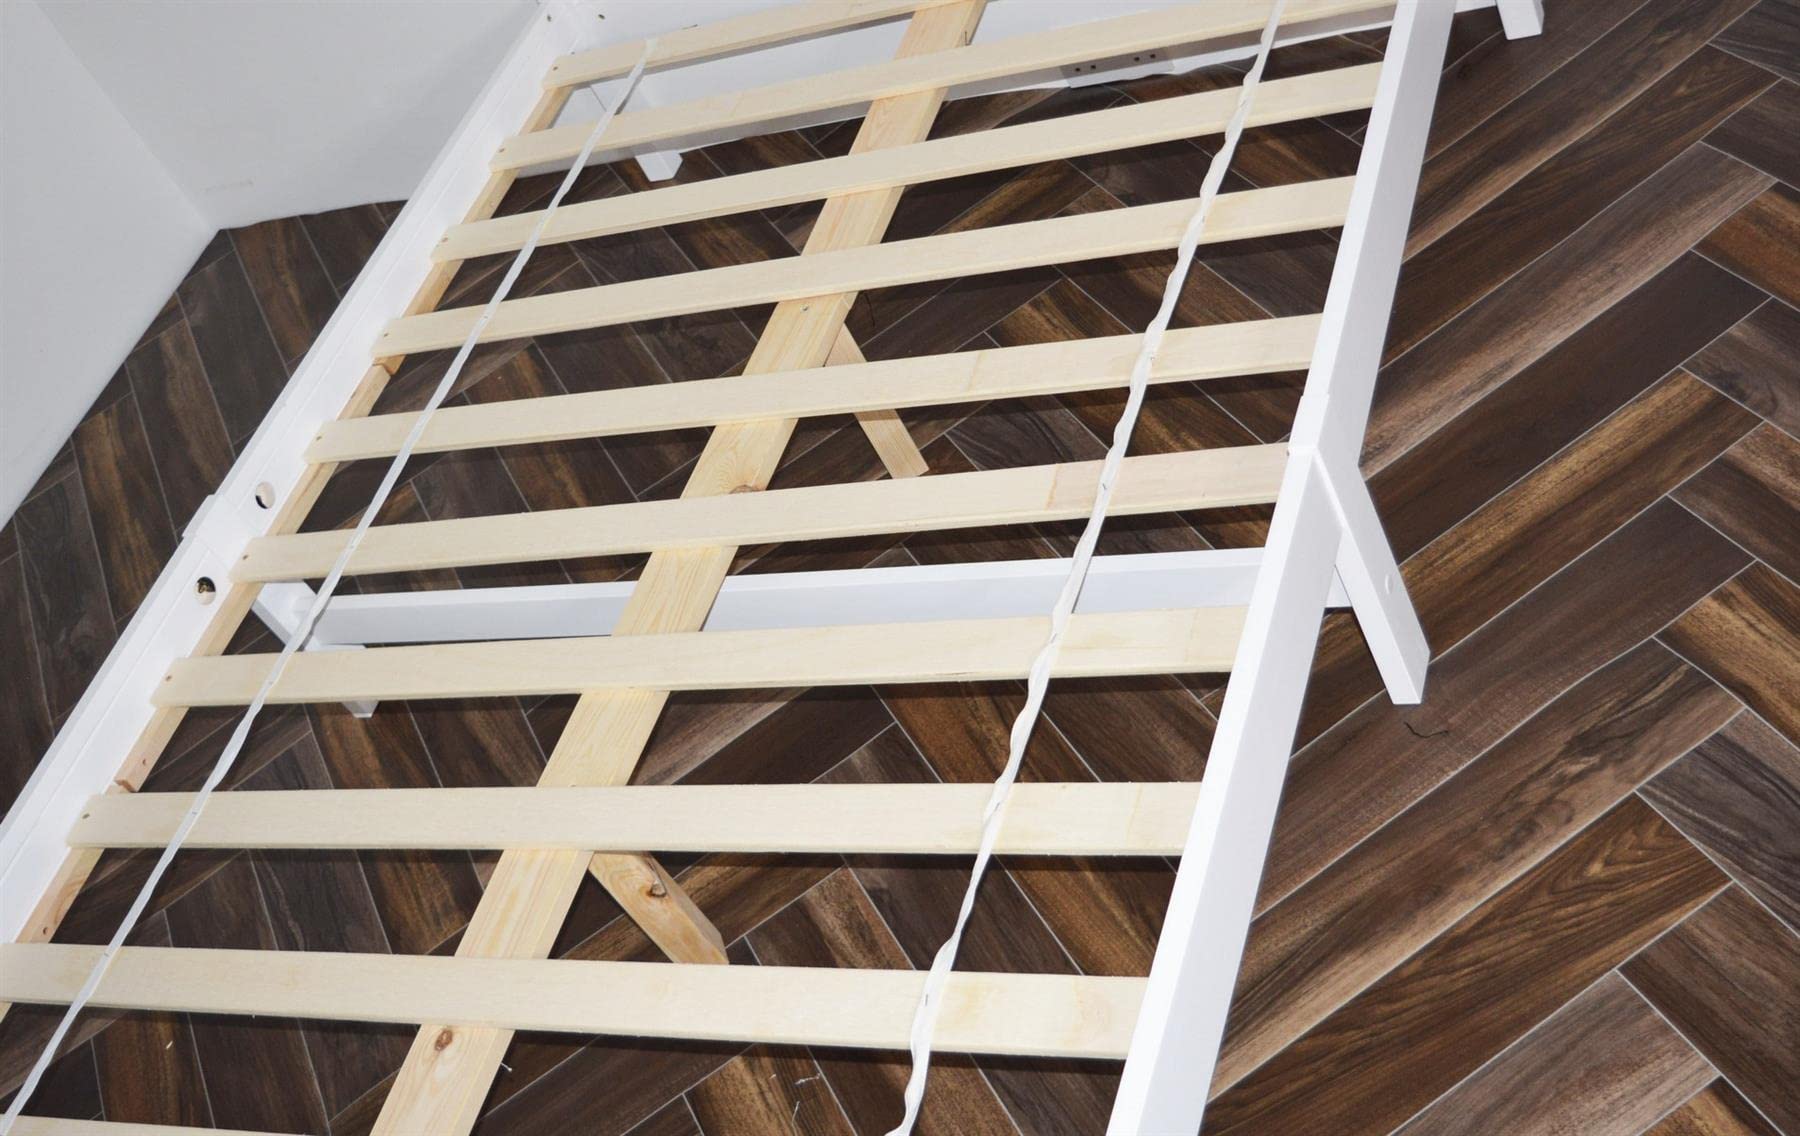
The XEO HOME 4ft Small Double Wooden Bed combines durable pinewood construction with a modern white finish, designed to fit standard small double mattresses. Supporting up to 160kg, it features firm slats for stability and easy assembly, making it the perfect stylish and practical choice for first-time buyers, students, and parents seeking a reliable bedroom centerpiece.
| Brand | XEO HOME |
| Model Number | SML DBL BED |
| Colour | Beige |
| Product Dimensions | 198 x 130 x 82 cm; 25 kg |
| Maximum Weight Capacity | 160 Kilograms |
| Special Features | Spindles |
| Item Weight | 25 kg |
J**K
Looks fantastic
Bed looks amazing for the price. Very sturdy indeed. If I had help, I think assembling it, would have been easier. But after many hours I did it, even though the slats at the top and bottom of the bed kept falling out, during assembling. My only complaint would be, after steps 1 to 5 being very good with instructions, when it came to step 6 it just showed a diagram, which basically said put all the bits together. I would highly recommend this product.
C**N
Good bed & comfortable optional mattress, can be tricky to build so here's my assembly tips.
Hi, this is a review & hopefully some building tips for the XEO HOME 4ft Small Double Wooden Bed. Print it out to keep it with you over the next few fun-filled hours & get some music on.Pros: It looks great, the package is about a foot wide/deep, 5ft long & around ~22kg so not too heavy to lug up stairs etc. The price is fantastic & if you’re handy with a screwdriver it’s worth it.Cons: The assembly instructions!I made a few mistakes so here's my assembly notes step by step to hopefully help you avoid the mistakes I made & noticed.-Tools: Additional tools that would be very useful are*PVA/Woodglue; I know from experience a small dab in each hole helps the bed last a long time, just don't add too much or it'll spread out & make sure to clean up any overspill as soon as possible to keep a neat finish.*ratchet screwdriver with hex & philips bits - speeds up assembly a lot & less arm exercise!*note A & D bolts are VERY easy to mix up. KEEP THEM SEPARATE as they're different lengths & if used in the wrong place can damage the wood finish. If you hear wood cracking, STOP!*The under the bed horizontal cross-beam is 12, this isn't listed in the instructions.*hammer for the wooden dowels (E)*sandpaper if/when it all goes wrong*Step 1: You're assembling the head & foot of the bed, essentially sideways ladders. Head horizontals are 7 & 6 with the longer 9 'rungs' while the foot is an identical 7 & 6 with the shorter 10 'rungs'. I first built the rungs by adding a large drop of woodglue (you can use PVA too) to 9 & 10's holes and inserting the E dowels, some needed a hammer to drive them fully in. I placed 6 on the ground, used glue in the holes & inserted the 9/10 rungs, then glued the holes in the 7 with the help of my patient girlfriend Kay holding the top, I worked from one side to the other slowly aligning the dowels with their holes and pressing down partially, when they were all in I fully pressed everything together tightly. You may have to push down heavily for it to seat neatly.*Step 2: You can go wrong easily with this one in a couple of ways! This assembles the four corner feet of the bed onto the head & foot & adds the trim on top. IMPORTANT: part 6 has three holes facing INSIDE the bed to attach to the long crossbeam, it's important to get the legs on the correct way or the head/foot side will be facing outwards rather than inwards.!!! make sure the head of the bed's 6 are the correct way, the diagram has them both facing inwards towards the centre of the bed, viewed from the outside. NOT from the inside outwards. There's a middle screw hole on the head side (6) diagram that is missing which confused me.I add the nut B first into 6, then the A bolt, tighten loosely together & when everything is aligned properly screw the self-tapping C screw in the higher hole. The three holes in the posts are facing inwards to attach to the sides which you'll build in the next step.On the right side of the page is the trim attachment, the wooden beams you'll be seeing the most. It's very important to use the shorter D bolts or the wood finish will crack as other bolts which look similar are too long (I found that out the hard way!) remember, if the wood starts to crack, stop & double check the bolt length.I messed up on the foot side 6 but luckily my girlfriend found an easy solution. More about that later.*Step 3 is the sides of the bed, viewed from inside the bed. The middle piece is the middle side leg & slightly protrudes outside the bed. You want a nice flat surface on the inside as you'll be adding the mattress support beams along this later. Place the long bolt in first making sure 5 is the correct way, add glue for the dowels & it fits together pretty easily, I did one side first so I could leave enough room on the long bolt for the other hole, it's just a few mm of leeway. Add the plastic spacer J then the washer L & finally the nut I & tighten together with the two supplied wrenches K, they tighten in opposite ways to each other clockwise, remember, righty tighty, lefty loosey.*Step 4 you've already done at the end of Step 3! Tightening the long bolts & nuts.*Step 5 is fitting the support for the mattress along the sides of the bed. Place three pieces of 14 along the bottom edge of the side, it's important not to get too close to the ends as there's holes there to attach the bed ends, don’t screw into them. Start from one end of a 14 & hold it in place while screwing it in, then start on the other end of the same 14, then the middle screw & screw the others in. Repeat another 2 times for that side trying to make it as flush with the side base & the other 14 as possible so the mattress won't catch on a sharp edge (you can always sandpaper it down if it's rough). A ratchet screwdriver comes in very useful at this part. Repeat for the other side. It looks simple but it’s hard work.*Step 6 has all the fun of unlisted parts & the use-the-force attitude of the diagram designers. There’s a few ways to do this, I started with the sides & attached the inner lower crossbeam which was marked 12 on the wood. In the circle on the diagram it’s shown you insert a B nut into a hole while a E dowel goes into another, a D bolt ties everything together. Yes, glue the dowel holes if you’ve been doing that. If you’ve done everything right the head & foot sections should have three holes in the middle facing inwards. Attach the head of the bed to the sides with a dowel E each side & then two B nuts on the sides, & two A bolts to tie everything together. It’s the same for the foot section, just no dowel for these posts, just A bolts.Then it’s the long support in the middle, which is in three parts, two 15s & a 17 middle piece. At each end attach them to the head & foot aligning with the three holes, the screw N goes from the outside in, there’s a couple of dowels to align it if memory serves (I think I’ve been trying to forget the experience so I’m a bit hazy). Align the inner legs, which have two pre-drilled holes at the top for the screw N, in a diamond so that both 15 & then 17 can be attached together, slotting 17 in last, there should be room.You’ll notice the inner crossbeam just built is higher than the mattress supports (14) at the sides, that’s typical in beds, don’t worry.I’d messed up again at this point & got 6 the wrong way on the bed foot, I was going to switch the posts but my girlfriend suggested we just screw it in as it was & luckily the bolts fitted fine, just a lower screw was visible & she didn’t mind.*Step 7 the final frontier. Arrange the wooden bed slats with the fabric strip on the underside facing down, so that staples or the fabric won’t catch on the mattress. Start at the head of the bed & space the slats equally towards the foot of the bed, you need more support towards the head so make sure that area is done well. Then it’s screwing in all the slats, you can take it side by side or slat by slat, if a slat doesn’t fit in, just push it forcefully down, some fit more tightly than others. In an extreme case you could use sandpaper to shave off a little.To cover the screw holes in the white trim on outside of the bed at the four corners & sides, simply push the white M plastic covers in, there’s quite a few of them.Now you’re finally finished, help yourself to the beverage of your choice!All in all it took me six and a half hours to assemble as I didn't have my regular tools with me & the instructions are... well, you’ve seen. A hex ratchet screwdriver would have shaved off a lot of time & trying to figure out why the wood was cracking on the trim & how to attach the foot of the bed with the reversed 6 added some complexity. While the bed arrived in just over two days the mattress was delivered a couple of days after the bed, inside a similar sized cardboard box. It’s vacuum sealed so we rolled it out into position on top of the bed & after the plastic was cut the air rushed in & presto, fully sized mattress.Happy assembling!
T**A
Beautiful bed
This is a sturdy and good quality, however it is a low bed keep that in mind looks great in my spare bedroom. instructions are not great
S**!
For the price this was perfect!
Bought this frame to stage our guest bedroom for sale. Ended up keeping it for the new house. It's not amazingly quality but it's ideal for the price and it's so far lasted well.
M**C
Hard work and terrible instructions
I suppose you get what you pay for but this bed frame takes a long time to assemble and, as nearly every review makes clear, the instructions are extremely poor. Despite the comments on the instructions the supplier hasn’t taken any steps to correct them.One reviewer says that two people assembled the frame in three hours. I bought the bed for someone else but made the mistake of assembling it for them. I didn’t time myself and did the work over two days but I’m sure I took far longer than three hours. I had some help with the final assembly but put together the individual parts by myself.If you buy the bed frame you may be tempted to assemble the different parts in situ but, in the absence of a large workbench, I found it easier to do on a well protected kitchen table. The worst job is bolting together the side pieces of the main frame. There are pre-drilled holes and large holes are used to place black plastic protective pieces over each end of the bolt and to put washers and nuts in place. I suppose I have large hands but getting the washers and nuts onto the bolts was extremely fiddly. The washer is too big for the holes/recesses. I managed to get a washer on one end of a bolt but that held the other end of the bolt tight so that the other washer wouldn’t go on. Trial and error led me to moving the wooden pieces upwards where they join and that allowed room to get the washer on. The nuts are also hard to get on. I dropped them into the hole over and over in the process of trying to screw them onto the ends of the nuts. My granddaughter also tried but gave up. They went on with persistence and a lot of wasted time.That part of the assembly also highlights a problem with the instructions. Two structural side pieces of the frame are joined to each other and to a leg by bolts. On the diagram the side pieces are numbered 13 and the leg 5. The leg has different holes on each side but the diagram doesn’t show which way it should face. It does show the relevant holes on the drawings of the side pieces. You are left to think about which way round the leg should face. If you can’t figure it out logically you have to guess and in doing so might get it wrong. There are, in fact, dowel holes on the side of the leg that should face inwards and, I think, because the bed is two miles away and my memory might be wrong, there is a larger hole that faces outwards. Why couldn’t the person drawing the diagram have made this clear to avoid wasting everyone’s time and risking a bad mistake?Some parts of the diagram are hard to read simply because of scale. The diagram of step 2 (the final part of the assembly of the head and foot boards) shows upwards facing bolts or screws which I had to struggle to see. The headboard and footboard both have to be fully assembled. Every slat has to be put in place and it’s best done on a table or bench.The worst feature of the instructions is at step 5, which purports to show how three unpainted, pine supports should be screwed (15 screws on each side) to the side rails. The unpainted, pine supports are what the wooden slats (for the mattress) rest on. The diagram places them at the bottom of the side rail in a position which would cover a hole into which a cylindrical nut (the sort with a flat screw head for levelling) has to be inserted! When I got to step 5 I knew that couldn’t be right and jumped to step 6 to assemble the central unpainted pine lat support (mentioned below) to get a level for the lats. I think the side supports for the lats should be places a millimetre or two above the holes I’ve mentioned. It seems to work that way anyway but why should such a misleading diagram have been used in the first place?Step 6 deals with, among other things, the assembly of the unpainted pine central support section as almost an afterthought with no real assembly instructions at all. It also fails to show that it should be held in place with dowels as well as bolts but you can guess that can’t you!I’d give the instructions nil points if I could. The supplier could do with employing a technical author to prepare proper instructions. The assembled bed probably isn’t too bad for the money. There is a visible split bit of woodwork/paintwork and other blemishes but it seems reasonably sturdy. I’ve therefore given it 3 overall but the instructions are a disgrace. If you’ve got time on your hands, like a challenge and solving puzzles you may want to give it a go.
L**N
Lovely bed
It was easy to put together and all the parts were there. The size was spot on for my mum who wanted a bigger than single and smaller than double bed. Looks really nice when it's made up. Good value for money and I built the bed on my own within a couple of hours.
H**.
Very sturdy
Well made strong + mattress very comphy
M**E
Great bed
I am very happy with this purchase. The bed is sturdy, a great size for our teenage daughter and was very reasonably priced. The bed arrived quickly and was easy to assemble.
Trustpilot
3 days ago
1 week ago


