Desertcart purchases this item on your behalf and handles shipping, customs, and support to Slovakia.
๐ง Build, Bond & Broadcast: STEM fun that hits all the right notes!
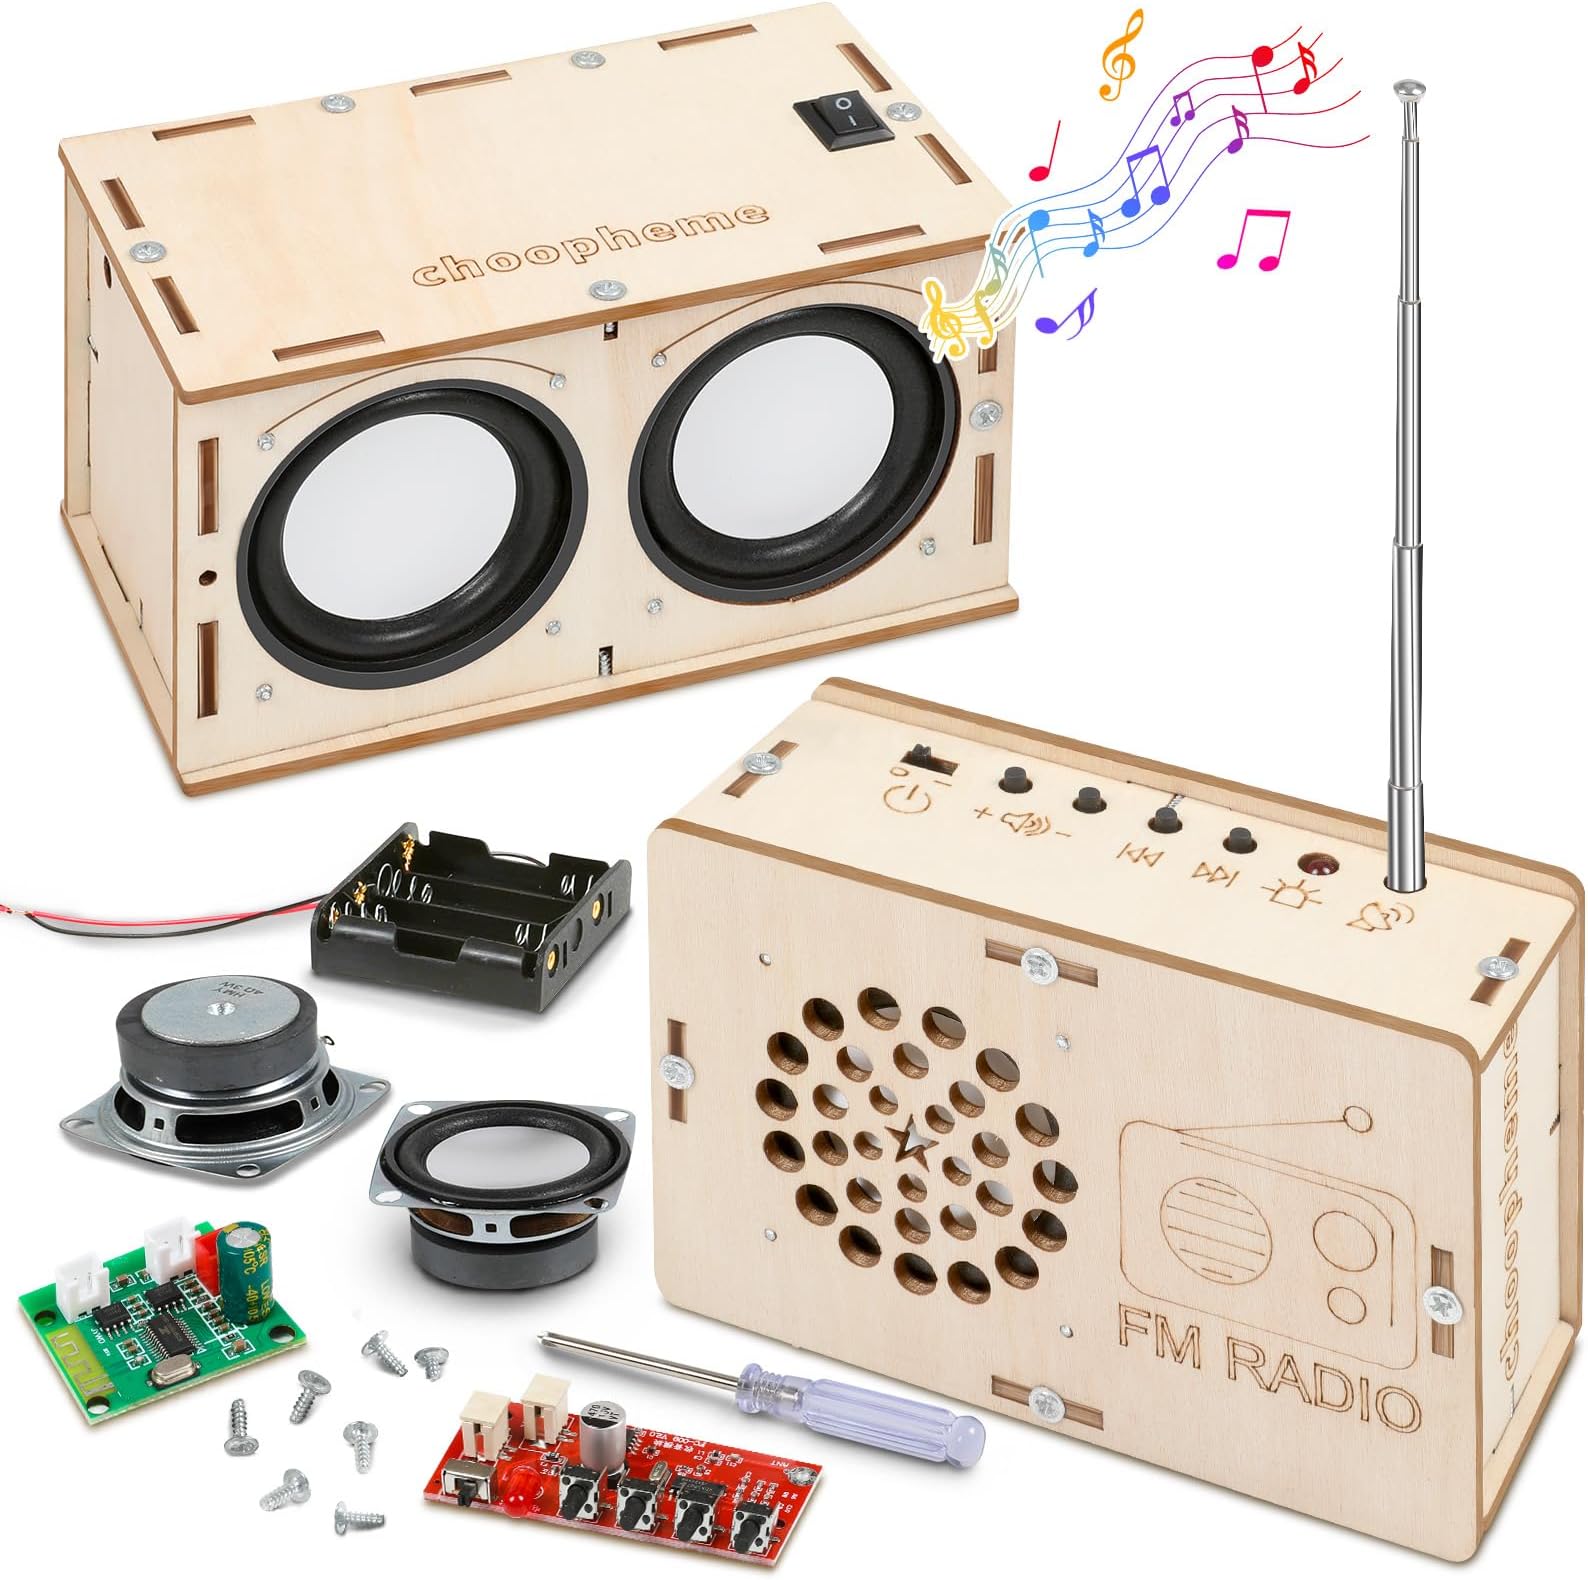
This STEM kit offers kids aged 8-14 the unique opportunity to build their own Bluetooth speaker and FM radio, combining hands-on electronics with creative customization. Featuring crystal-clear FM reception (88-108MHz) and easy-to-follow instructions requiring only a small screwdriver, it encourages parent-child bonding and nurtures scientific curiosity with safe, durable materials.


| ASIN | B0D8B3R2L2 |
| Age Range Description | kids teen |
| Best Sellers Rank | #13,493 in Toys & Games ( See Top 100 in Toys & Games ) #121 in Educational Science Kits |
| Brand Name | choopheme |
| Customer Reviews | 4.4 out of 5 stars 456 Reviews |
| Educational Objective | STEM |
| Included Components | FM Radio |
| Item Dimensions | 1 x 1 x 1 inches |
| Item Type Name | Bluetooth audio and radio |
| Item Weight | 0.45 kg |
| Manufacturer | Yuanyi |
| Manufacturer Part Number | YYi-1 |
| Manufacturer recommended age | 8 years and up |
| Material Type | Wood |
| Number of Items | 2 |
| Number of Packs | 2 |
| Size | 1 inch (L x W x H) |
| Theme | General Science |
| UPC | 074655950645 746559506456 |
| Unit Count | 1 Count |
A**R
Great gift for 13 year old boy
Purchased this as a gift for my 13 year old nephew and it was a hit! Easy to put together with his grandpa, sound was great, and he now gives news reports to is family from the radio. Great gift.
J**Y
Excellent side project
I know these are for learning but the wiring could of been better follow the instruction and won't go wrong. Looking to get these for my grandson.
I**S
Good for kids 12 and older
It was a gift and he's very happy
G**E
If you don't want to solder get small female spade electrical connectors if you order this!
Pretty cool project, comes with (almost) everything you need to make a Bluetooth speaker AND an FM radio. Maybe not for a 5 year old unless they have an unusual amount of patience and interest and you plan to mostly do it yourself. Seeing the parts go together to make something useful is great for all kids but I think this is more for an 8 yrs and up. The box says for 5 year olds but the directions say 8 year olds. The only part of the project than can be a little tricky is the wire connections. I RECOMMEND ALSO ORDERING SMALL FEMALE SPADE ELECTRICAL CONNECTORS IF YOU ORDER THIS STEM KIT. You either need a soldering iron/kit, and experience using one, or you can use small spade connectors like those commonly used for speakers which is what I used and recommend. The instructions are less than perfect so I'm going to offer what I'd recommend doig to use in conjunction with the included directions. 1. Using a utility knife, sharp chisel or knife (WITHOUT CHILDREN PRESENT) score or completely cut wood pieces out of tabs, or just break them away if you don't care if it comes out perfect. 5 minutes. 2. Use a small piece of sandpaper on all of the pieces to "break" the edges and make it more comfortable to touch and less likely for end grain to splinter. 5 minutes 3. If you want to color the wood or put a finish on it I'd do it now, before assembling, after assembly is fine if you just color it or hand paint it. NOTE/WARNING ABOUT FINISHES: Please don't use store- bought stain/ finish/ varnish, commercial BLO, or anything that has the word "finish" unless you plan on using a few coats of shellac or other kid-friendly sealant/ top coat and give it time to dry and cure. I used markers for the front panel and stained the top and sides with a used coffee pod, then lightly sanded the raised grain again. I sprayed 2 coats of Rust-Oleum 2x clear satin and allowed cure time. In hindsight I should have used shellac, mineral oil, cutting board oil or 100 percent pure tung oil (not "tung oil finish"). 4. Use a medium- large electrical crimpers or pliers and crimp the spade connectors onto the wires that will be pushed onto the speakers and other components. For the wires that need to be joined together, use both wires twisted together and crimp into one side of a connector only (not what they're made for but it works). 5. Use a #1 Phillips screwdriver to assemble everything following the pictures in the directions, try not to over tighten. I believe the short 4mm screws are for the circuit board but I don't remember, I know the longer ones are generally for the wood to wood connections. I also added stick on rubber feet to protect surfaces from the screws on the bottom of the speaker. Have fun and good luck!
T**.
Great gift !
Works well great gift for all ages able to use a screw driver
R**.
Good product to get them involved in tech..
Muly kids loved it !! Easy to build with them...
S**L
Teen boys loved these DIY electronics!
2 Teens, 13 & 15 both loved these products. Immediately they put them together as soon as they opened presents!
R**L
2 Quick projects
I thought the project was make one or the other but it came with the parts to make both the speaker and the radio. I did minus 1 star because the instructions were small and somewhat hard to make out in an attempt to fit them all on a small pamphlet. It caused me to miss part of a step, and in my attempt to disassemble the radio to fix my error, one of the connectors broke off the control board. Luckily I have enough electronics experience to solder it back on. The 2nd star was because I bought this hoping it would be a somewhat educational tool with maybe something about how these work. Other than the parts a small slip of paper with a few assembly steps, there was nothing else included. Assembly of each was pretty simple though. The radio was essentially 2 plugs and a handful of screws. The antennae has to be put through the hole at a specific step. The first time I put it together the volume up button was stuck because it wasn't perfectly lined up, so I had to disassemble, resulting in aforementioned issue.
Trustpilot
2 weeks ago
2 weeks ago