Desertcart purchases this item on your behalf and handles shipping, customs, and support to Slovakia.
🛠️ Transform your garage into a sleek, durable masterpiece before your next project!
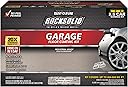
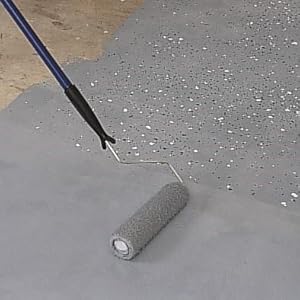
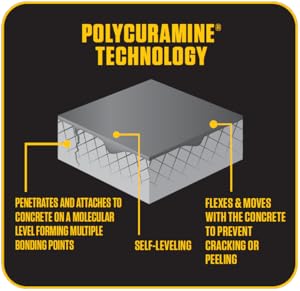
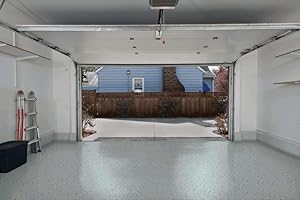
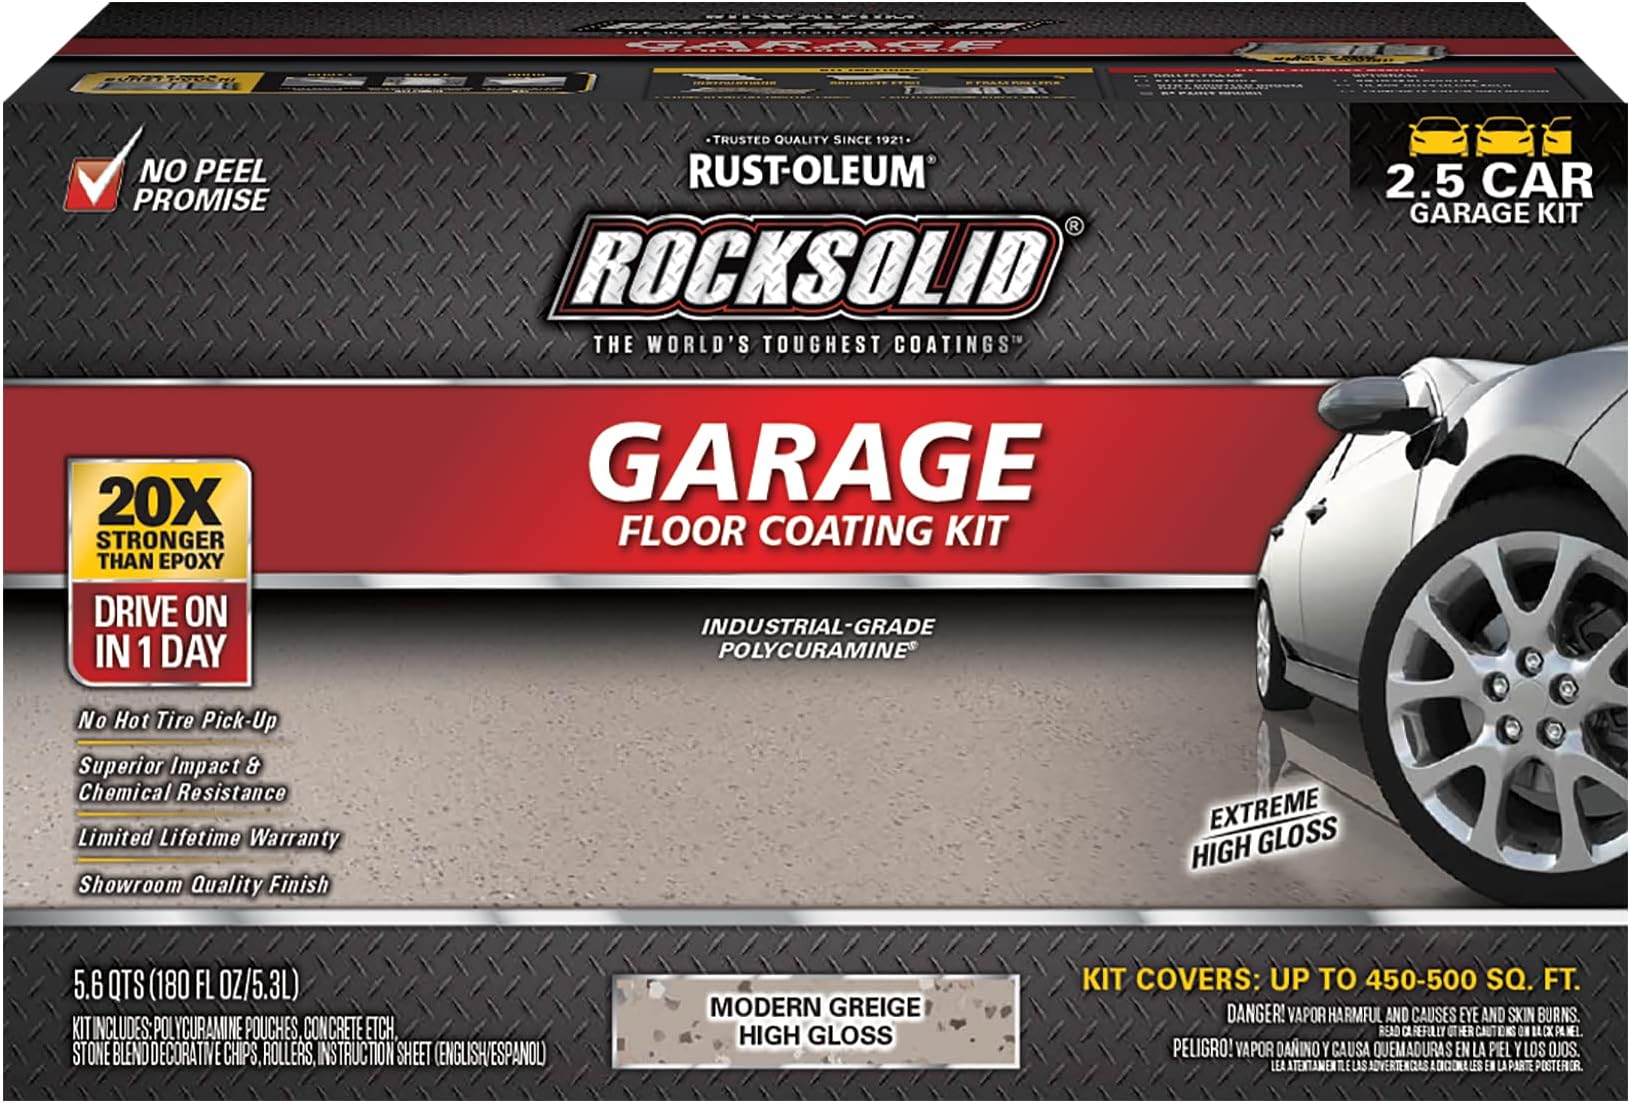
Rust-Oleum RockSolid Polycure Garage Floor Coating Kit delivers a professional-grade, ultra-durable concrete finish with 20x the strength of epoxy. Its fast-curing, low-odor, and low-VOC formula covers up to 500 sq ft, providing a high-gloss, showroom-quality terrazzo look that resists salt, oil, and chemicals—ready for foot traffic in 8-10 hours and vehicle use within 24 hours.


| ASIN | B0C2977G41 |
| UPC | 020066020149 |
| おすすめ度 | 5つ星のうち4.0 2,746 レビュー |
| カラー | モダングレージュ |
| カラーコード | Gray |
| サイズ | 1.41 Gallon (Pack of 1) |
| ブランド | Rust-Oleum |
| ブランド名 | Rust-Oleum |
| メーカー名 | Rust-Oleum |
| メーカー型番 | 381087 |
| ユニット数 | 180.0 個 |
| 仕上げタイプ | ハイグロス |
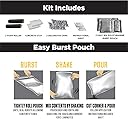
| 同梱商品 | ポリキュラミンバーストポーチ2個、フォームローラー2個、コンクリートエッチング、装飾カラーチップ2個、説明書 (日本語ではない場合があります)。 |
| 品番・型番 | 381087 |
| 品目の容量 | 180 液量オンス |
| 商品の用途 | 内装 |
| 商品タイプ | リキッド |
| 商品体積 | 180 液量オンス |
| 型番 | Rocksolid Polycuramine |
| 塗料の種類 | 油彩 |
| 完全治癒時間 | 10 時間 |
| 容器の種類 | カン |
| 屋内屋外での使用 | インドア |
| 干燥時間(時間) | 8 |
| 推奨する地面のタイプ | Terrazzo |
| 特別な機能 | 水洗い可能, 耐クラック性, 防汚性 |
| 特徴 | 水洗い可能, 耐クラック性, 防汚性 |
| 色 | モダングレージュ |
| 適用範囲 | 1キットあたり400~500平方フィート。 |
| 防水 | True |
中**幸
とても便利
少しムラムラですが、素人でも 駐車場塗り替えできましたぁ サンキュー
K**E
Great product! But not a weekend project if you want it done right!
I have a 2 Car Garage that is 20X20. Purchased the Tan 2.5 car kit and the Clear Top Coat kit. I had no issue with covering my 2 car garage with this amount of product. I am very happy with the finished project. But requires pre-planning and time to do it right. Advise: Labor: use 2 people to apply the paint and chips and the clear coat. You have about 45 minutes of pot life to get the paint down then it will start getting hard and difficult to apply. 2 people working together will reduce the (Monkey on your back) stress out of the application. On the paint one person painted and one person did the chips. On the Clear Coat we put the clear coat in a paint tray, put in middle of us and used 2 brushes to apply the product. We split the garage and each took half and worked back to front on the garage. Rollers: I did not use the cheap foam rollers that are provided in the kit. Like other reviews they do not last. I learned this 20 years ago on the original job. I purchased 6 Purdy 3/8 nap rollers and used 4 of them to apply both the Poly and the Clear Coat with it. Do not go cheap on your rollers…. On the Tan paint I used one roller per bag of paint. Also buy some small 3 inch disposable brushes to use to cut in the edges. Then throw them away at the end of the job. Also buy some Nitrile disposable gloves to use during the application. Chips: I did not use the provided chips as there is only enough for a light dusting of chips. I would recommend buying flakes online by the pound for the project. I purchased pre-mixed “Dark Earth Tone” chips and did a Medium to Heavy flake. Sure I had flakes left over but was not worried about being short on chips. Prep: The prep is the key to this project and takes time! I had put the RockSolid Epoxy Garage covering on the garage floor 20 years ago. I wanted to remove that covering before this project. I rented a floor polisher from Home Depot and a Diamabrush Coating removal tool. (Polisher was $46 for 24 hours and $75 for Diamabrush removal tool) Note: There are 2 Diamabrush available. One for prep and one for removal and prep. I spent 10 hours grinding the floor to get original paint off of it. I then used a 4 ½ inch double row diamond cup grinding wheel (Amazon $17) with angle grinder for edges and low spots. NOTE: this product WILL NOT fill in cracks!! If you don’t want cracks to show then you have to spend the time to fix them before applying the product. I had a number of small cracks and also wanted to fill in the expansion joints. I simply purchased Premixed Concrete Patch from Home Depot. Fill crack with putty knife, roughly smooth it out, let dry and then grind with angle grinder smooth. I even filled in the expansion joints this way. Last step was to pressure wash out the garage before painting. (PS. I painted the garage before the applying the garage floor paint) Application: The trick to this project is putting the right amount of paint down for coverage. You have to put down a small ribbon of paint on the floor. I put the ribbon of paint down in a straight line. When you start rolling first pull the paint towards you then start your rolling. I had a small amount of paint left over and on the Top Coat we ran out exactly at the end of the application. I did not use the Anti-skid in the Top Coat. So I cannot offer any advice on that. We started the job early in the morning. My garage faces East so the sun was going to be an issue so I had to drape a tarp over the front of the garage to keep the sun off. We put the paint down in the morning and we finished at 9:00. We then applied the top coat on the floor that afternoon around 6:30. Remember to do something to the garage door (lock it and put painter’s blue tape across the door) to keep anyone from walking out the garage door while the paint is curing. Also remember to put something on the garage door track to keep it elevated off the floor while it is curing. I pulled the emergency release on my garage door before we started the job and put a clamp on the track so I could pull the door down manually and have it rest on the clamp. Is the paint coverage perfect? No. If you look you can see some light color changes in the paint. But it is a garage after all and I am happy with the result. If you want a consistent coverage with no color changes then I would recommend putting down 2 coats of the paint. Paint one coverage with no chips then paint again with chips. But that will obviously increase your project cost. Added some pictures, hope this review helps.
M**I
Use Double the amount of Product to get a beautiful result. Divide space by the number of pouches
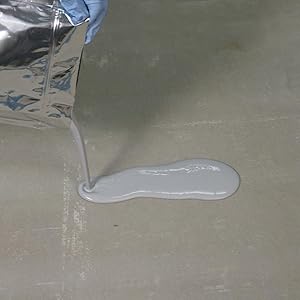
I, like everyone else, researched this process for weeks before deciding on the Rest-Oleum Rock Solid Garage Kit (the 20X version) in light gray. After reading many many reviews about the problems where people ran out of product or the coat was too thin or they could see color of the concrete below due to being too thin of a coat, rollers falling apart etc., I decided I did not want those issues so I started doing some math. My 2 car garage is exactly 410 Sq feet. There are a couple of nooks so it is not exactly square but I meticulously measured everything to make sure I had exact sq. ft. numbers I was trying to cover. From the comments of others, I deduced I would need two full 2.5 garage kits (4 burst pouches) to get the coverage I wanted. Preparation was a bear for me. The concrete is almost 60 years old and there were plenty of cracks and a lot of the rocks in the old cement that were just under the surface popped so I had significant pitting. They must have used a percentage of an inferior type of stone that was black and very soft. When I was doing my prep, the pitting was all because of these softer stones that seemed to have just turned to a black dust when I scraped during my process of fixing and leveling. To make matters worse, 20 years ago, I used an epoxy paint so I had that to deal with. I did not want to go thru the process of grinding the entire floor so I used my portable hand grinder with a grinding wheel and then really tuff sanding disks (about 40 grit I would say) to grind out the cracks and pits as best I could. I used self-leveling cement primed with the Self leveling solution that is supposed to help the cement adhere to existing cement in the cracks and pits then sanded that cement work when it dried using the grinder to get everything level. Perfect is the enemy of good so I decided I would use the Rust-Oleum Re-Coat Primer, to save time. I degreased the rest of the floor with Simple Green and got on my hands and knees and scrubbed the heck out of it hard with brushes and sponges to get every trace of dirt, spider poops, any oil etc. off. When I was satisfied with the cleaning and restoration, I used about 1.75 gallons of the Re-Coat primer and followed the instructions and let that dry overnight. In my mind I wanted to use 100% of the 2 Epoxy Kits that I bought the next day. I wanted a surefire method to evenly coat the floor with my 2 kits so I used a pencil to split and clearly mark my 410 Sq ft int 4 exact 103 Square foot sections. My thinking was I would use 100% of a burst bag in each quadrant area. This worked great for me so you might want to consider doing something similar. I used the foam rollers that came with the kit and had no trouble with them. In fact, I used the same roller for all 4 burst bags with no issues until literally the last 3 square feet where it started to come apart but it finished like a champ. That roller gave its all for me. I had gone out and purchased a 3 pack of top quality purdy 3/8 inch nap rollers just in case the foam rollers were really the disaster everyone claimed but I never used the nap rollers but I will for future painting projects. In my case the temperature was about 55 degrees so that may be why the epoxy never even came close to getting tacky. I used a 2 ½ inch brush to cut in the edges. I basically followed the Video instructions, kneaded the burst bags for a good 3 minutes, cut the pouch corner and poured directly from the pouch in 2 or 3 inch ribbons. The rollers basically pushed around a “puddle” of Epoxy. It filled in 95% of the imperfections as I went and used up the entire pouch in that 103 square foot section. As I was rolling my goal was to do more pushing and pulling of the puddle than “painting” and there was no roller noise one gets when painting say a wall where you hear the paint “ripping” off the roller. It was mostly silent so keep that in mind. I was not sure how heavy a flake I wanted but I did read this stuff is not designed for a full flake or even a heavy flake but I was clueless how much I would actually need and the last thing I wanted was to run out of flakes and have 80% flaked one way and the remaining looking like I ran low etc... So I purchased 2 more pounds of the Black and White flakes, took all 4 bags of flakes from both kits and emptied the blue and grey chips from the kits and my black and white extra chips and mixed them all together in a 12 x 12 box. So my flake is a custom blend of the kit flakes with the black and whites mixed and its awesome. I think each blue flake bag in the kit was ½ pound so I had a total of about 4 pounds of flakes total to use. I ended up with about 3/4 pound extra at the end and I got the exact flake density and colors I wanted as I went. For me, since the air temperature was on the lower range for the application it worked out pretty good. I got a nice slow cure. For a hot minute I actually got a bit nervous it was not going to cure correctly. I finished at 6 PM and checked it after 2 hours, 4 hours, 6 hours and even at 6 hours it was still like I just rolled it out so I was having a heart attack something went wrong. I went to bed and the low temperature that night was 49 degrees and got up and checked it at 8:00 AM (14 hours post completion) and it was still slightly tacky but firming nicely. Certainly, no way was I going to walk on it per Rust-Oleum’s claims of walking on it in 10 hours… No way for me. It warmed up to the mid 70’s during the day and by about 11AM it seemed much firmer but I could still take my fingernail and push into it and it was soft yet. By 4 PM it seemed set up pretty good. I made the mistake of walking on it with my socks and I noticed that the moisture from my feet was actually leaving like ghost prints on the shine and I have about 3 foot prints where the gloss is slightly marred with the outline of my foot and toes. Fortunately, I detected this right away and let it cure overnight again in the warmer temps before messing with it any further. Next day it was truly “Rock Solid” this stuff is tuff as nails hard and you cannot even scratch it but don’t under estimate cure time in cooler conditions or you will damage all your hard work. I think it turned out awesome and I enclosed a couple pictures. The wife and I had two other couples over last night for dinner and everyone was in awe of my project. I can truly say this is one of the most satisfying projects I have done in a long time.
F**O
Good product, lots of preparation is necessary
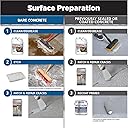
I give this 4 out of 5 stars only because I believe Rust-Oleum should provide 10% more epoxy in these bags to ensure coverage is possible for the suggested area. The finished product is very nice. Shipping was very fast and at $167, this is the cheapest price I’ve seen yet for the 2.5 car kit (normally $214 in my local stores). There are tons of videos and explanations on how to apply epoxy floor coating, but I wanted to share my experience as well in case something I did differently might help someone else. This is my third time using this product specifically and I wanted to pass a long some of what I’ve learned so far. Before beginning, check all your supplies. The kit should come with two bags of epoxy sealed ( I have purchased these where they bags are slightly leaking, make sure to return and get a new one if that’s the case), two rollers, two bags of flake coloring and two bags of floor etching. If you’re using a clear coat be sure to check that kit as well. Sometimes items will be missing from kits or the contents will be damaged. 1) vacuum the floor/cracks and wipe any easily removable contaminants from the floor before etching the concrete. prep is key! I did not use the acid etching method for my floor, since I’ve heard mixed results on that. Instead, I prefer to use an angle grinder with a 4inch cement grinding blade and a dust shroud with shop vacuum attachment (see pictures). The first time I did one of these floors I used a big floor buffer and was never able to grind through everything (oil spots), couldn’t get in the corners, and even with the shop vacuum attached to the floor buffer it still created a lot of dust. For the rental fee of the floor buffer you can own an angle grinder with all the necessary attachments (minus the vacuum probably). The dust shroud I used on the angle grinder really does capture 99% of all dust as advertised and it took me 4-5hrs to angle grind one garage spot. Aim for the same whitish color everywhere on the the cement after grinding; any dark spots indicate an area that might have had an oil spill or other contamination and you should do your best to remove this dark area. 2) check floor temperature using an infrared laser thermometer. Harbor freight sells these for $18-60 typically depending which one you want. See picture. Be sure the floor temperature is above 55F is my suggestion. Some people might feel comfortable with lower temps but it will slow or even stop the curing process depending how low the temperature is. I have a garage heater I used to help control the temperatures for this job. Ambient temperature was 74F while the coldest spot on the floor was near 65F for reference. Outside the garage was near 40F. Humidity should remain below 85% according to Rust-Oleum; mine ranged 61-72% from what I saw. 3) use the Rust-Oleum Concrete Patch Repair kit epoxy. It comes in a small whiteish box and you can see how far one 24oz kit went in the photos I’ve uploaded. I mixed this epoxy with a putty knife in an old shoe box and used that as my trough for the mixed epoxy while I moved around the garage. If I had wanted to fill all the cracks between the cement slabs for this one garage spot I probably would’ve needed 3-4 more kits. This crack filler product does a great job, but at $1 per ounce it is expensive. I filled cracks up to 1/2 inch wide and deep for this particular epoxy coating and did not fill the cracks between the cement slabs to save some money. (Filling cracks prevents wasting the floor epoxy which will flow into cracks very easily.) Once the filler epoxy has hardened (~8-20hrs depending on your conditions) be sure to grind the filler epoxy to level it out and also to rough it up so the floor epoxy will stick to it next. 4) vacuum the entire floor area to be coated. I used a shop vacuum with squeegee attachment then a Dyson house vacuum with the motorized head to scrub the concrete pores. 5) wipe the entire floor with acetone and some rags. I’ve found this can pick up additional particulate that the vacuum misses. I allowed the acetone to dry for 12 hours with fans running while looking for any dark spots in the cement (wet) before continuing. If you note a lot of moisture in your cement you may need to perform additional sealing of the concrete before epoxying the floor (see Rust-Oleum moisture stop). Water seeping in to the concrete from the underside can cause the floor epoxy to peal up over time and even to crack the concrete. To determine if there’s a moisture issue, Rust-Oleum suggests using a piece of plastic taped to the floor for 24hrs to see if moisture builds up under the plastic. 6) prepping the epoxy... make sure to have your paint roller ready and colored flake accessible. Before breaking the seal between epoxy A and B sides, I mixed around the contents of each separately in case they had become separated or built up in one corner inside the bags (these can sit on the shelf for years in a store). Then, on the floor, slowly roll part A side of the bag (like you’d roll a sleeping bag) toward part B and you should feel the seal in the middle “pop” open and both parts will begin mixing. Very important to mix for the suggested minimum time 3-4 minutes... I add one extra minute of mix time to be sure. Roll the bags around, press the edges, do your best to make sure parts A and B are completely mixed together. 7) Start at the furthest point from where you plan to exit the area after coating the floor. Cut the corner of the bag off to allow a small opening to pour from. Pour a line of the epoxy three fingers wide a few inches from the wall. I worked from the back of the garage to the front so I was doing 10ft wide sections at a time. The roller will absorb a bit at first, but then will act more like a squeegee pushing the epoxy around. Avoid pushing any epoxy into deep cracks as this will waste a lot of material. Attempt to keep the same thickness of epoxy in all areas of the floor to avoid discoloration. I was able to complete one 10x20 foot garage area with one bag of epoxy, but I note it appears thin in a couple spots (different color grey finish when dry) due to thin spots most likely. Unfortunately, I believe for perfect coverage, 2.5-3 bags are needed in a 20x20 garage depending on how many pours and pits the concrete has. If you want the color flake, I suggest laying 4-5 feet of epoxy on the floor in front of you, then throwing the flake (throw up and let it fall on the epoxy rather than throwing down. It will disperse more evenly this way) 8) leave the garage closed and check back in 8hours. If it is still tacky (not gummy) then check back in another 4-5hrs. I had a little on my paint roller still so I was able to check that for tackiness before I went back to the garage (trying to keep the heat in the garage). After 12hrs my epoxy was hard enough to walk on. I crawled around and used my hands to search for any sticky spots at this point. The first time I used this product I believe it was not mixed long enough before applying and/or the floor was not completely ground down and the epoxy did not cure in 60% of the floor. We had to use grinders and acetone to remove this area and then grind/rough up the cured spots before applying a new coat of epoxy. 9) once the epoxy is cured, I chose to add the Rock Solid clear coat for added strength/durability. Since the cement has been coated the pours are sealed and one bag of clear will cover a 20x20 garage floor nicely. After mixing the Part A and B for the clear, I decided to add the provided anti slip additive. I cut the top of the bag open completely and poured in the additive. I worked it around in the bag a bit before starting to pour it out around the floor. Be sure to continue to stir the additive as you’re pouring, or it will all settle to the bottom. Similar to laying the first epoxy coating. Note, This will spread much easier over the already epoxied floor, so you don’t need to pour as much out as you did initially when coating the floor. 10) wait 8-12hours and check back on the curing floor. Solid is goo, tacky is okay, gummy might 11) I wait a full weekend before moving everything heavy (tool chests) back on the floor just in case some spots are still curing. Good luck! EDIT: if you are applying the Rock Solid Clear, I have recently found better results to throw the anti slip additive on the floor (similar to throwing the colored flakes) rather than adding it to the clear epoxy while it’s in the bag. This prevents clumping of the anti skid material when the clear coat hardens.
A**R
Ease of use.
This product is amazing! Ease of use, product support, and beginner friendly. I have never used any epoxy and this is probably the easiest thing I have ever done in home renovation! If you are willing to put in the work for prep you will have amazing results. I’m not quite done but here is a picture of the large part of my garage.
S**N
False Claim on 2,5 car garage, but GREAT product (2nd review).
2ND BOX: 1 STAR: Fine, Rost-Oleum doesn't have a return policy for such an expensive product. I had to order a 2nd box of 2.5 car garage at $$+tax, fine. By now, I am an expert in my own work. I scrubbed the floor, went to a local big box home improvement retailer, bought a Rost-Oleum repair kit. Used the repair kit as my 1st half side of the garage to repair any tiny holes. Let it sit per instructions, sand it off with 80 gade sandpaper than wash it off. The next day, I used the ACID white salty looking powder in water (it smell by the-pls protect yourself) and scrub that floor like no body's business (same process I used on the 1st box). Wash/rinsed it off and let it dry 14 hours. The next day, I opened the product, temperature nicely around 50 F just like the 1st half when I painted. Shake it well before I mixed the 2 products; burst the middle section, mixed it up for 5-10 minutes (just like I find with the 1st half), poured it in a painter plate. Started painting-then-a 1/4 into my painting see pictures, the damn $$ paint started HARDENING. I am heartbroken couldn't believe what is happening. First, they lie about the COVERAGE and now I received a BAD PRODUCT! Hence, my 3 stars to 1 star. Three, I decided to leave a message to the SELLER to see if we could solve this matter privately without me leaving a message to all potential customers since it is still a great product minus the false advertisement, but they don't allow you to leave a message to a seller and no return! Seller, contact me -let's talk about the 2nd porch of this bad product. See pictures of the good 1ST BOX:3 STAR: I didn't believe other reviews when they were claiming that this product description is NOT correct for 2.5 car garage, rather for 1 car garage. True, no matter what you do....fairly new garage 5 years old garage....strictly used for car storage not mechanical works...no oil spills...etc. Yet, I couldn't use this 2.5 car garage claim product for a standard 2 car garage. Swept, cleaned, washed with the ACID cleaner that came with the package (by the way it smell-use all safety preactions protecting your eyes, hands, and skin). Yet, when it came to painting the garage floor, the 2.5 car garage couldn't cover the whole garage. PICTURES: The 1st 2 pictures depict the 1st half od the garage-as you can see-perfect-love it-1st time.-great result. The remaining pictures are the 2nd half that I literally only used the 1st paint box and that's my complaint. Meaning, I bought a 2.5 car garage paint box and only used 1/2, and now I am stuck because can't continue. Plus, I need to go buy some resources to remove it and buy another 1.0 car garage or until I hear from Rost-Oleum! The 2.5 car garage is a false advertisement but the final product is excellent - love it. Another Caveat: Be ready to put in some good exercise on prep-work:-) But you will love your new garage.
Trustpilot
1 month ago
1 month ago