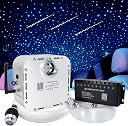
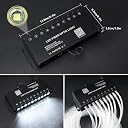
After carefully measuring the ceiling of the intended room, I purchased the kit containing 800 stars and 40 piece meteor/shooting stars to install in my media room. Let me just say that this was A LOT of work!! First, I went into the attic to bag and remove the insulation and placed them aside. Then, I carefully measured each bay or section where the ceiling studs ran from wall to wall to get an approximate count of how many stars I would need per section. I averaged about 4.25 stars per square foot. I then used a QUALITY stud finder (that's key) to find each stud on the ceiling and marked them with lines of blue painter's tape to distinguish each section/bay. Next, I separated and counted the amount of cables needed per each section, zip-tied them each bundle, and placed a Post It note labeling the number of cables in the bundle and the section or bay it was intended for based on my measurements. Using a finish nail (actually, quite a few by the time I was finished because they bent over repeated use) held in place by locking pliers, I climbed the ladder and punched holes randomly small enough for the cables to be passed through from the attic down into each section in the ceiling, again based on the number needed. You don't want to punch the holes from the attic down as they will cause a "blowout" in the drywall and will look bad. Going in the direction from the room into the attic works best. From the attic, you can see the holes made pretty easily if you have enough light in the attic. I used two big Dewalt flashlights I have. Next, I went back into the attic and fed each cable through the holes and glued them in place using basic Elmer's school glue. ***Remember, I designated each bundle of cables that were zip-tied to the respective section/bay they were intended for, per a grid I drew up on a sheet of paper. The grid contained the specs of the section/bay and cable count per section/bay. I also fed the cables for the shooting stars in the designated holes, glued them down, and ran them to the ports on the designated shooting stars light engine. I then bundled all of the individual bundles of cables (one per section - 14 bundles in all) and taped the end that goes into the light engine really tight. I cut the end to where all of them were the same length. You don't want any to be sticking out just a bit as they rub against the spinning cover that makes the lights twinkle. Finally, after testing the lights to make sure everything was good to go, I placed all of the insulation back in place. I do want to add that I also removed the existing two-gang box from the room's wall and replaced it with a four-gang box. I added some electrical wiring and added a switched outlet at the top of the wall and another switched outlet in the attic above the ceiling. I also added a switch for the stars/meteors and another for the indirect LED crown moulding. My only gripe is that when I turn the switch off that controls the ceiling stars, it doesn't save the setting I have it in after using the app. It defaults back to the medium speed twinkle and fastest shooting star effect when I turn the switch back on. I would love if the manufacturer would fix this to have the app remember the last saved setting regardless of how they are turned on and off.. This project took me a few weekends and some weeknights to complete with my busy work and family schedule and all. But, it was well worth it. It has added a nice upgraded look to the room. Anyone who has seen the finished look, loves it. I would charge a fortune if somebody asked me to do this to one of their rooms. IT'S A LOT OF WORK!!! BTW, the crown moulding LED's were also purchased from Amazon. The link to that product is included below. Both the ceiling stars and crown LED's work via their respective apps and also remotes. https://www.amazon.com/gp/product/B083XX8BLJ/ref=ppx_yo_dt_b_asin_title_o09_s01?ie=UTF8&psc=1 EDIT: Included a short video to show the 10 different colors and meteor effect. Please note that there is a "halo" effect or blur on the stars. This only happens while recording on my cell phone and does not exist to the naked eye. The stars are very crisp and sharp to the naked eye. Honestly, the video doesn't do them justice. They look WAY better in person.