Desertcart purchases this item on your behalf and handles shipping, customs, and support to Slovakia.
✨ Snap into style and craft your signature look! 🧵
The CHEPULA Craftsmanship DIY Snap Button Kit offers 200 durable 9.5mm copper snaps in 10 vibrant colors, paired with a high-quality aluminum plier tool for easy, hammer-free installation. Designed for versatility and longevity, this kit is perfect for sewing enthusiasts and professionals aiming to add a polished, rust-resistant finish to garments and crafts.


| ASIN | B07JKTGJYT |
| Best Sellers Rank | #11,384 in Arts, Crafts & Sewing ( See Top 100 in Arts, Crafts & Sewing ) #39 in Sewing Snaps |
| Brand | CHEPULA |
| Brand Name | CHEPULA |
| Color | Silver, dark blue, pink, blue, orange, purple, pink, black, green, white |
| Customer Reviews | 4.3 out of 5 stars 4,946 Reviews |
| Head Style | Button |
| Item Dimensions L x W | 6.2"L x 4.2"W |
| Item Type Name | Snap Buttons |
| Manufacturer | CHEPULA |
| Manufacturer Part Number | CH-SNS |
| Material | Copper,Aluminum |
| Material Type | Copper,Aluminum |
| Model Name | CH-SNS |
| Model Number | CH-SNS |
| Recommended Uses For Product | Craft, Purse, Handbag |
| UPC | 681013559343 |
| Warranty Description | 90 days |
S**5
so far, so good!
It seems of reasonable quality for the price, we'll see how long the snaps last. The instructions are horrible, but with a little experimenting it gets clear pretty fast, here's the quick version: There's a latch on the side of the pliers that keeps them folded up, release it for us. The plier die that's dish shaped with no hole in it is the bottom, you place the spiked rings in it. The rubber ring around the die did not hold the ring for me - if you turn it over it will fall out, so keep it on the bottom with the spikes up. The plier die that has a hole in it is the top. The rubber ring around the die will hold either the male or female ring. When installing male rings the protrusion goes up into the hole in the die. When installing female rings look closely, one side has a slight lip protruding up around the hole, that protrusion goes down toward the spikey ring. When compressing the rings with the pliers it doesn't take much force, you'll feel a slight give and it's done. When done there's a small metal ram with a hole in one end, I set the snap down on a board with a piece of 1/4" flat steel I had laying around on top of it. Wood would probably work too, but it'll probably leave an imprint in the wood. Place the protrusion of the male ring up into the hole in the rammer and tap it with a hammer to fully secure the two rings together. For the female ring just flip the rammer around so the flat end is centered on the ring and tap with a hammer to fully secure the two together. That's it, you're done.
S**I
Snaps are good quality and easy to install.
These snaps work perfectly. With the snap tool included they snap on quickly and easily. I mostly use the silver ones but the snaps with color are a bonus and look very nice.
M**D
It's easy when you finally figure it out. A good engineering experiment for teenagers.
Great snaps, had to figure out how to use them properly. Cathy's instructions. (This first method only works on thin material, following this I give the method for thick material) 1. Take collar off of tool on the side that doesn't have a complete opening or hole in it. 2. place the collar on a heavy duty flat surface with the widest side facing up. 3. Place the pronged ring in the white collar facing DOWNWARD, jiggle it to make sure it is even. 4, Place collar back on tool. Used the outer corners of your thumbs to lock in place the white collar with pronged ring. 5. Take off the white collar on the side with the hole that goes all the way through. 6 . Place the white collar on a flat surface with the widest side facing upward. 7. Place either the female or male snap in the collar with the deep prong receiving ring downward. 8. Place the white collar back on the tool. Take your thumbs and press the collar down firmly around the snap. 9. locate where you wish to place the snap on your fabric, think about what direction you want your snap to go 10. Give the tool 3 good squeezes on your fabric. The white collars may stay on the snap or pronged ring, but can be removed easily. 11. Take the setting tool, a small hammer, and a sturdy surface to complete your job. If you are setting the male portion of the snap, use the flat side of the die tool, if you are setting the female portion of the snap use the indented side of the die tool. Cathy's Instructions for thick material 1. Take one of the extra white collars which is included in the easy open packaging 2. Place white collar on heavy duty flat surface with widest side up. 3. Place pronged ring with prongs facing UPWARD for this method 4. Position your white collar with pronged ring under the fabric where you want the snap 5. Take a pair of tweezers and press your fabric gently into the collar with the pronged ring 6. Put your male or female snap into the fabric depression you created within the white collar 7. On a hard surface place your die tool over the head of your snap (indented end for female, flat end for male), then strike it tool hard several times to lock the prongs in place. . 8. Remove the white collar from the pronged ring and repeat step 7.
C**S
Small snaps hardly visible
I used this to make my clothes fit better. The snaps are not very noticeable. It is just right for me, easy to use and a good price.
B**E
Yay! No more sewing snaps!
My daughter recently had a baby, and I decided I would make some baby clothes. After not sewing for quite a number of years things have changed a lot. Of course on my first article that I made. I remembered about the crotch on baby clothes and had to so many snaps in place. For the next article of clothing, I found snaps that are already mounted on pieces of tape, and you just sew the tape down like you would show in the zipper. This is a great innovation, but one small piece for example, for one pair of pants is $10! That’s way too much. Then I remembered my grandmother had this contraption that pushed the snaps into the clothes and I looked at Joannes. They were very expensive and they did not have much variety of snaps to go with the tool. Most of the hooks were empty and it was difficult to figure out which snaps , you were supposed to use with which tool. I decided to look here on Amazon and found this kit, and I’m very happy with the variety, and with the ease of attaching the snaps! Yay! No more handsewing snaps!
K**S
Very Cheap Materials
The first use the handles of the pliers bent inward like I was squeezing too hard. I am not some body builder doing squeezy exercises, just a regular human. Clearly not made of hardened steel. The snaps are hit and miss. I placed 10 snaps in 2 garments and three had to be redone because of failure. So the snaps worked, but with a 30% failure rate. The best I can say is I didn't pay $35 for the same quality somewhere else.
T**Y
Snaps
Works as advertised
C**Y
Garbage
The teeth on the clamp aren’t strong enough and the hand tool included doesn’t align the teeth correctly. I got three pairs to work “okay” enough that they withstood me snapping them together and pulling apart about 10 times. I’m not keeping them on any longer though to see if the stand the test of time Because i also wasted 15 pairs. as soon as i snapped them together, then tried to pull them apart, the snaps separated from the teeth on at least one side. It was a pain to get them unsnapped without having both sides attached to something. Just to try again and the same thing happened. I also noticed that on some (but not all) where they separated from the teeth side, the teeth didn’t all bend inside the snap. Some bent outward and outside of the snap, so obviously that’s not going to hold it. That part I believe is the hand tool not aligning properly. The others where the teeth looked like they bent in and around the snap correctly and still failed, I believe is a weak teeth issue. Yes these come with a LOT of pairs. It’s not about wasted value on the quantity of them. but it’s not worth the time or effort for a 1 out of 5 success rate of them actually working. Some other notes I wouldn’t have cared to mention if I wasn’t already writing a bad review: The hand tool game sticky. Like it was sprayed with a can of aerosol glue. None of the snaps came organized. They were all just mixed together in the tiny compartments
V**V
Great value.
Super happy with this product. Does exactly what it's supposed to do. You will need to come back to the product info of this ad to see how it is to be used because it doesn't come with any instructions. However the pictures in this ad were sufficient to learn how to use it properly. I'm a little disappointed I don't see any refill packs of the snap hardware available, but it comes with alot more than all the other similar products, so I feel it is worth the money I paid for it.
B**R
Simple and Easy to Use
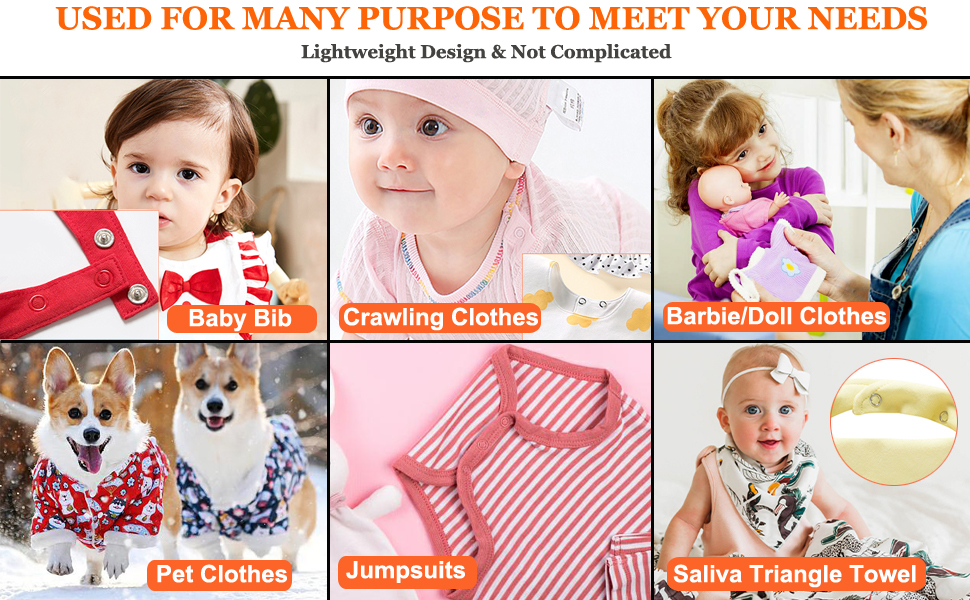
I love how simple and easy this is to use. I have used this to replace snaps on my babies clothes, baby shoes, my dress and even made quick snap bandanas for my dog. Used on cotton, polyester, satin and spandex/swim material. No issues at all! I love it ❤️ worth ever cent.
W**A
Smart product
I really like the product, it’s easy to use , learn, and very practical. Note ( if you already have the snap buttons and you only need the tool, you need to check the dimension of the buttons you have)
A**I
Missing the female snaps
So disappointed ! It’s written in the description that it comes with male and female snaps but i received it with only male snaps.
S**A
One good product for easy use
The quality of the product is really good and those buttons are easy to put into cloths. I have just used it on for few shirts on my baby i felt it is very usefull. Hopefully it give a good value for my spent money but will try giving a followup review
Trustpilot
1 month ago
3 days ago