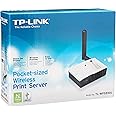
Print Without Limits! 🖨️
The TP-LINK TL-WPS510U is a high-performance wireless print server that allows you to share printers wirelessly with speeds up to 150Mbps. It features a USB 2.0 connection, supports multiple operating systems, and ensures secure printing with advanced encryption methods. Perfect for modern offices looking to enhance productivity and streamline printing tasks.
M**T
Excellent WiFi Upgrade for 20 year old HP LaserJet.
NOTE - This review is specific to the **TP-LINK TL-WPS510U Wi-Fi Print Server** (not the Parallel or USB print servers).Outstanding! Highly Recommend. Very pleased with this Wi-Fi Print Server. It's tiny - half the size of a deck of cards.Printer: HP LaserJet 1200 circa 1990's (using PCL 5 print drivers) - the little LaserJet workhorse!Previous networked solution - USB cable HPLJ to DLINK router, plus DLink's ShareportPlus utility installed on each PC. (Unreliable in a multi-user, concurrent printing environment.)New networked solution - TP-LINK TL-WPS510U Wi-Fi Print Server mounted inside HP LaserJet 1200 connectivity bay (totally concealed). Successfully working on 5 PCs (all Windows 7 SP1, 1 Dell desktop, 3 Dell laptops, 1 HP desktop)Step 1 - Turn off printer; mount WPS510U inside LaserJet, power up both print and WPS510U. (10 minutes)Step 2 - run "Easy Setup" (from the mini-CD) on first PC. This configures the WPS510U in the printer and on the network (via DHCP), then configures the printer port for the PC. (10 minutes)Step 3 - run "Setup Wizard" (from the mini-CD) on remaining PCs. This configures the printer port for each PC. (5 minutes per PC)Success - printing tests on all 5 PCs successful. HP LJ1200 is now WiFi capable. No complications during setup, at all.Also Note - I'm running a multi-printer environment - HP LJ1200 (now WiFi) and an EPSON Workforce Pro 4530 MFP (with built-in WiFi). Both printers happily co-existing.
C**N
Works well, but a bizarre and irritating setup procedure
Five stars awarded for working well and being able to add additional PC's easily once it was setup. It's extremely reliable, sitting in the far corner of a kitchen / dinette, 25' from the wireless router, with a wall and a refrigerator directly between the router and this device (although take that with a grain of salt, because I have a beefy wireless router, an older WRT-54G with upgraded antennas, and Open Source firmware I installed that allowed me to greatly goose up the transmit power of the router).Two stars knocked off for a bizarre 3.5 hour setup process.This is not a device for the faint-of-heart with networks.Their term "Easy Setup" is a real Oxymoron.Even though this device comes pre-configured with an IP address of 192.168.0.10, I was never able to connect to this device by using the "Static IP address of 192.168.0.x on your laptop" trick that many of the older reviews describe. Strangely, I finally was finally able to connect to it, after multiple tries, by using the normal 192.168.1.x address on my laptop and running Easy Setup multiple times. Maybe I finally just got lucky.Very strange.At the end of EACH step of the "Easy Setup" connection dialog (Select wireless router, Enter network key, Select print server, Select Use DHCP, Select Printer) it would disconnect the laptop from the wireless network, and I would have to reconnect before doing the next step. Sometimes, it made the laptop forget the saved network key, and I'd have to re-enter it. It did this for each of the 5 or 6 times I ran "Easy Setup" before it finally connected with the laptop on the 192.168.1.x subnet.Very strange.I was relieved when it finally offered to print a Test Page. But, no Test Page was printed. At this point I gave up and decided to start over from scratch, so I pressed and held for a few seconds the Reset button on the back of the unit to put it into factory condition. It cycled through it's POST routine, and... Printed the Test Page, showing an IP address of 192.168.1.103!Very strange.At this point, I was able to log into the device from the laptop by using the browser interface, and I changed the IP address to from DHCP to static 192.168.1.103 (so that I'd always know it's IP address in the future, taking no chance that it would lock me out by getting a different IP address that I wouldn't know).At this point the device was on the network, could see my HP PSC 2400 multi-function printer, and had printed a Test Page.However, Windows 7 said that the printer was off-line. I could not print anything from Windows 7.What I finally figured out I had to do was1. Delete the printer.2. Go to Add Printer, and add the printer as a new printer, using the device driver that was already installed on the system.3. Add Port, select "Local printer attached to this computer"4. Create a new port of type Standard TCP/IP Port5. Configure the new port, entering the IP address of this device (192.168.1.103 in my case), specify LPR protocol and print queue name of lp1.And then, everything worked beautifully.Giving an old XP system access to the printer through this device was very easy, I just had to do steps 2 - 5 above (NOT using the Easy Setup software that came with the unit); it took about a minute.
R**S
Worked for a while
I purchased this to allow two laptops to print to a brother laser printer. I got one of them to work but could not get a Windows/8 laptop to install. It worked for month on the Windows/7 laptop until I shutdown the printer and this unit to move them. When I turned both back on it would not work. I reset it and tried (many times) to re-install. The Easy Setup would find it only once and only immediately after the reset. During installation it ask if I wanted static or DHCP (I selected Static) IP and continuted. When setup was completed it did not ask which printer to assign to it, I could not ping the address - the printer could not be connected to and the PSAdmin could not find it. I scanned all active IP's on my network and it could not find the print server. Finally I replaced it with a USB/to RJ45 Print server and gave up on this unit.As a bit of background I have been supporting small business computer for over 20 years and have installed both wired and wireless print servers. This is the only one I gave up on.
E**R
Wireless printing!
I followed the instructions in the manual to set this up using the browser interface. My router uses WPA encryption and I was able to set it up without issue. You do have to pay attention to detail. The ip addresses used during setup are specific and switch between 192.168.0.10 and 192.168.1.10. You will need to be careful to match the address in your laptop or whatever wireless computer you use to do the setup as well. Follow the directions and it should work for you too. I did not use the setup software so I cannot comment on the quality of the software. Once the print server is setup you will need to add the printer to each of the computers that will print to your printer. Again the instructions were fine. Just pay attention to the detail.It has been running for most of a month now and has been flawless sharing my Brother HL-1440 among 3 computers. The HL-144o is not on the list of supported printers but it works great. Now I don't have to leave my computer on just for printer sharing.
Trustpilot
1 month ago
1 month ago