🛡️ Elevate your ride’s style with science-backed ceramic protection!
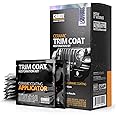
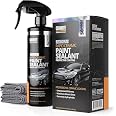
CERAKOTE Ceramic Trim Coat Kit delivers a durable ceramic coating that bonds permanently to vehicle plastics, restoring and protecting trim with a finish that lasts over 200 washes. Developed and manufactured in the USA by industry-leading chemists, this quick-apply formula offers professional-grade UV protection and a lasting showroom shine without the need for frequent reapplication.


| Manufacturer | CERAKOTE |
| Brand | CERAKOTE |
| Model | AH-TRKIT |
| Item Weight | 1.76 ounces |
| Product Dimensions | 1.18 x 1.57 x 3.15 inches |
| Item model number | 8 |
| Exterior | Polished |
| Manufacturer Part Number | R-TKIT1004 |
| Bulb Type | Fluorescent |
A**R
Absolutely amazing
Crekote completely blew me away! From the moment I opened it, I could tell this was a premium-quality product. The application was smooth, effortless, and mess-free, and it delivered results far beyond my expectations. The finish is rich, professional, and long-lasting — exactly what I needed.It not only enhanced the look of my car, but also provided superior protection that has held up beautifully over time. The durability is unmatched, and it’s obvious Crekote is made with top-notch materials and craftsmanship.If you’re on the fence, don’t be — Crekote turns an ordinary job into something extraordinary. This is my new go-to product for every project. 100% recommend!
K**B
Very impressed with initial application, will see if it lasts, hope it does!
This stuff works, if you follow directions and watch videos you will be able to do a great job and really bring your plastics back to new . I have a 26 year old for f250 and the plastics were starting to fade ABC show their age, nothing seemed to work to make them look good very long. This is actually a sealant that dries clear and brings the original plastic color back. I used it on my running boards, mirrors, rear bumper, front bumper, and door handles and they all look really really good with one application. My only concern would be durability, but I’ll report back. They guarantee 200 washes, I go through the car wash 2 to 3 times a week so we will see , so far I am very impressed with the initial way it looks and feels after it cures it doesn’t seem to be any more slippery than the original plastic so it doesn’t make things slick like some products or remain oily.
S**N
Game-Changer for Trim Restoration
This product is a game-changer for restoring faded plastic trim. The ceramic coating bonds to the surface, ensuring a long-lasting finish that doesn't wash off like traditional dressings. Application is straightforward—just clean the trim, let it dry, and use the provided pre-saturated wipes. In less than 30 minutes, your trim looks like new. I've used it on my vehicle's black plastic trim, and the results are outstanding. The finish is deep and rich, and it has held up through multiple washes. Highly recommend this product for anyone looking to restore and protect their vehicle's trim.
H**Y
It mostly works. Here’s my follow up….
This product is amazing!! Put on as directed on my ‘03 Chevy Avalanche. Goes on easy! Brought new life back into my side trim and all the panel moldings!! Looks like NEW!!! Still looked perfect after a week and several rain showers!! Amazing!!Only have one suggestion…. I wish the product application cloth was some bigger in size! Takes forever and is difficult to cover that much side, wheel housing and bumper area. I should bump it one star. Didn’t because it’s so effective. Also needed to ‘buy again” as it wasn’t enough for all the trim and had to buy another quantity. Also haven’t applied the headlamp product, but will follow up.Here’s my follow up……. After 15 of days now, some areas that have even been treated twice now, after a week are starting to streak, while others look fine. Don’t believe it was my application because I had two coats as mentioned. I was ok with that because it was very faded. And again at first trim looked like new. Now sadly it’s starting to fade in some areas and I can see streaks. Not everywhere. But enough that it is starting to stand out.From a distance of 3-5 feet away is certainly noticeable. Seems to me the areas that get more sun exposure are affected more. So side panels down low look great. Higher on the side panels or trim on top of panels don’t look as good as when applied and after two coats.It’s only May and concerned now what will happen to the trim cote this summer.
V**4
Great product.
Works amazing on plastic trim. Also used it to restore a Formica table top! It did an awesome job on that also! It’s held up very well under daily use! Most definitely use the gloves it comes with!
A**A
Worth the hype
Works really well . I have a really sun weathered nissan rogue, the trim was faded grey and this brought it back to black! I've used Meguiare's and armor all which have faded within a week or did nothing. This has lasted through 4 car washes and multiple rainstorms and hasn't faded at all in the weeks of Georgia sun. It is easy to apply and I'm really glad it lives up to its rep. and yes it is definitely not for window trim which i tried anyway, and it kind of left residue on the glass but could probably be scraped off. My trim is hideous anyway so no loss for me. I did only 1 swipe on all the trim with two wipes.
D**1
Great product
This is a great product my trim looks brand new again. Easy to use and high quality product. And price is reasonable also.
A**R
Great if you don’t have to high expectations
This is much like Armor All on steroids. It does great on plastic and vinyl that’s in good shape. Brings a great shine and protection that surpasses what Armor All does by a wide margin. It may take 2 coats to cover really well with no streaks.The negatives:The wipes dry out really quick, so cover as much area as possible as quickly as possible. Keep the wipes folded. Opening them up dries them out extremely quickly, so keep them folded but flip the fold. You can smoke through the whole box or more on one detail, so they’re pricey for what they cover, but do a really good job of making the dash and ect look like new.I have a Solstice GXP that the top edge of the door panels have lost some color from sun over the years and from what I had read thought this would bring the color back. It had zero affect on that. Was really disappointed in that area. Maybe I was expecting to muchConclusion: really good product that doesn’t cover as much area as I feel it should for the price, and does nothing for restoring black plastic starting to lose its color. I so much wanted this to be a 5 star product for me, but came up short for what I needed and hoped for….but really good it a lot of areas. Why I gave it 3 stars.Hope this helps someone.
Trustpilot
1 month ago
2 weeks ago