Some deliveries may take a little longer than usual due to regional shipping conditions.

DOWNLOAD THE APP


Customer Services
Copyright © 2025 Desertcart Holdings Limited
DOWNLOAD THE APP


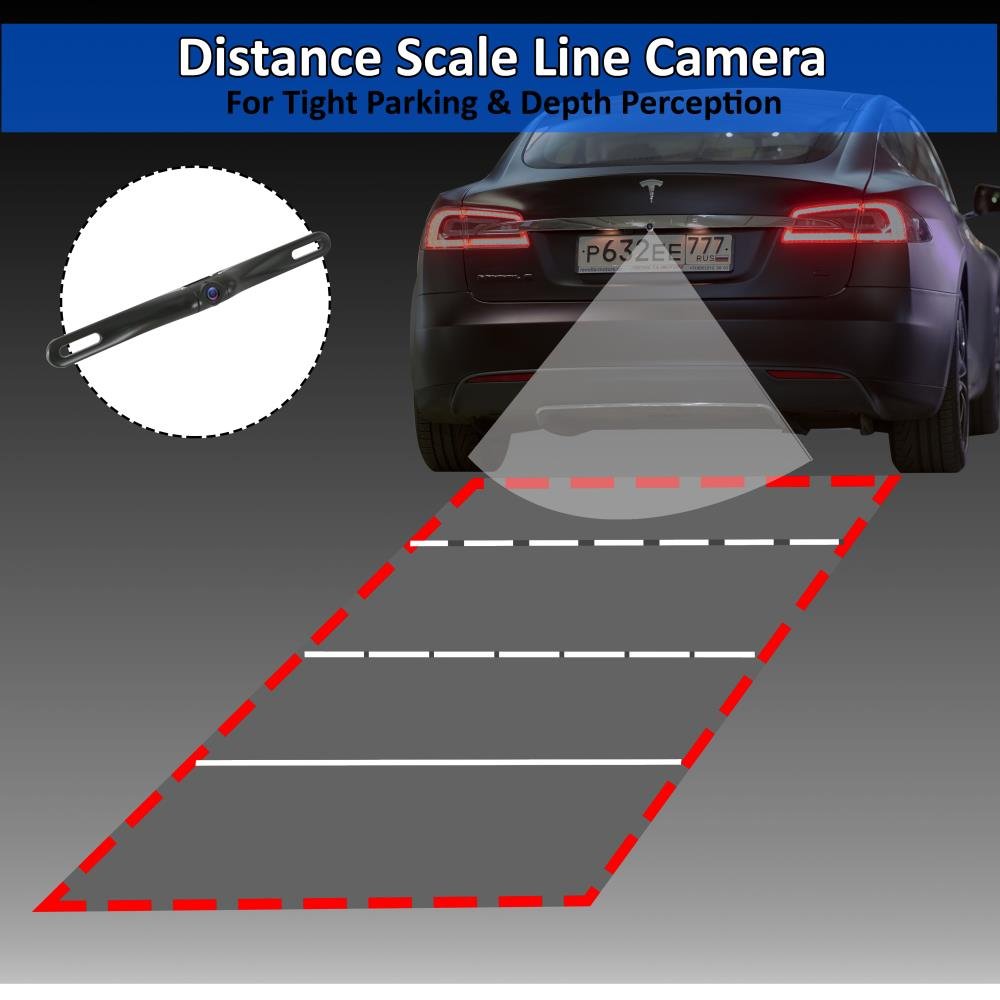
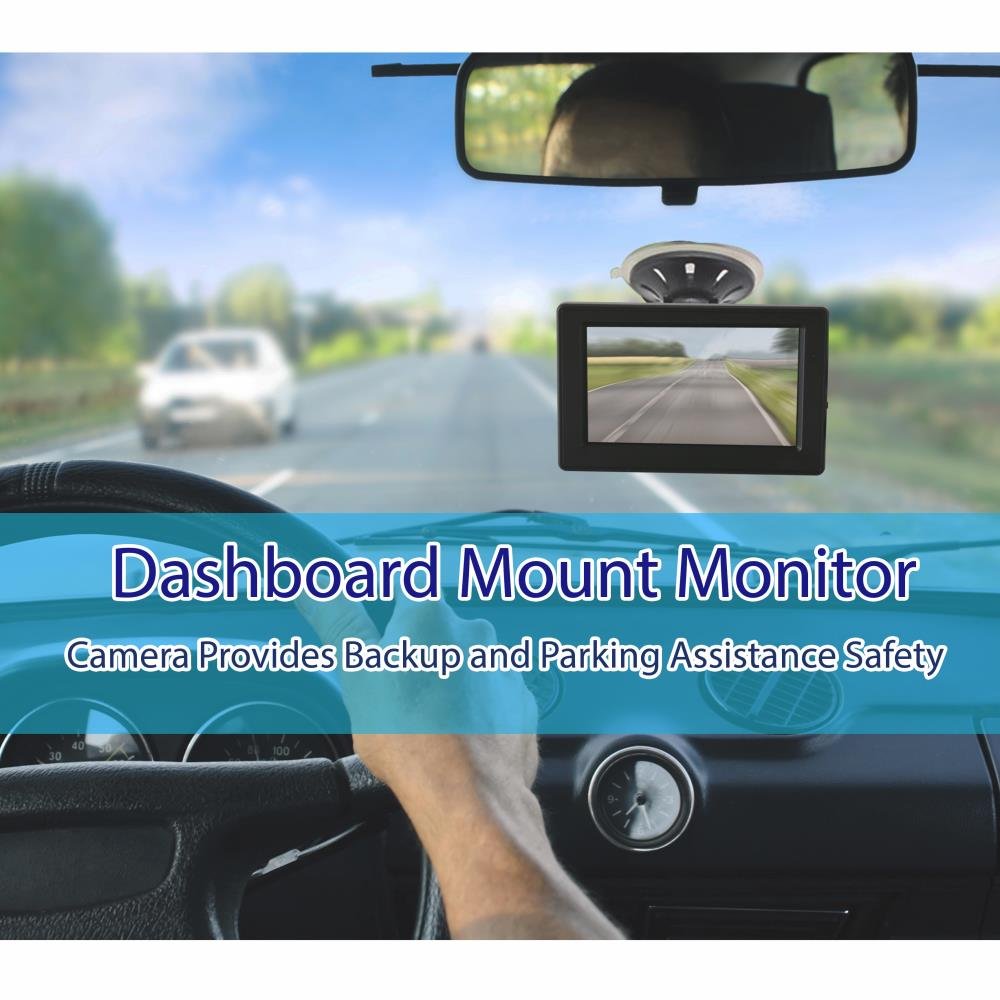
🚗 Drive with Confidence: Your Eyes on the Road!
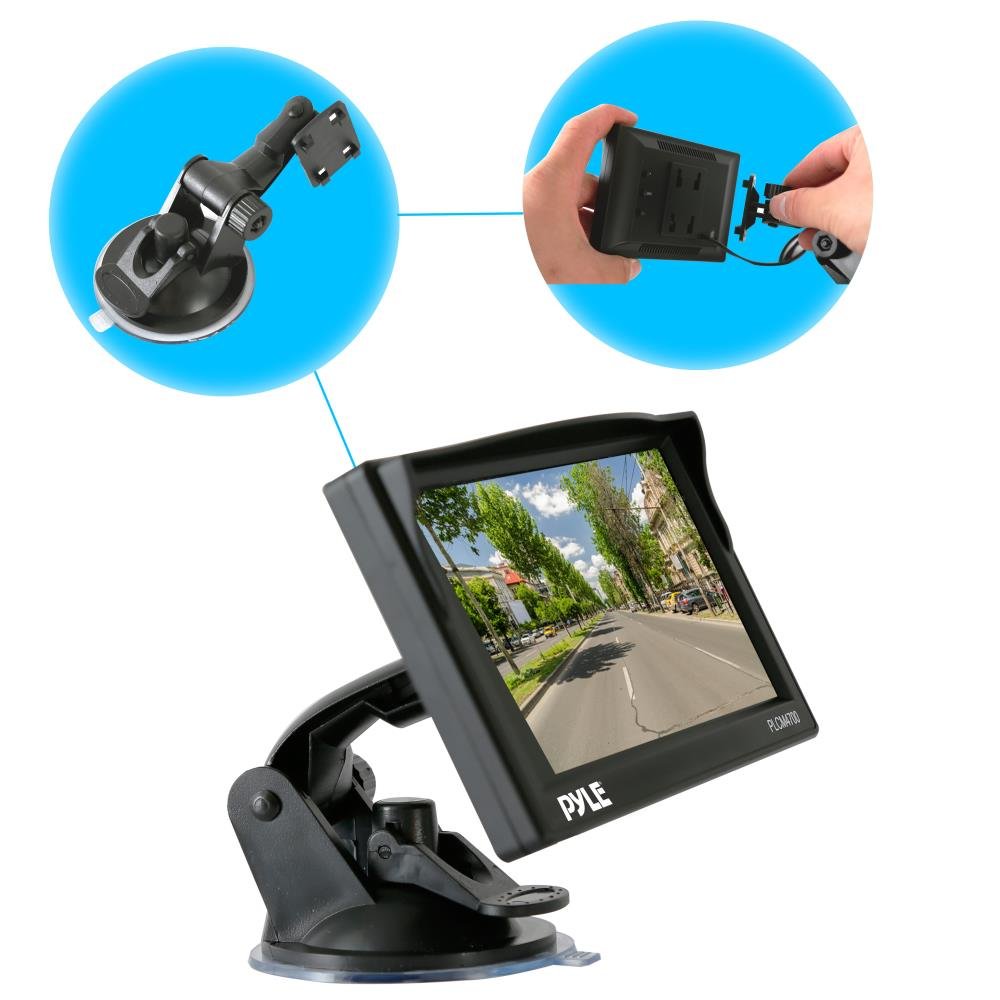
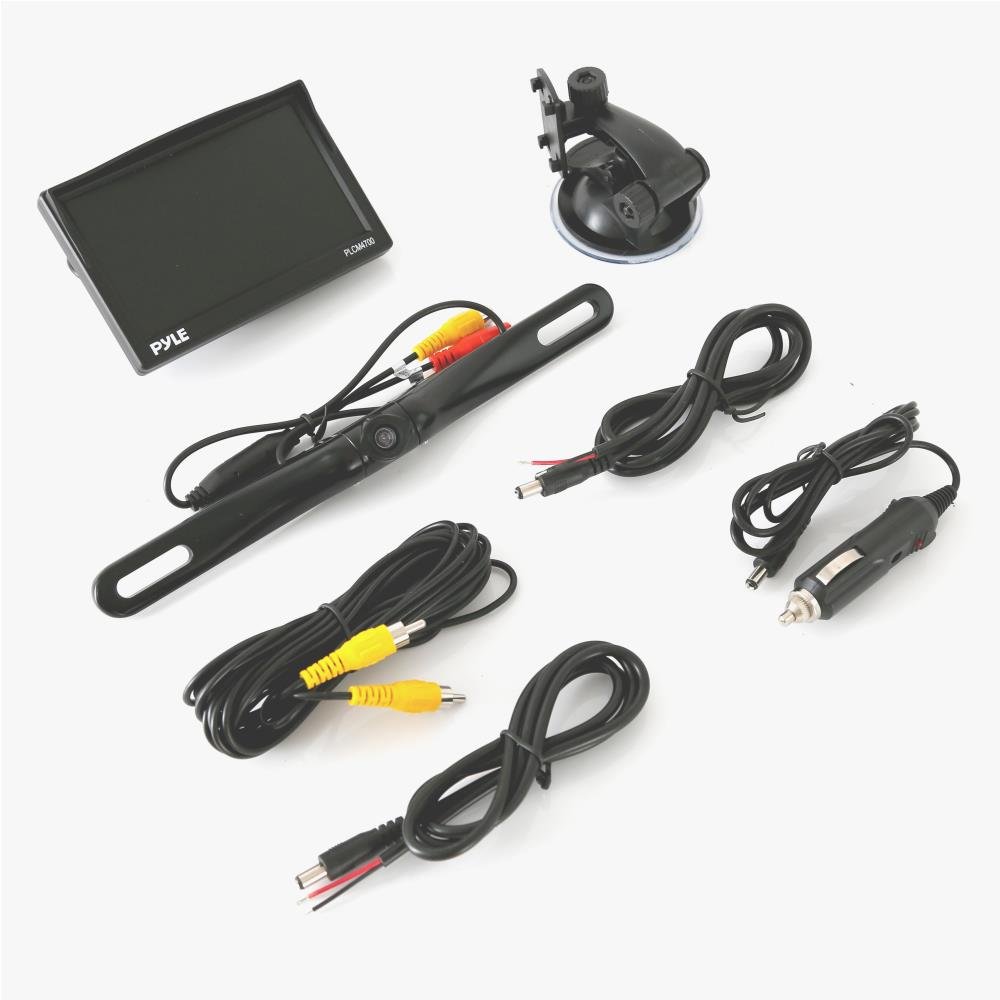
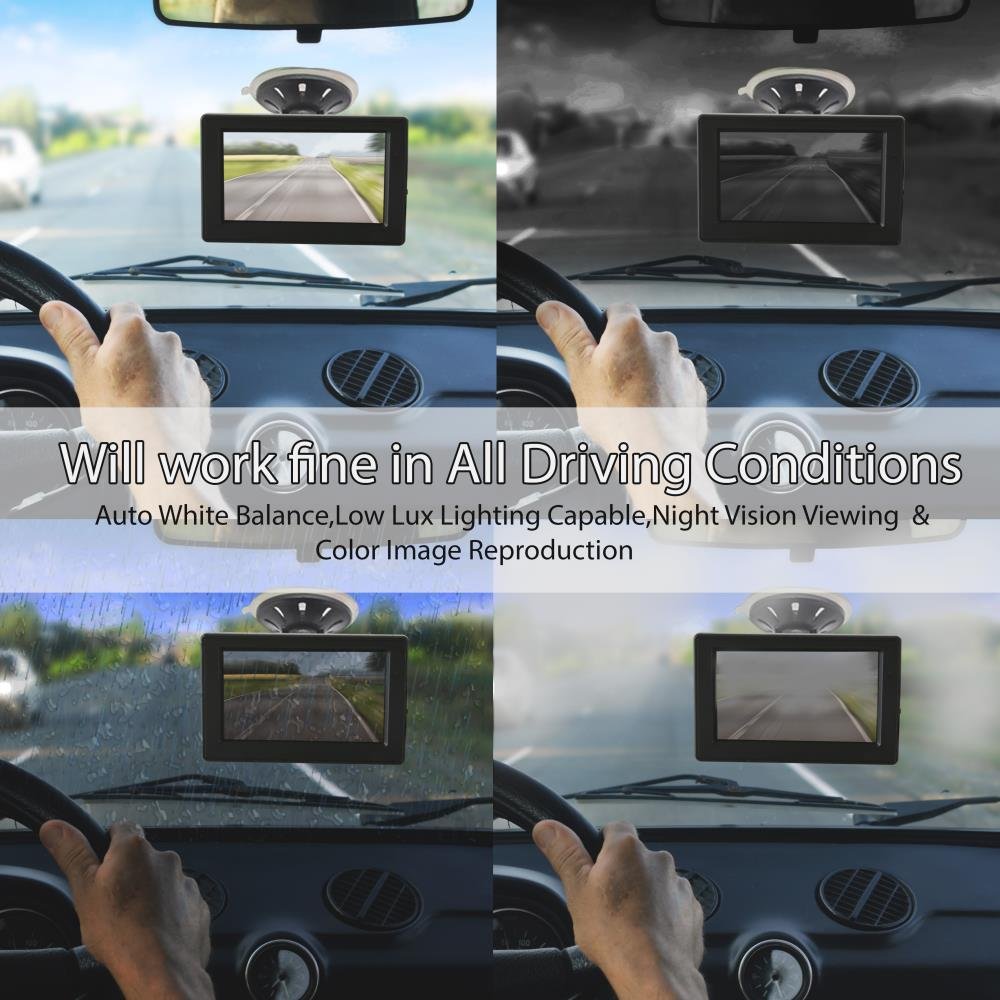
The Pyle Backup Car Camera Rearview Monitor System (PLCM4700) is a robust solution for safe parking and reversing. Featuring a 4.7" LCD monitor, 170° wide-angle lens, and advanced night vision capabilities, this system ensures you have a clear view in all conditions. With waterproof design and easy installation, it's perfect for any vehicle.
| Item Weight | 1.58 pounds |
| Product Dimensions | 8 x 11.25 x 2.75 inches |
| Item model number | PLCM4700 |
| Is Discontinued By Manufacturer | No |
| Display Type | LCD |
| Warranty | One year limited |
| Height (inches) | 3 inches |
| Width (inches) | 8 inches |
| Weight | 0.13 Kilograms |
M**A
easy set up despite others complaints.
Despite people's complaint about poor wiring instructions I found the whole install to be easy. Dont let them discourage you...People...you hook the rear view camera up to one of your reverse lights on the back of your vehicle. Common sense. You'll need to solder the connections. I also hard wired red and black 12v wire ( also found on amazon for cheap) from the monitors power cord to the same reverse light bulb Connection instead of hooking the monitor up to the accessories plug. I figured since i had the interior of the car apart for running the video wire i might as well run the monitors power wiring. It was simple. Now the camera -and- monitor only turn on when the reverse lights come on ( when in reverse !) . Quality product. Works great for its intended use.
J**Z
Works well with a few minor improvements needed - Detailed instructions described.
I bought this system because I wanted a higher resolution camera and display with 2 video inputs. Giving it 4 stars because of the wire gauge, viewing angle, and poor almost no light view on the camera. Monitor and mount is plastic and camera is metal. I like the size of the screen and suction seems to keep it on the windshield just fine. Would have been 5 if these things were improved but for the price I cannot complain that much. for detailed review and instructions.Pros--During the day the picture is pretty sharp and does get stretched to the 16:9 aspect ratio (although you can change the monitor to 4:3 aspect if you like). I don't find this to be an issue at all and really like the ability to see behind me backing up in those tough spots.-The suction cup and mounting arm is decent and allows me to put it just to the right of my mirror, you cannot rotate it more than a few degrees and the mount has to be up and down as the monitor mounts up and down. What I mean is you cannot mount the suction cup sideways as the monitor will be sideways. Not a show stopper but was considering mounting it in a cubby on the dash of my GMC Sierra. I find it up by the mirror just fine. However the swivel up and down and side to side is very adjustable and can tighten in place easily.- Monitor had basic adjustments like contract, brightness, aspect ratio (16:9, 4:3), tint, and factory reset, etc.Cons--The wires that connect the positive and negative are really thin. I used a bigger gauge wire to connect to the camera and monitor power wires and used some screw on electrical connectors. This way I could use splicers to connect to the vehicle power and reverse wires.-The video cable that came with the system was only just long enough (barely) to reach from the monitor to the camera. It is decent quality. I have a crew cab GMC Sierra 1500 and ran the video from just right of the rear view mirror through the headliner, down the left post, under the dash, through the grommet for the emergency break and along the existing wiring harness to just above the spare tire in the back. If I had a couple of inches less I wouldn't have made it. It will be plenty long enough for a car, but a tight fit for a truck. Don't get me wrong, it is a long cable. But only just long enough for my application. You mileage will vary.- The wide angle doesn't look to be 170 degrees but without measuring it, I cannot be sure. It is wide enough for me to see my full rear and the backup lines are done well.- Great picture during the day, not so much at night when it is pitch dark.. With street lights it is fine enough. Even though it says it is a low lux camera, if your reverse lights are not super bright it is hard to see. I might have gone with one with built in LEDs to see the difference.- Instructions are minimal at best but most inexpensive ones are. Not really a knock but just an observation. I didn't really need them, enough research on youtube will get you what you need to know. Or read below and I pretty much spell it out for you.Basic instructions: - I am in no way responsible for any issues, damages or anything else - use at your own risk.If just want to hook up the camera with the kit you purchase do this.Monitor -Red wire to red wire - black wire to black wire on the 12V cigarette lighter adapter. Plug in when you want to use it. It will stay on all the time if your plug is always on. So unplug it if your plug always stays on not to drain the battery.Camera, - identify your reverse light wire in your trunk, or on a truck usually some bolts holding the light on. It will be on the back of the bulb that powers the reverse light. Usually the clear light, not the red (breaks) or yellow (flasher) lights. Tap into that wire, black is usually ground and the other color (green on mine) is positive.Mount the camera to the license plate and the put the monitor on the windshield.Run the video cable to the camera through the chassis and hook up the CAM port on the monitor. That's it!I went a little further as I wanted to have this camera work in reverse but hook up another camera on the back on my camper and make it priority and always on when towing. My goal was to have the monitor and truck camera only come on when I put in reverse. Also have a camera on the back of the camper be on all the time but switch the monitor on all the time when the camper camera is hooked up. So I needed a switch that would allow me to turn the monitor on when I wanted to see the camper camera but also activate and turn on the monitor when I put the truck in reverse to see the camera on the license plate. All this and be in an off state when normal driving with no camper.Here is what you will need to do this at least.I am in no way responsible for any issues, damages or anything else - use at your own risk.1. Monitor with 2 video inputs, one takes priority, usually marked CAM and the other marked AUX or Video. (This system you are looking at now)2. A Single Throw, Double Pole relay switch or relay and switch combo. Got mine with the connecting cables and fuses from Pep Boys for about $19. It came with a rocker on-off switch and a 5 prong relay. Posts marked 85-86-87-97a-30. See the link further on down for a description of the general operation of a relay.3. Located direct power on the left side of the cab (red/white wire) by the fuse panel. GMC 2011 1500 Sierra. Used a wire tap and connected it to port 87 on the 5 post relay. Also tapped that same wire close to the relay and connected it to the 5 port relay on port 85. This cable already had a fuse but recommend putting one in line if you don't have one before you tap into it so that both connections have a fuse (87 and 85). This will provide direct on power to the relay and connect power 87 to pin 30 to power the monitor when the switch is turned on. When the switch is turned OFF, the power comes from the reverse light.4. Connected the middle post on the rocker switch to port 86 and the port closet to the off position to vehicle ground. I found a bolt close to the fuse box and used it. When the switch is turned on it will energize the relay and change power flow from ports 87a-30 to 87-30 and give direct power to the monitor.5. Locate the reverse backup light (blue wire top right of the 2011 GMC Sierra 1500 box where the left foot on the floor board under the dash just below the emergency break) Your vehicle may very. Did some google searches before I started to see where others found theirs. Connected this to the 5 post relay on port 87a. This will be the normal power provided with the switch OFF. Power will come from the reverse lights and the camera and monitor will only come on when the vehicle is in reverse.6. Plugged in connector 30 to the monitor positive red wire. Ran this under the dash, around the left post to the head liner and over to the monitor.7. purchased a second long RCA video cable for the camper backup camera. Ran it as well as the RCA cable that came with the kit to the back of the truck. Connected the provided cable to the Video port and the license plate camera. Connected the camper camera cable to the CAM port. This monitor will make the CAM port take priority over the video port so when I have the truck in reverse and the camper hooked up with its camera on, I will always see the camper camera even though the license plate camera on the back of the truck it on.When rocker switch is OFF 87a is connected to 30 and 87a is only HOT when truck is in revers and reverse lights come on.When rocker switch is ON 85 power connects to 86 ground and energizes the relay and makes 30 connect to 87 which is 12v power. Turning on the monitor.Here is a link on how the relay works with a good explanation and diagram. Copy and paste it into your browser.[...]So the final result. When the switch is OFF the power feeding the monitor comes from the reverse light power. The camera is also powered by the reverse light. So when the truck is not in reverse, nothing is on and nothing drains power.When the switch is ON, it energizes the coil in the relay and power is fed to the monitor directly from 12v and the monitor is switches on. I will hook the camper camera to the running lights on the camper so all I have to do is turn on all the lights on the truck (which includes running lights) and the camera is on. Since I fed the camper camera to the CAM ports, even when I am in reverse the camper camera will take priority over the truck camera and I will always see behind the camper.I hope this setup helps someone as it took me quite a while to find out how to do this on the internet. All told it took me about 2 hours to test out the connections and about 12 hours to hook everything up and be done. I used some plastic wire protection video cables and wrapped it all in electrical tape from the grommet to the back of the truck. That took a while. Also used some silicone to seal the hole I cut in the grommet I ran the video cables through. Read more
B**E
Decent camera, cheap wires.
Camera and display seem to be a decent quality, but wires are very cheap. The center prong of the RCA plug on the camera broke off very easily, and felt the need to wrap the full length of the power cables with electrical tape just because they were so thin. Also the cigarette plug was the cheapest looking plug I've ever seen. I added some shrink tube to the wires where they go into the plug because there was no extra rubber coating, just a thin 22 gauge wire coming out of it.Over all a decent camera for the price, just don't plan on being able to take it out of the window when leaving the car unattended very long. The wires or plugs will probably break.
S**V
Not really worth the extra cost
I purchased this combo after I had purchased another (different) set for my wife's SUV (camera and monitor were purchased separately) desiring a little bigger monitor and needing a license plate install since I did not have another good place to install on my F150. This combo cost twice as much as the combination of the camera and monitor I had previously purchased yet the picture is not as clear and crisp. Additionally, I had this combo only 4 days when the camera quit working. Amazon replaced it very quickly. Not sure why I didn't just take the return and buy a different unit, maybe just hoping 2nd go around would be better. Its now working but image is only fair. I would pass on this combo and buy the cheaper options on Amazon.
R**R
Piece of Junk !
Installation instructions are useless and incomplete. The first one didn't work at all. The second one worked for one day and died. The instruction the someone put on the web page was helpful. Don't buy!
P**D
Easy Install, Great Pair
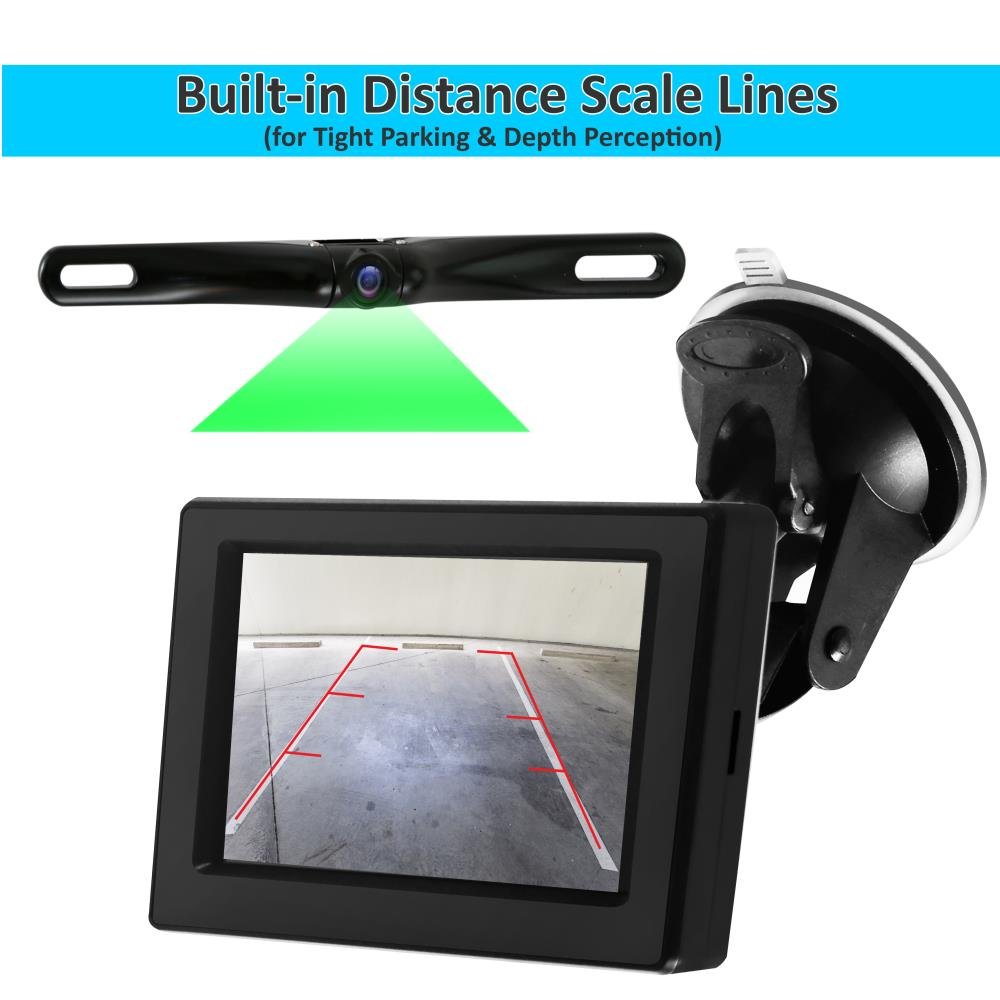
This installation is easy and soldering is NOT required. Just use tap splice connectors off one of your vehicle's reverse lights to connect the power to the camera. Attach the power cables to the 12 v adapter with butt connectors. Run the included RCA video cable to the monitior and plug it in to your 12 volt socket and it works when the vehicle is in reverse. There is an extra red wire with the RCA video plugs that is not used. Image quality is great. The colored distance parking lines are a very useful guide when backing up. This makes it a breeze to line up my trailer hitch.
J**N
Très bien
Notice pas très claire mais pose facile. Longueur du câble un peu juste pour une installation dans un fourgon. la caméra est orientable (haut et bas) permet d'ajuster au mieux la distance de sécurité.Utilisation en rétro permanent.A voir avec le temps
H**S
Produit conforme
La caméra et le moniteur sont conforment à la description.Le montage est facile malgrè l'absence de notice.Un petit croquis serait le bien venu.
Trustpilot
3 weeks ago
3 weeks ago