Description
🚀 Unlock speed, security & style — carry your empire in your pocket!
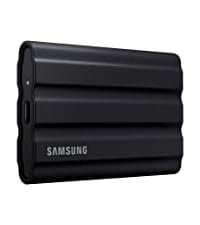
- RUGGED READY - Shock-resistant design with durable aluminum unibody protects your data from accidental drops up to 6 feet.
- SECURE YOUR WORK - Advanced 256-bit AES hardware encryption keeps your sensitive files locked tight and private.
- COMPACT POWERHOUSE - Sleek, lightweight design packs up to 2TB capacity, so you never run out of space for your creative projects.
- BLAZING FAST TRANSFERS - Move massive files in seconds with up to 1050 MB/s read speeds, perfect for professionals on the go.
- UNIVERSAL COMPATIBILITY - Seamlessly connects with PC, Mac, Android, gaming consoles, and more — your all-in-one storage solution.
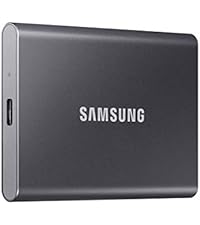
The Samsung T7 Portable SSD offers ultra-fast USB 3.2 Gen 2 transfer speeds up to 1050 MB/s, a shock-resistant aluminum build that withstands drops up to 6 feet, and robust 256-bit AES hardware encryption. With 2TB of storage and broad device compatibility, it’s engineered for professionals, gamers, and creators who demand reliable, high-performance portable storage.