
DOWNLOAD THE APP


Customer Services
Copyright © 2025 Desertcart Holdings Limited
DOWNLOAD THE APP


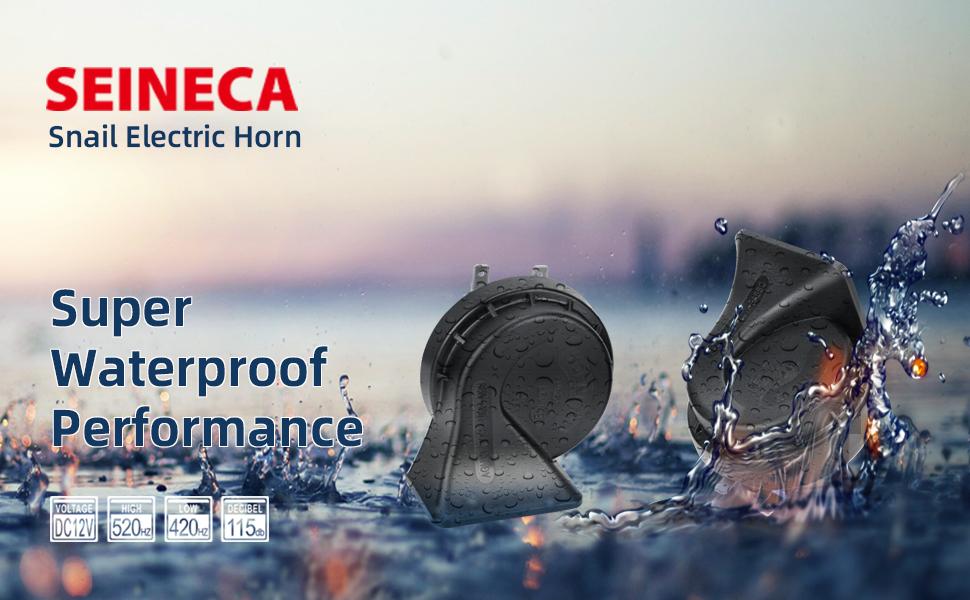
🚨 Make Your Presence Unmissable with SEINECA’s Thunderous Dual-Tone Horn!
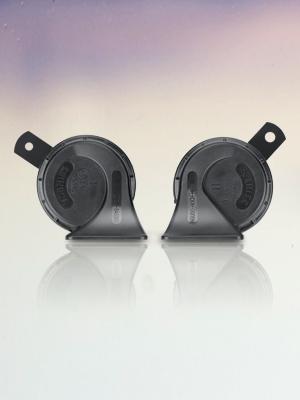
The SEINECA Car Horn is a universal 12V dual-tone electric snail horn delivering a powerful 130dB sound blast. Engineered with premium materials and an impact-resistant, weatherproof design, it guarantees durability and reliability across all conditions. Its low 3A power draw ensures efficient performance without draining your battery, while the universal fit and included wiring harness enable a quick 15-minute installation on cars, trucks, motorcycles, and more. Upgrade your vehicle’s alert system with a horn that’s 30% louder than standard factory models.


| ASIN | B089W5WXYR |
| Automotive Fit Type | Universal Fit |
| Best Sellers Rank | #64,873 in Automotive ( See Top 100 in Automotive ) #60 in Air Horns #1,604 in Electrical |
| Brand | SEINECA |
| Color | Snail horn kit |
| Customer Reviews | 4.3 4.3 out of 5 stars (1,708) |
| Date First Available | June 9, 2020 |
| Item Weight | 1.25 pounds |
| Manufacturer | SEINECA |
| Manufacturer Part Number | BBE009-FBA |
| Noise Level | 130 Decibels |
| Package Dimensions | 6.42 x 5.08 x 3.9 inches |
| Style | Unique |
| UPC | 779139112761 |
J**S
Good upgrade from stock Ryker horn.
Installed on my Can Am Ryker 900 Rally. The horn that came with the Rally was high pitched and not very loud. This horn has a lower pitch with a bit more loudness. Nothing crazy, but to me, an upgrade worth it. Install took me less than 5 mins. 13mm bolt for bracket on Ryker. 10mm bolt to attach this horn to its bracket. And then reused the Ryker bolt to re-attach. Quality seems good. Sound good. Will update with any problems through I don’t for see any.
L**S
Nice horn for a bike
Definitely louder then the horn that came on my Harley and wired right up, good quality
M**A
Good upgrade from Toyota horn
I HAD to replace my rav4 wimpy horn not only because it sounded terrible, but other motorists couldn’t even hear it when I needed it. I wish they looked better, I do like the look of the red hella horns, but they just sound like a louder Japanese horn. They can be seen thru my grill so I took the stickers off and made them inconspicuous where with hella’s I’d want to show them off if only they sounded good. These horns were a huge improvement over stock, kind of like the sound of a 70-80s car horn. I do wish they were louder, but they are definitely heard by others so that’s what matters most. Easy install and came with everything I needed other than plug and play connector from Amazon but they were only like 7-8 bucks. That way I didn’t have to splice or cut any wires. Just connector to positive and negative to ground. I feel a lot safer with the upgrade. Can’t speak on durability since I just installed them.
A**O
Good, loud horn that is a great replacement for your bike.
This replaced the horn on my Honda 599. Much louder, and much more noticeable in traffic. Works great. It draws about the same power as the stock horn, so no relay needed.
P**T
Great alternative to factory horn
Installed on my 2015 Honda CTX700. Plug N Play, no need for instructions. Simply unbolt the factory horn (a single nut) and unplug the two wire leads. Plug in the new horn using the factory leads and mount with the same nut. Done. If it weren't for removing and reinstalling the plastic engine cover, this job took all of two minutes. And no more whiny "beep beep" from the factory horn. This sounds more throaty, like a car horn. It's louder with a deeper tone, both improvements over the original equipment and safer in traffic. Recommended.
T**A
Install
My overall rating is based on a few factors and the fact that the instructions that come with the horns are basically worthless and do not pertain to everyone's situation. I find it hard to believe that it pertained to anyone's situation. So, unless you already have a 2 horn set up, with 2 wires for each horn, it is not necessarily easy. However, I was not to be deterred and I am very mechanically inclined. To install: I had to do my own research to find out how to install a double horn system, to my 1995 chevy truck, with a single horn set up. After using my multi-meter and doing research on You Tube, I was able to determine that the horn I had was definitely bad, which is what I suspected anyway. But, I could not find anything that told me which of the 2 horn wires on my truck was positive and negative. But, with my tester, I was able to find out that the green wire was positive and the black wire with white strip was negative. (not that it really matters) So, I hooked the two horns together in series, using the included wires and added a male connector in between, to plug into my existing wires and connectors. I hooked both "Y" connectors to one male and the two "3" connectors to the other male connector. (Y and 3 are the only listing on the horns, instead of + and -) As just mentioned, it doesn't really matter which one you plug into the ground, or the positive wire. I took the included mounting brackets, attached them to the back of the horn and then crossed them in a manner where the two opposite ends overlapped each other to mount with my single bolt ground setup. Basically making the two horns touch one another and pointing at as much of a downward angle as possible. Once grounded to the chassis, with my existing bolt, to where the original horn was installed, it worked fine. I also put electrical tape over all exposed connections, to try to keep as much water off, as possible. Good points, is that they are a great value and the horns are rather loud, as I hoped. So, the video did not lie about the sound level. They are just a little wimpy sounding for a Chevy truck. It sounds more like a Chevy car horn. But, at least it doesn't sound like the wimpy horns on Japanese vehicles. (don't get me wrong, I love my Japanese vehicles, just not the horns.......LOL)
B**K
It is loud, like LOUD, loud.
I needed to replace the air horn I installed on my Ryker as it was slightly too big and was rubbing on my battery. I was a bit skeptical of its loudness due to the small size and price. This skepticism was based off the OEM horn being about the same size and being unable to hear the OEM horn when the Ryker was running. I could not have been more wrong. This little guy is loud and I mean LOUD. It is easily as loud as the air horn and without the delay. Installation was easy and it fits perfectly. Testing the horn brought an instant smile toy face as I know this will get the attention of the car driver who does not see me when merging over. I am grinning while writing this anticipating the instant overcorrection I will cause when I lay on the horn to save my life from an inattentive driver.
G**.
Good buy.
Worked out great on my Rhino. Nice sound and volume.
A**M
I installed this SEINECA 12V High Tone Snail Horn on my newer-generation Honda, and it worked perfectly! Right out of the box, it felt well-built and durable, and the waterproof design is a great bonus for long-term reliability. Installation was an absolute breeze—it fit seamlessly with my car’s wiring, and mounting it took just a few minutes. No special modifications were needed, and once installed, it worked flawlessly. The sound is loud and clear, with a sharp, attention-grabbing tone that’s much better than my stock horn. Whether in traffic or as a safety precaution, it gets the job done without sounding obnoxious. Overall, this is a great upgrade for anyone looking for a reliable, easy-to-install horn. I highly recommend it, and I’d definitely buy another one for future vehicles!
W**R
Easy to mount and loud for the price, works great on my side by side.
M**E
Used it for my 2020 Honda CB500X. It replaced the wimpy stock horn and didn’t disappoint! Easy to install too!
M**K
Wonderful now cars hear me! Easy to install
J**E
Remplacement parfait! Plus puissant que celui d’origine.
Trustpilot
2 months ago
1 month ago