We remain fully operational. Our teams are working around the clock to ensure your deliveries continue safely.

DOWNLOAD THE APP


Customer Services
Copyright © 2025 Desertcart Holdings Limited
DOWNLOAD THE APP


🍷 Brew like a pro with our Conical Fermenter!
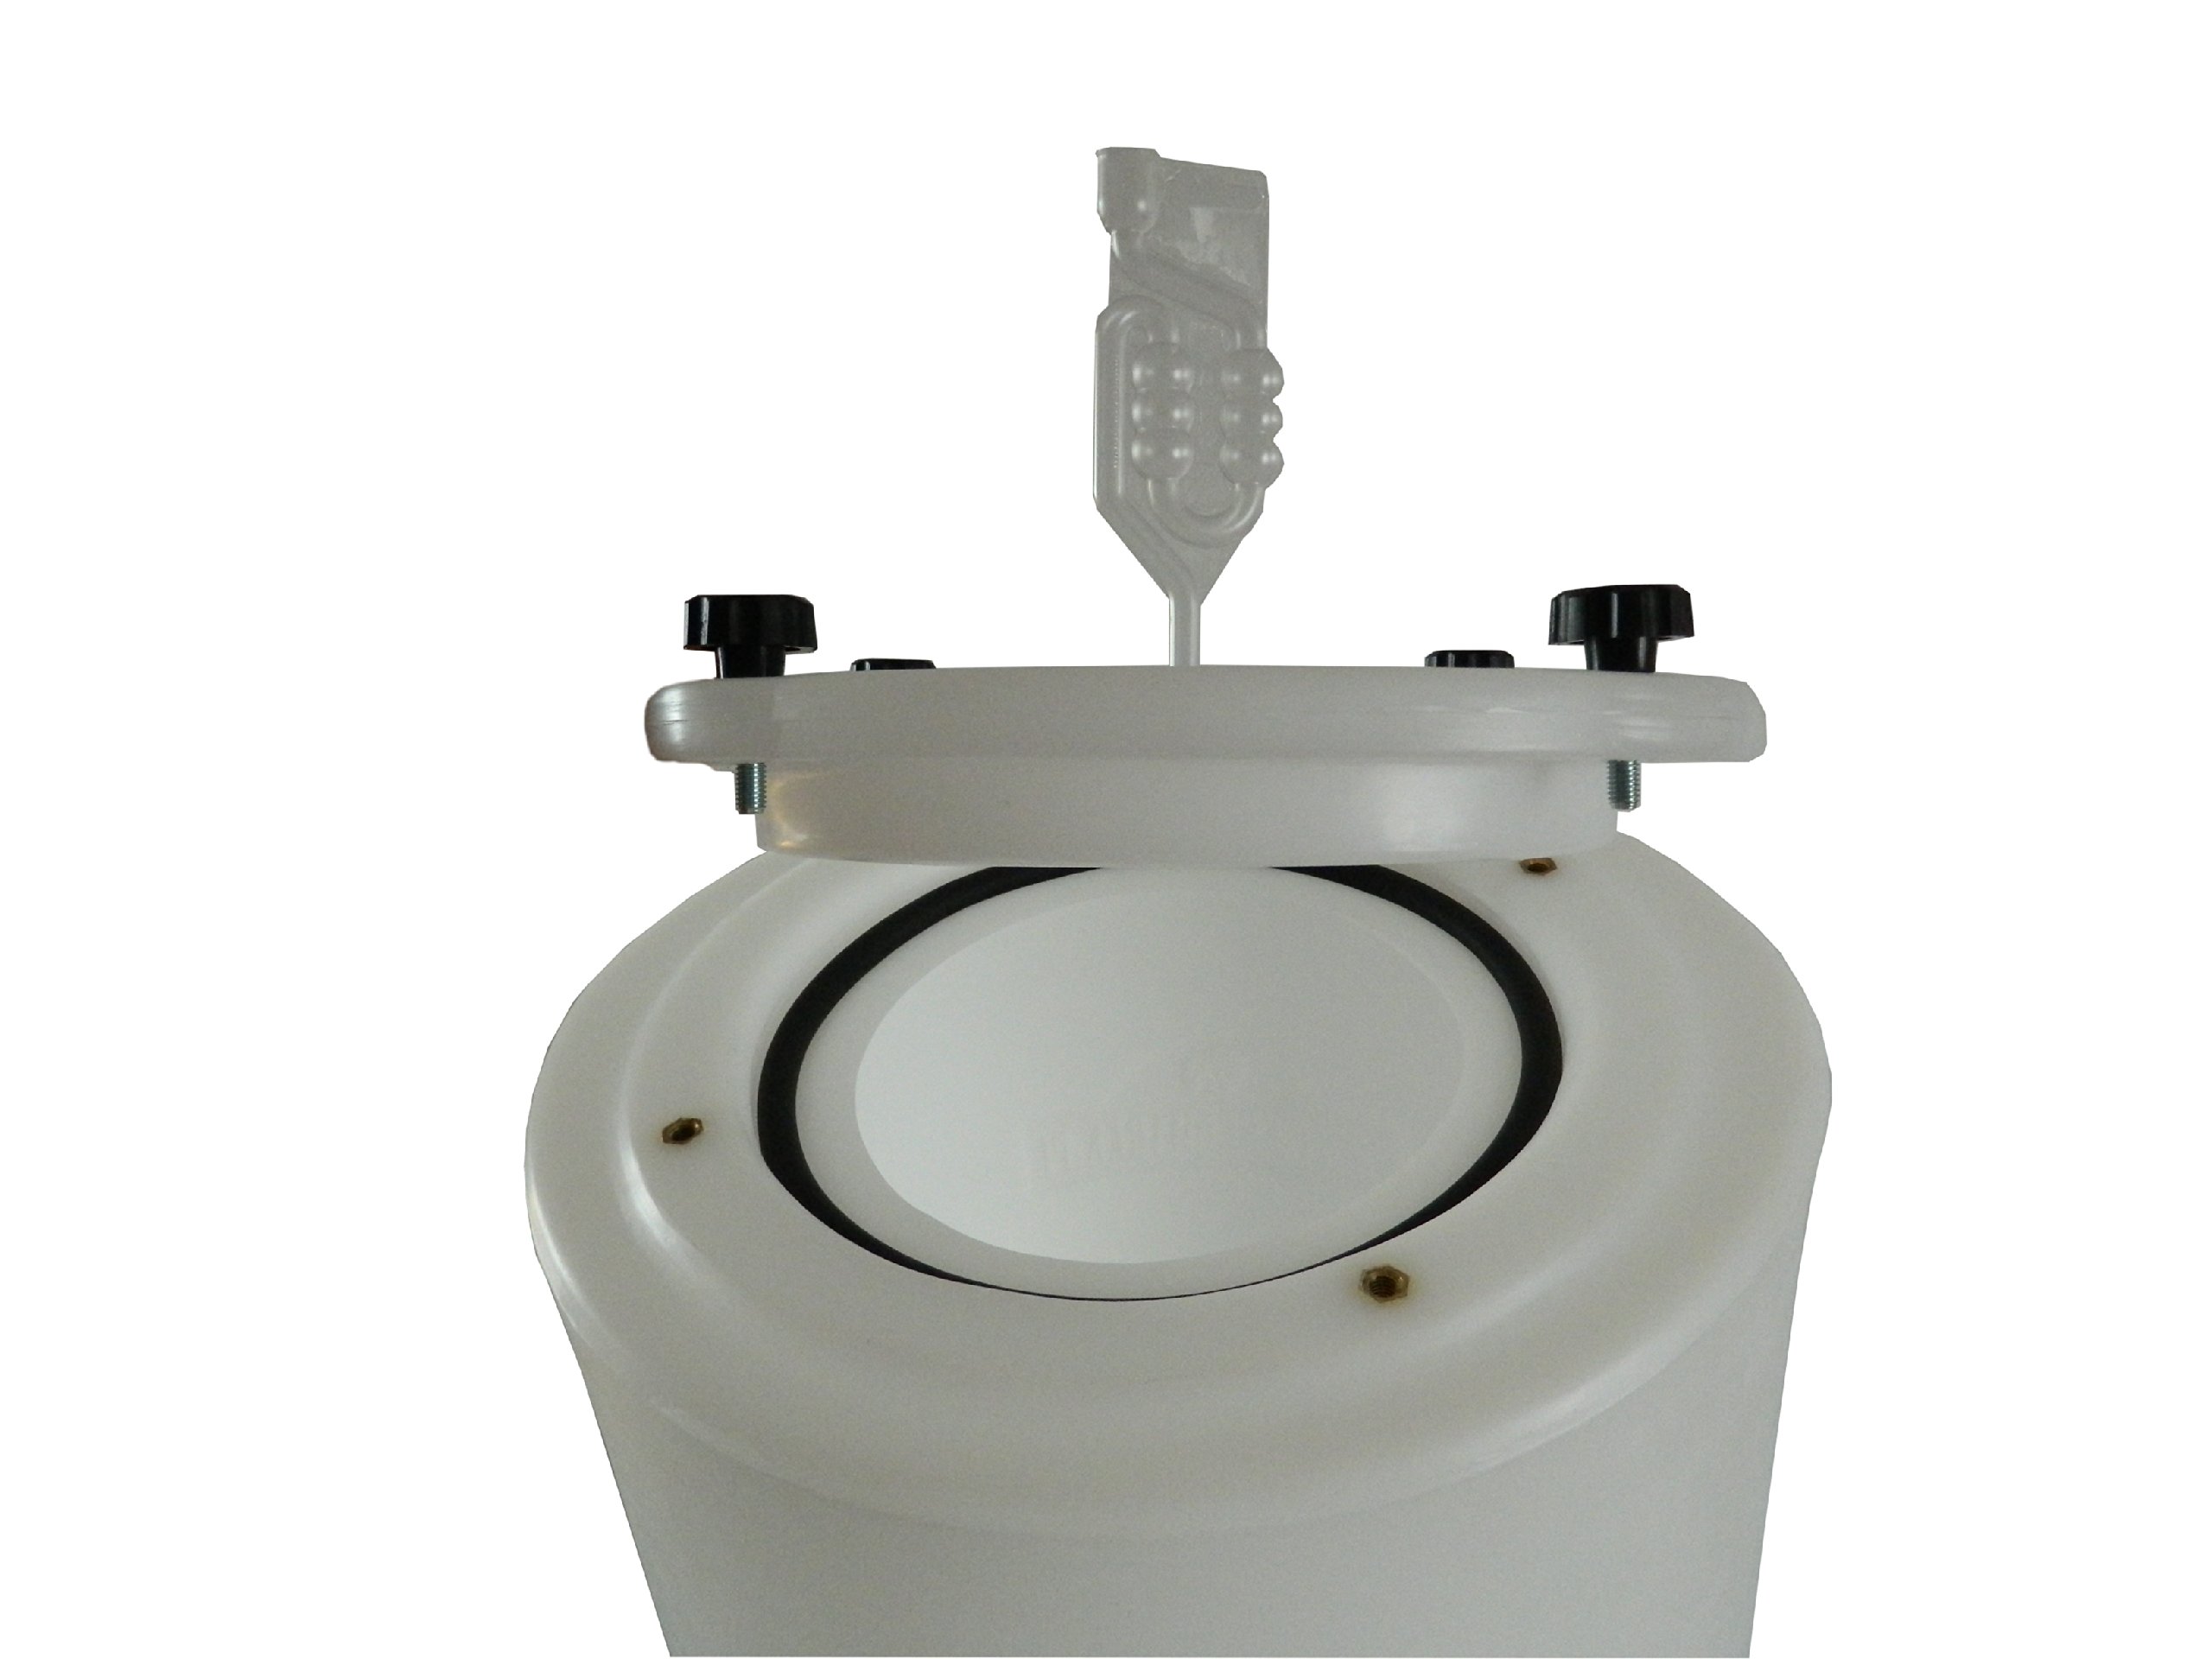
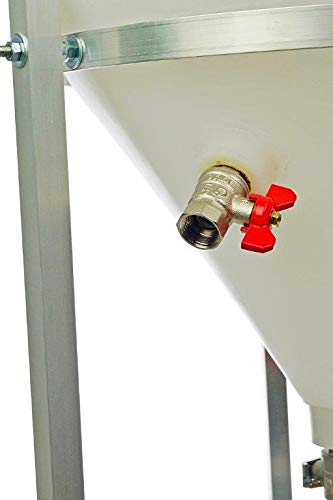
The Conical Fermenter is an 80L fermentation tank designed for homebrewing beer and winemaking. With a durable 2.5mm thick wall, a large 20cm opening for easy access, and a smart closure system, this tank ensures a seamless fermentation experience. Its efficient drainage valves simplify the post-fermentation process, making it a must-have for any serious brewer.
Z**N
Great tank in the end, but significant repair needed to fix leaking valve ports.
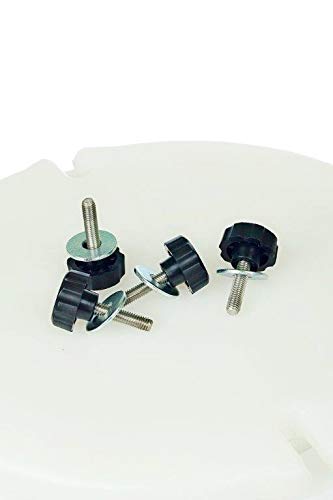
Please bear with me while I explain the ups & downs of this product.A rating of 3 stars may be overly generous considering all the trouble we went through to get this tank operational, but in the end, we have an AWESOME fermenter, and we're very happy with it.Cons:=====- It shipped from Poland so it took forever to arrive (a couple months). Not their fault - I knew that was the case when I ordered it. But this did influence my decision to repair vs. return.- The carton was damaged in transit. There was a hole in the carton and I'm not sure if any parts were lost, but all the essential components seemed to be there. It should've been packaged better.- This is the big one . . . We installed the valves and did a leak test. It failed miserably on both ports. Thinking we just didn't tighten the valves enough, we torqued them down a little further, and . . . the brass inserts spun out! That's right - brass to plastic. Also, the valves didn't use a tapered thread, so even laying on teflon heavily didn't help - the valves just bottomed out in the brass inserts. Nonetheless, it wasn't the threads that leaked after all. The problem was the seal between brass and plastic wasn't done properly. I describe how we solved this problem below.- In the conical section, the tank isn't quite round - slightly oval in fact. Not a big deal, but it complicated construction of the stand a little. Nothing that a grinder to the wooden stand couldn't fix :)- The 4 holes used for securement of the lid were not drill very accurately. It takes some work to get the securement knobs in all the way. But once screwed down, it does maintain a good seal. I'm considering making my own lid out of solid HDPE plastic anyway, so I can re-drill the holes when I do that. I'm planning to drill additional holes for temperature sensors and chilling lines.Pros:=====- Simply can't beat the price. Any locally supplied plastic tank is almost twice the price, and 1/2 - 2/3rds of it is shipping cost. The shipping alone for a 30gal tank within the US is ~$200, so I'm not sure how they shipped theirs from Poland for ~$200 'delivered’.- Difficult to find a 20gal plastic conical fermenter (~21gal actually, or 80 liters). Most jump from 15gal to 30gal.- Once all the modifications were completed to pass leak-testing, we now have an awesome tank.- Using plastic vs. stainless (aside from the 5:1 cost savings) allows us to readily see the liquid and solid levels inside. It's also very easy to clean.How we fixed the leaking ports:===============================- First we had to completely remove the 2 brass inserts, and then clean off the old adhesive. This wasn't difficult as the adhesive just pealed off easily. No wonder it leaked!- Bought new brass valves with tapered thread (NPT).- Cleaned out the plastic ports in the tank, and used a small grinding disk to scuff the inside of the plastic. This would make for a better surface for the new epoxy to adhere.- We re-drilled the tank holes - I felt the original holes were a little undersized.- Pre-mounted the valves into the original brass inserts with teflon tape. We didn't want to torque the valves after epoxy'ing the inserts back in. But seeing how well the new epoxy held, I'm convinced we could use a pipe wrench without any trouble.- We mounted each valve separately, roughly a day apart to allow the epoxy to fully cure. When doing so, we positioned the tank such that each port would be parallel to the ground. We mixed the epoxy runny, and didn't want it to leak out of the port cavity.- We positioned the assembly into the port opening in its final resting position, facing in the direction we wanted the valve lever to point, and secured it with tape.- From the inside of the tank (with some difficulty) we sealed the brass insert so epoxy wouldn't leak into the tank. To do this we screwed a PVC pipe into the brass insert from the inside, and then used plumbers putty to seal the interface. We took our time with this part because there would be no 2nd chances. The pipe also helped us to immobilize the brass/valve assembly.- We mixed a small amount of West Systems marine epoxy (~2-1/2 ounces per port) to the consistency of maple syrup, and injected it around the brass insert with a syringe, while tapping on the sides of the port to percolate air bubbles to the top.- After several hours, the epoxy was stiff enough to remove the PVC bracing, but decided to wait a day to ensure we didn't disturb the epoxy.- There was a small dribble of epoxy down the PVC pipes on the inside (no more than a few drops), but that was enough to make it (very) difficult to unscrew the PVC pipes . . . but we managed.- The plumbers putty was then cleaned off from the inside with a toothbrush; we then took the tank into the shower and 'power washed' it with a dental water pick :)So . . . it's not for the faint hearted, but totally doable. We also had a plan 'B' in case the epoxy didn't work, but it wasn't needed after all. Plan 'B' was to completely drill out the ports then apply a patch to seal them up. We would've used a heat gun to soften the plastic to shape it better (flatten it) in preparation for the patch. We could then drill new holes and mount new threaded plastic fittings using rubber gaskets.While I'm upset that we had to go through this elaborate process to fix the tank, I'm elated that it worked and we got great value in the end. Would I do it again . . . not a chance! I'd rather spend the extra money and not have to deal with the repair issues. The system of sealing brass to plastic is flawed if not done properly, and re-doing it is complicated. We had no idea that's what we were getting from the pics on Amazon, until it arrived. It would've been far more efficient to cast solid plastic ports integral to the tank, then drill out the plastic and thread holes for mounting the valves directly.
Trustpilot
4 days ago
2 weeks ago