
DOWNLOAD THE APP


Customer Services
Copyright © 2025 Desertcart Holdings Limited
DOWNLOAD THE APP


🪟 Keep your view, lose the heat — the smart window upgrade you didn’t know you needed!
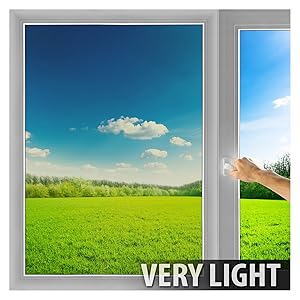
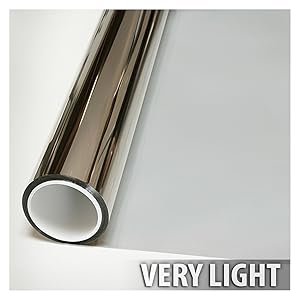
The BDF NSN70 Window Film is a premium, nearly transparent PET film designed for superior heat rejection (up to 95%) and UV protection (99%). Measuring 36 inches by 7 feet, it reduces cooling costs while preserving natural light and views. Its durable, scratch-resistant surface and strong adhesive make it ideal for DIY installation, enhancing home comfort without compromising aesthetics.


| ASIN | B00P009N58 |
| Brand | BDF Buy Decorative Film |
| Colour | Near-clear |
| Global Trade Identification Number | 00810203025386 |
| Installation Type | Peel and Stick |
| Item Weight | 363 g |
| Item model number | CSPNS7036007 |
| Manufacturer | Buydecorativefilm™ |
| Material | Polyethylene Terephthalate (PET) |
| Net Quantity | 1.0 Count |
| Number of Items | 1 |
| Product Dimensions | 91.4L x 17.8W Centimeters |
| Size | 36in X 7ft |
| UPC | 798167989725 810203025386 |
| Ultraviolet Light Protection | True |
T**L
I bought this film to apply under the Skylight that I just replaced. My old Skylight was cracked, and since it's 50 years old, very few new Skylight will fit. I bought the only one I could find, and I was not so satisfying with it. It was medium grey, color and not as dark as my old Skylight. My house is already hot as hell with the old Skylight, so imagine that with a lighter color Skylight. As the sun shined through the Skylight, it left a large rectangle moving through my carpet, then my staircase, then on to the wall. Looking at it was like looking at a 150-200 watts incandescent light bulb directly with the new Skylight, so I had to use my hand to cover on side of my face every time I walked by, to keep my eyes protected. it's that bad. And here is where the tint film came in. I applied 4 layers of this film, BDF NSN70, directly under the Skylight because it was for interior use. I cut each layer in 3" stripes and overlapped them so that they could conform to the curved surface of the Skylight better. It was still imperfect, but looked more decent than apply the whole film on the curved surface. It still didn't look good. Then I went to Home Depot and bought a 2x4 defusing panel that you normally installed on the ceiling below the fluorescent lights. This was done to defuse light better, and also make the Skylight look good since the flaws wouldn't show up through this panel. I then installed the Skylight with the pannel sandwiched in between the Skylight and the roof, rough side of the panel down. The result: ABSOLUTELY AMAZING !!! I just couldn't believe it! This cut the heat absorbed through the Skylight by 95%. You read it right, by 95%. I stood directly under the Skylight with the sun shined directly over my head, and I can feel the heat on my skin: It was only VERY SLIGHTLY WARMER THAN MY OWN BODY TEMPERATURE and the outside temperature was 85 degree. The sun shine had been cut down so much thru out the day, and the light color was actually WHITE all day long, not YELLOW as it should be any more. It was like looking at a 40 watts fluorescent white light bulb from a distant. The light was slightly darker before noon, and from noon on, it was at full capacity, which was gentle and very easy on eyes. For me, this was perfect. If I wanted it brighter, 3 layers would do that, with a little temperature gain, of course. So, the template now was the temperature of the house coming from doors and windows, but no longer from the Skylight. The defusing effect of the panel also dispersed the light out such that it created a more even light through the area, and I no longer saw the sharp rectangle sun glow on the wall anymore, that was the end of it. Needless to say, the result was sort of unexpected because from my calculations, I never knew that it would turn out like that, but hey, who is complaining? An important thing I learned from this exercise is this: If you want to use a film for heat blocking, try an MIRROR EXTERIOR FILM first. I used the BDF EXS35 for my windows and doors that I wanted to see more out of those, and BDF EXS15 for my master bedroom to cut the heat to a minimum level so that I can sleep in it in the afternoon. This will cut the heat by 60% and 80% respectively. I plan to apply the BDF NSN70 to the interior of the same glasses to cut the heat down another 15% and 8% respectively, making the heat rejection totals to 75% and 88% respectively. This will bring the temperature down further, but affects the views very little. The BDF NSN60 will not be that much more gain to consider. Note that I mentioned MIRROR FILM here, preferably the SPUTTERED type for EXTERIOR use, and NOT the regular black or dark gray films. Black color attracted heat, so, initially the black film blocks heat by blocking sun light, but given enough time and the right sun angle, the sun light turns into heat, and heat will start to radiate into the room because the film only blocks light, not heat, so the later part of the day (4-6pm), it will be the hottest. I used to come home from work almost every day and it was ok, but now I stay home all day everyday, so I realized how much discomfort it was with the black film. And from the experience I gained from doing the Skylight, I no longer again tint my glasses with black or dark grey films. Hope my experiments here will be of some helps for those who needed it.
A**Y
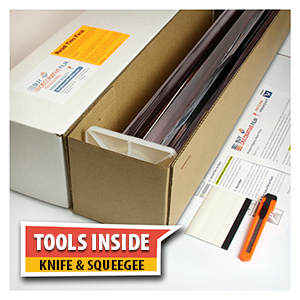
I love this window film! I paid much more to have a very similar film professionally installed on some windows in my home. For these smaller bedroom windows, I decided to take it on as a DIY. I followed the directions and took my time and I couldn’t be happier with the results! My son‘s room stays much cooler and you can’t tell that the windows have tinting by looking at them. For reference, the lower left window in the photo has no tint and the three other window panels do, but it doesn’t make it look too dark at all. I really wanted this to block the UV light from fading furniture and floors and to keep the house cooler and was happy it doesn’t make it dark. Bonus, I noticed this really takes away lots of glare on a sunny day, too! It was also nice that this set came with a sharp X-Acto knife and a squeegee. I’ll definitely be ordering more for other windows in my home!
A**R
Our family room has 8 large windows ( 4' x 6' ) and the AC was struggling to keep the room cool in the evenings when the sun was shining in. After installing, the room stays cool in the evenings now. It is so clear, you cannot even tell it is there, other than making the room much cooler. With help of my wife to hold and position the tint, all the windows came out absolutely perfect. If you haven't installed tint before, order some extra to practice. It is exactly like tinting a car window ( just a much larger scale ). I just placed another order to do more windows.
A**G
One side of my new build house is south facing and after multiple rounds with the heating and ac folks I decided to try this film to reject the heat. I’ve completed the bottom half of three windows and wanted to share how clear this goes on. It’s a little difficult to work with as it’s not very forgiving- even without losing control of it I still have one or two little spots where it looks like it’s been folded and therefore creased. I saw another review where it apparently went away after a few days so I’ll update this with this review to confirm, as well as give an opinion of whether or not the heat is truly reduced. Update: it’s been about 2 weeks and I really like this product. My extra ecobee sensor indicates that the pantry, which always runs hot (74-76 degrees when the thermostat is set at 70), is registering at 71. As I worked through other windows I tried two methods of install. The first was how the instructions say to put them on, by slowly peeling the product backing off as you worked to attach to the window, and the other way I tried, was I laid the precut piece on a table and peeled it all off there, and then I attached in one fell swoop. Option 1: it takes about 20 minutes to apply, and it appears there are little to no bubbles under the film. The film does peel off periodically as you are installing and will fold over on itself which creates creases that do not come out. Over time they will minimize but if you’re like me, you’ll see them. No one else will notice it, but it drives me crazy. I also noticed there were little bubbles and almost like a smeared effect on one or two windows at the bottom and the bottom corners. Overall, it gives a clean look but definitely leaves a few blemishes, even after a few weeks of adhering. I suspect it’s because I couldn’t really get the back of the film as wet as the window’s because It was already so close to the window, creating a more dry, and therefore more difficult hang. Option 2: after I peeled the film backing off, I would apply a lot of the spray to both the window and the film, then line it up from the center and let it just do its thing. It behaves a lot like tempered glass for a phone so if you start in the middle of the glass and let go, it attached quite nicely to the window all by itself. Once it’s on, I then smoothed out as many bubbles as I could. I did panic a bit because it appeared smooth but when I came back an hour later I saw a lot of bubbles. It took about 7-10 days of leaving it alone, but they are completely gone now and the bottom and corners look great. You cant even tell there’s film on the windows. This way took me closer to 12-15 minutes once the film was cut so the more efficient install time also made it nicer to use this option.
A**R
The product was delivered on time and well packaged. We put he film on 1 window, and then placed identical colored construction paper in the window where the film had been applied. We then put the same construction paper in a window next to it without the film. You can see how the red has faded and the black has faded as well. These were in the window for 4 days. I expected to see very little change to the paper hat was behind the film. I was very surprised by how much fading happened in such a short time in general. I wish I could get a refund because this film does not protect 98-99% of us rays.
Trustpilot
2 months ago
3 weeks ago