
DOWNLOAD THE APP


Customer Services
Copyright © 2025 Desertcart Holdings Limited
DOWNLOAD THE APP

🎯 Level up your VR game with precision joystick repairs—don’t let worn sticks hold you back!
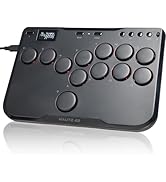
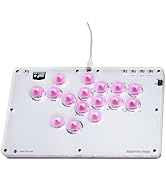
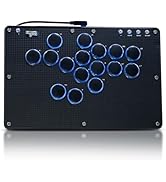
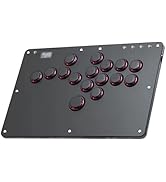
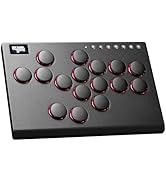
This 2-pack joystick replacement kit for Oculus Quest 2/3 controllers offers upgraded analog sticks with enhanced springs and grooves for durability. The comprehensive 14-in-1 toolkit includes replacement joysticks, thumbstick caps, and professional-grade tools, enabling users to repair worn or broken controllers themselves. Designed for long-lasting use and comfort, this kit restores controller responsiveness and extends device lifespan, making it a cost-effective alternative to buying new controllers.


| ASIN | B0B31GNZPX |
| Best Sellers Rank | #5,850 in Video Games ( See Top 100 in Video Games ) #21 in PC Virtual Reality Controllers #338 in Xbox One Accessories |
| Customer Reviews | 4.1 4.1 out of 5 stars (569) |
| Date First Available | June 2, 2022 |
| Item Weight | 2.11 ounces |
| Item model number | Quest 2 |
| Manufacturer | JZW-Shop |
| Product Dimensions | 6.3 x 3.2 x 1.1 inches |
J**L
Perfect.
Honestly great. My Q2 Joysticks were giving out after thousands of hours of use between myself, siblings, and friends. While Meta certainly doesn’t make it easy to open anything up, the process took me around an hour or so, and even years later, they’re still working great. Worth the price, plus you get some cool tools to use, if you need to ever use them again.
S**8
Ditch the screwdriver
So, I ended using my iFixit kit because as soon as I pulled out the screwdriver, the top popped off. I didn't think much of it at first until I screwed off the metal cap, dumped out the bits and then accidentally put the cap on upside down. So, it's never coming back out. After trying to deal with the setting up of the bit I got over the amount of actions it took and just got out the ifixit set. META Mechanic had the best video to follow, since it has extra explanation on the reassembly process and a diagram for the screws. After I did one, I did have to leave the face to gap a little. I'm not sure yet, but the stick was against the face so it created friction. Not pressing the face all the way flush seems to be what worked.
S**N
Good. A slimmer screw driver would have been better.
Appear to be functional after installation, fixed my drift issue. Good kit HOWEVER, the provided screw driver is a bit bulky and may not be able to reach the first couple T5 screws without pressing rather hard on the plastic controller ring. Also, the kit provides 5 driver bits (Philips and torque, various sizes) although the controller only uses T5 screws, be sure you're using the right one. Otherwise, the kit provides everything for a repair following iFixIt. Also, the sticks are not identical to the stock ones (most notably, the stock ones use a spring exterior to the assembly) but they still fit fine.
C**R
Fixed My Quest 2 Stick Drift—Does the Job!
Bought this kit to fix stick drift on my Quest 2 controller, and it works well! The replacement joystick functions just like the original, and my controller is back to normal. Pros: ✅ Fixes Stick Drift—Controllers feel like new again. ✅ Comes with Everything You Need—Includes tools and multiple parts. ✅ Good Value—Cheaper than replacing the controller. Cons: ❌ Included Tools Are Basic—They work, but nothing special. Final Thoughts: If you’re dealing with stick drift on your Quest 2, this kit is a solid fix. Just don’t expect high-end tools—though they get the job done. Great buy for DIY repairs!
C**R
Doesn't Work
Bought the product because the video shows how easy it is to remove the broken component from an oculus joystick. However, the screws are angled in such a way that the provided screwdriver does not fit inside the round ring of the joystick. It is impossible, using the tool provided, to do this. Also, the plastic prying tools are useless. They snapped upon first use. They have the strength of a plastic drinking straw. If you had the right tools, this kind of job might be fine, but these tools are not adequate for the job. I don't know if the actual toggles are any good, because I couldn't get to the old ones to replace. Just purchasing new joysticks, which is a better use of my time.
I**D
Little difficult to install, but they work great.
Replaced the joystick in my right controller. Little difficult to replace but it works great, can’t tell the difference between this and the factory one. Great value for the money.
P**D
works fine brings new life to my controller
I think the repair took about 45 mins total. I got a tear down video from youtube to follow and everything when rather smoothly. You just have to be exact in your steps. There are a couple of places were you could damage something if you just ripped it off. I will say they need to update the screw driver also I found I only needed the t5 driver. Not sure what the others are for but there is a removable bit that no matter how much i try to tighten it still falls out. Not great during a repair but still usable. I would suggest that people doing this get a grounding strap or atleast touch something metal before starting. Make a clear work space available to hold everything. I actually have a esd pad that has sections to hold tools and screws keeping everything neat. With a bit more practice I could probably do it in about 15-20 min.
T**S
Fixes stick drift, supplied tools not very good
The replacement part works great. No more stick drift. As for the tools supplied, they're not very good. Tweezers don't pinch and the driver tool is garbage.
M**L
Servirebbero altri pezzi x meta quest su Amazon ma questo pezzo e buonissimo
R**O
Worked perfectly! Fixed my left controller’s joystick 😁
F**S
M'as permis de sauver mes contrôleurs Quest 2. Conforme à la description, sans dommages. Livraison rapide.
P**.
The replacement part works as advertised (for now). Seller should include some instructions or a list of dos and donts, though. I primarily relied on a user-contributed IFIXIT guide and a 29-minute-long video on the Ima_Rainbow YouTube Channel. If you are not a professional, you’d do well to follow a teardown guide or two like me. As careful as I was, I ended up cracking a pin inside the controller. Fortunately the crack was small enough to be amenable to a quick fix using some extra-strong adhesive. Don’t forget to use ESD protection.
R**C
Easy to install and makes a huge difference. Good as new.
Trustpilot
4 days ago
2 weeks ago