
DOWNLOAD THE APP


Customer Services
Copyright © 2025 Desertcart Holdings Limited
DOWNLOAD THE APP
🤖 Elevate your DIY robotics game — build, code, and control like a pro!
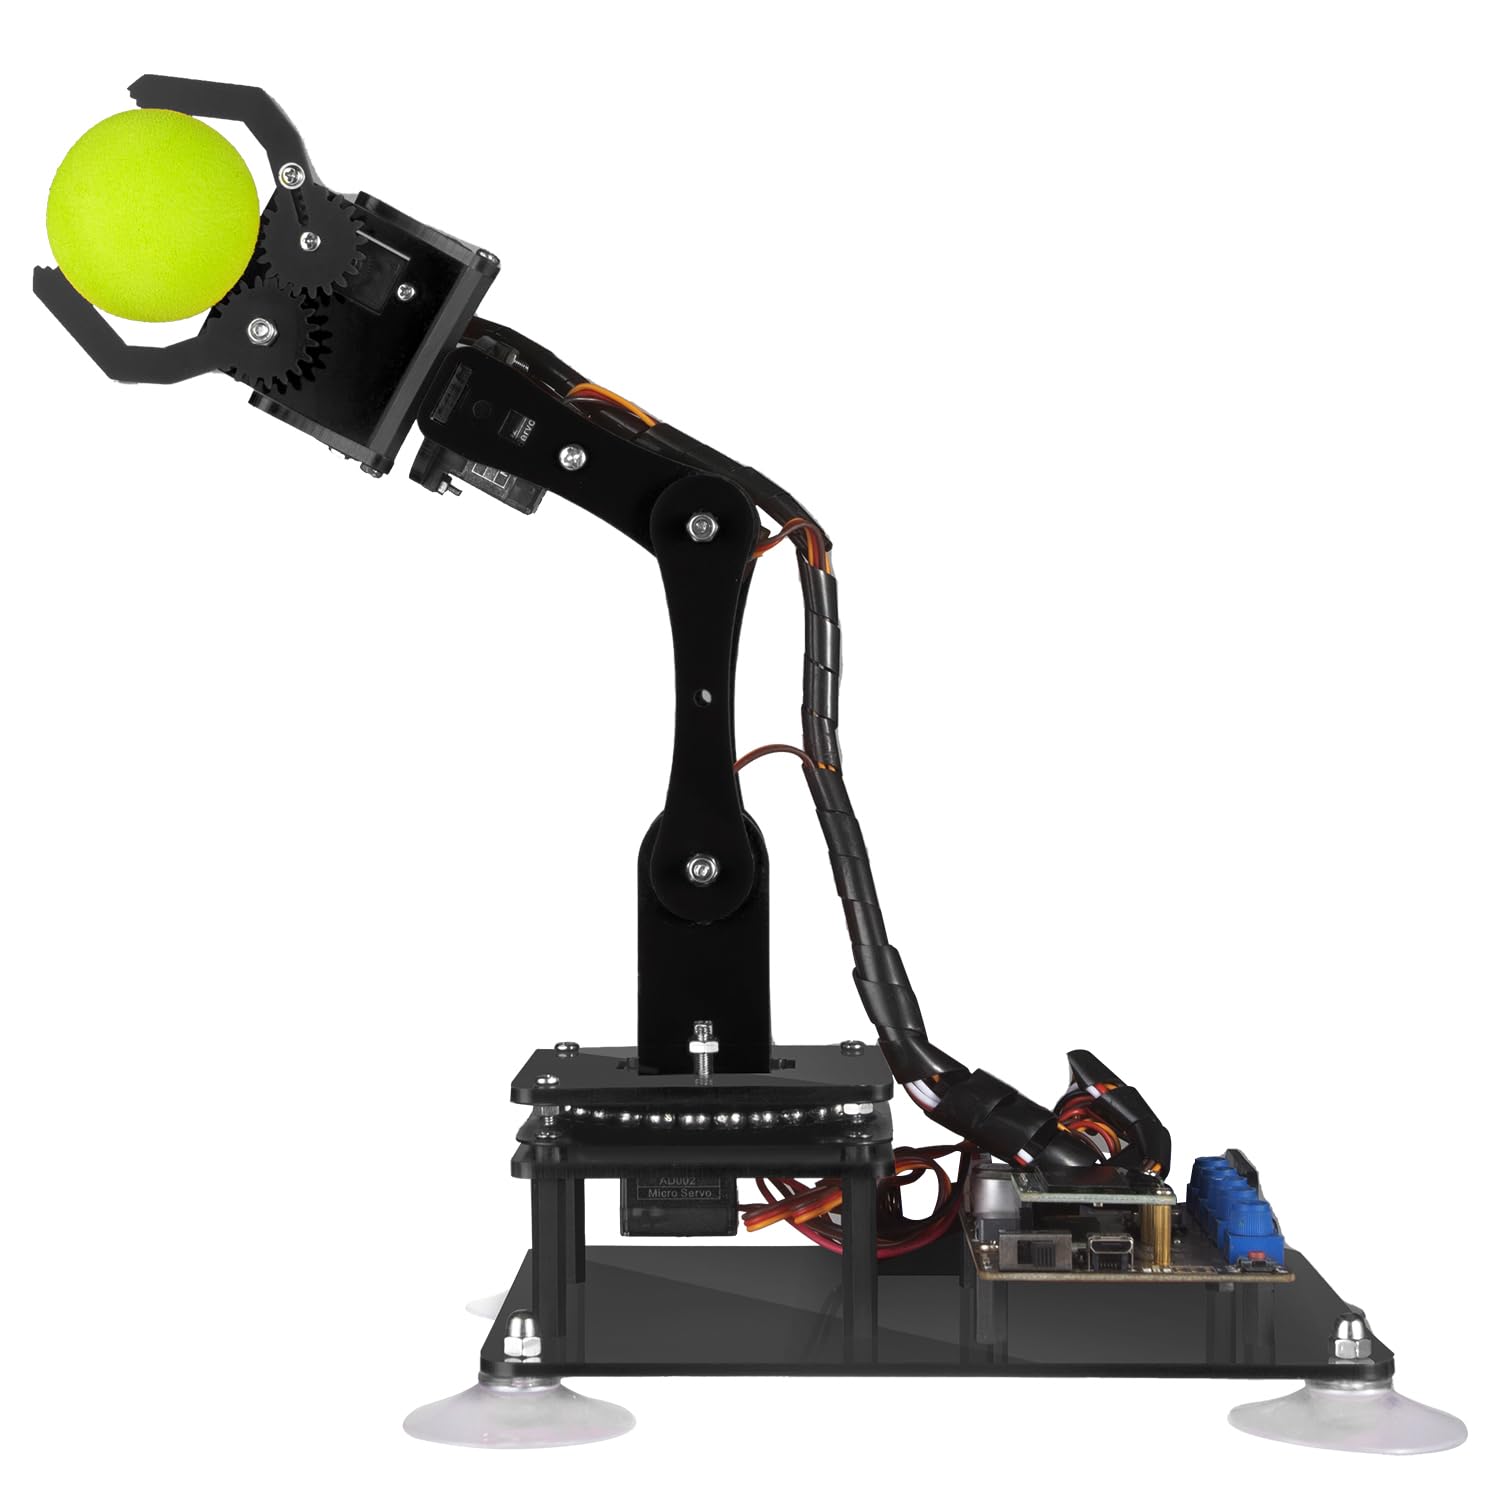
The Adeept 5-DOF Robot Arm Kit is a robust STEM educational tool designed for teens and adults, featuring 6 high-torque servos, integrated Arduino UNO R3 driver board with OLED display, and multiple control options including manual and PC software. This acrylic-constructed kit offers extensive programming flexibility, detailed documentation, and strong community support, making it a top choice for hands-on robotics learning and creative automation projects.


| ASIN | B087R8DLG6 |
| Amazon Bestseller | #52,051 in Toys & Games ( See Top 100 in Toys & Games ) #125 in Robotics Science Kits |
| Batteries Included | No |
| Batteries Required? | No |
| Customer Reviews | 3.9 3.9 out of 5 stars (310) |
| Date First Available | April 29, 2020 |
| Item model number | ADA031 |
| Language | English |
| Manufacturer recommended age | 17 years and up |
| Material Type(s) | acrylic |
| Model Number | ADA031 |
| Number of Pieces | 1 |
| Product Dimensions | 22.35 x 16 x 5.84 cm; 680 g |
| Target Gender | Unisex |
ツ**ク
Arduino互換でLCDパネルも付属し基板ははんだ付け済です。スタンドアローンで使えます。ボリュームで動作を記憶させることができます。ステップ数はLCDに表示され、本来のArduinoのバッファより大きいようです。100STEP以上も使えるようです。同じ値段のラズパイ搭載(ラズパイは無)のアームも購入しましたが、大したアプリは無くハードも脆弱でした。記録動作のようなものならこのアームは、非常によく考えられています。また、microbitのようなブロックプログラムツールも独自に提供してくれています。コスパ最高の製品です。
K**A
この商品はサーボモータで制御するロボットアームで、箱の中にある紙に書いてあるURLから使い方や組み立て方がダウンロードできる。QRコードは他の商品の紹介なので、使い方をダウンロードしたい人はURLを打ち込む必要がある。ダウンロードしたファイルの中にはArduinoのスケッチや使い方のpdfなどが豊富に入っている。説明書は英語で書かれている。組み立て方の動画がネット上で紹介されていることがあるが、これはこの商品ではなく前の商品の物の可能性があるので、ダウンロードした説明書を読んだ方が良い。(動画の部品とこの商品の部品の名前が異なる。)足りない部品はなく、少し多めに入っているのでありがたかった。
W**W
QRコードの説明が不十分かつ雑で組み立てが出来ませ。 返品も出来無いので絶対に買ってはダメです。
ヒ**T
・付属されている取り扱い説明書のQRコードから作り方のPDFにアクセス出来ない ・どうにかこうにか組み立ては出来るものの、参考動画とパーツが異なる ・余るパーツはたくさんあるのに、肝心な頸部固定パーツが入ってない ・とりあえずは動く ということでこの評価にさせていただきます
A**ー
華奢で各関節がグラグラします。 制御の学習用に購入したので、私は気にしませんが、精度を求めて購入されるとガッカリするかもです。
め**も
電池が日本の単三ではなく18650 2本必要 説明書もネットから取る必要あります 英語での記載なので翻訳苦手な人にはやめたほうが良い商品です 謎にネジが余るので完成後も不安になります
R**N
Wow - this has been great fun to assemble! After reading the other comments I was a little sceptical, but the assembly instructions were really clear and the quality of the components exceeded expectations. First, the instructions come in a rar/zip, and the download is linked to on the box. The directory structure in the archive is a little chaotic! The assembly instructions in particular can be found in Tutorials-pdf/5. Assembly of the Robotic Arm.pdf, and it's a good idea by starting the base, and pausing after mounting the board. I say that because the servos needed to be primed to a 90 degree angle, which can be done by plugging them in to the board, and running the relevant script. The script simply angles the servos correctly, so that when you attach the rocker-arms etc then you are attaching them at the same angle as the instructions. It was straightforward enough (I'm a software consultant by trade with experience in electronics, but with patience and a little help I think a 14y would be able to manage). The engineering behind the arm is quite impressive. And building the arm was great fun. To be honest, I bought this for my six year old as a summer holiday project, but after looking through the instructions decided the build was too complex. However, he's already using Scratch Junior at school (a wysiwyg programming environment) so we're going to code the arm together using a similar approach. I'd say the main advice I'd give someone when following the instructions would be to trust the model diagrams over the physical diagrams. Each step has a few models and a few photos - I found the photos to be a little inaccurate (i.e. when determining the angles of the parts connecting to the rocker-arms, the models are correct, the photos not). Also worth noting that some of the scripts need libraries installing before they will build. Searching for the name of the header should fix this in most cases (e.g. for "#include <Adafruit_GFX.h>", go to Tools>Manage Libraries.. and search for search Adafruit_GFX, install the "Adafruit GFX Library" that show up and it should then work - do for each include that generates an error). Final tip - I found a torch on amazon that cost ten quid and came with 4 x 18650 batteries, so now I can work the arm without being connected to a computer via the potentiometers, and I can see where I'm going at night. I though this was a good price for four of the batteries, and they arrived next day.. No charger though, but I'll come to that when I come to that! All in all, very impressive, well worth the price for the joy it brought building and the possibilities that extending this will bring.. Might buy another in four years and see if my boy wants to build it with me :)
D**V
This is my first Arduino kit as the starter kit I ordered still has not arrived. While watching videos on what projects can be done on Arduino starter kit. Saw this product with next day delivery and bought it.. The Good: - A single Arduino Board which can control 6 servo motors, an OLED screen and power supply for the motors. There is a Bluetooth and Wifi option but not sure what is required to use those. - Tutorial pdf on how to control the board using Arduino IDE, Python and a few others tools but it is not detailed, just enough to demonstrate it can be done. - There are extra part for every screw, nut, or bolt for assembling the kit. - Although the Robot Arm and the Potentiometer on-board only have 5 Servo motors, it maybe possible to control a 6DOF Robot Arm via software coding. The Bad: - The arm is fragile and can break easily. Tiny screws and nuts and took 6 hours to build and another few more hours to adjust as I skipped some steps shown on the video. The motor should be 'primed?' before assembly to set to 'default' position. - The PDF or the Video may not match the kit, so I have to watch both side by side during assembly. - The 18650 battery maybe a problem to those who does not have it yet, not only you need to buy this battery, may also need a charger. - The CH340 chip has some extra steps every time Arduino IDE is launch as the driver seems to lock some Arduino files. - The finish product sketch for the kit is not available on-line. Once a tutorial sketch is uploaded, there is no way to restore the original sketch and must quickly learn programming to enable the features. Edit: The default sketch maybe is the Learning sketch available on the tutorial. - The Servo1 on the base under the ball bearing was difficult to secure with the servo screw as it is blocked by Servo2. At first, have to use Adeept extra screw which was longer and can secure it but later decided to remove the Servo 2 with the Arm and use the shorter servo screw for Servo1. Overall, this product is good enough to learn Arduino/Python programming for the servos and the OLED display. Not sure yet what can be done for the bluetooth and wifi options if it can be enabled.
T**R
Unfortunately, the device is very small compared to the description, and there is no opportunity for a return.
A**R
The servos are bigger and more powerful than the MeArm open source robot. This robot is also easier and more straight forward to build than the MeArm as well. The first axis had a little slop between the servo plate parts A03 and A04, this was fixed by adding a piece of tape around the edge of part A03 to reduce the gap between. The quality of the parts is very high, they are several extra parts if you break any, I did not need any but still nice to have just in case. The first driver board I received was defective but after a few trouble shooting messages through the amazon messaging system a replacement board arrived and worked perfectly. The OLED display is bright and easy to read. The small text size is very tiny but it is easy to change through the Arduino IDE. Overall happy with the little robot.
A**Z
Excelente
Trustpilot
4 days ago
1 month ago