
DOWNLOAD THE APP


Customer Services
Copyright © 2025 Desertcart Holdings Limited
DOWNLOAD THE APP


Sew Fast, Sew Smart! 🏃♀️✨
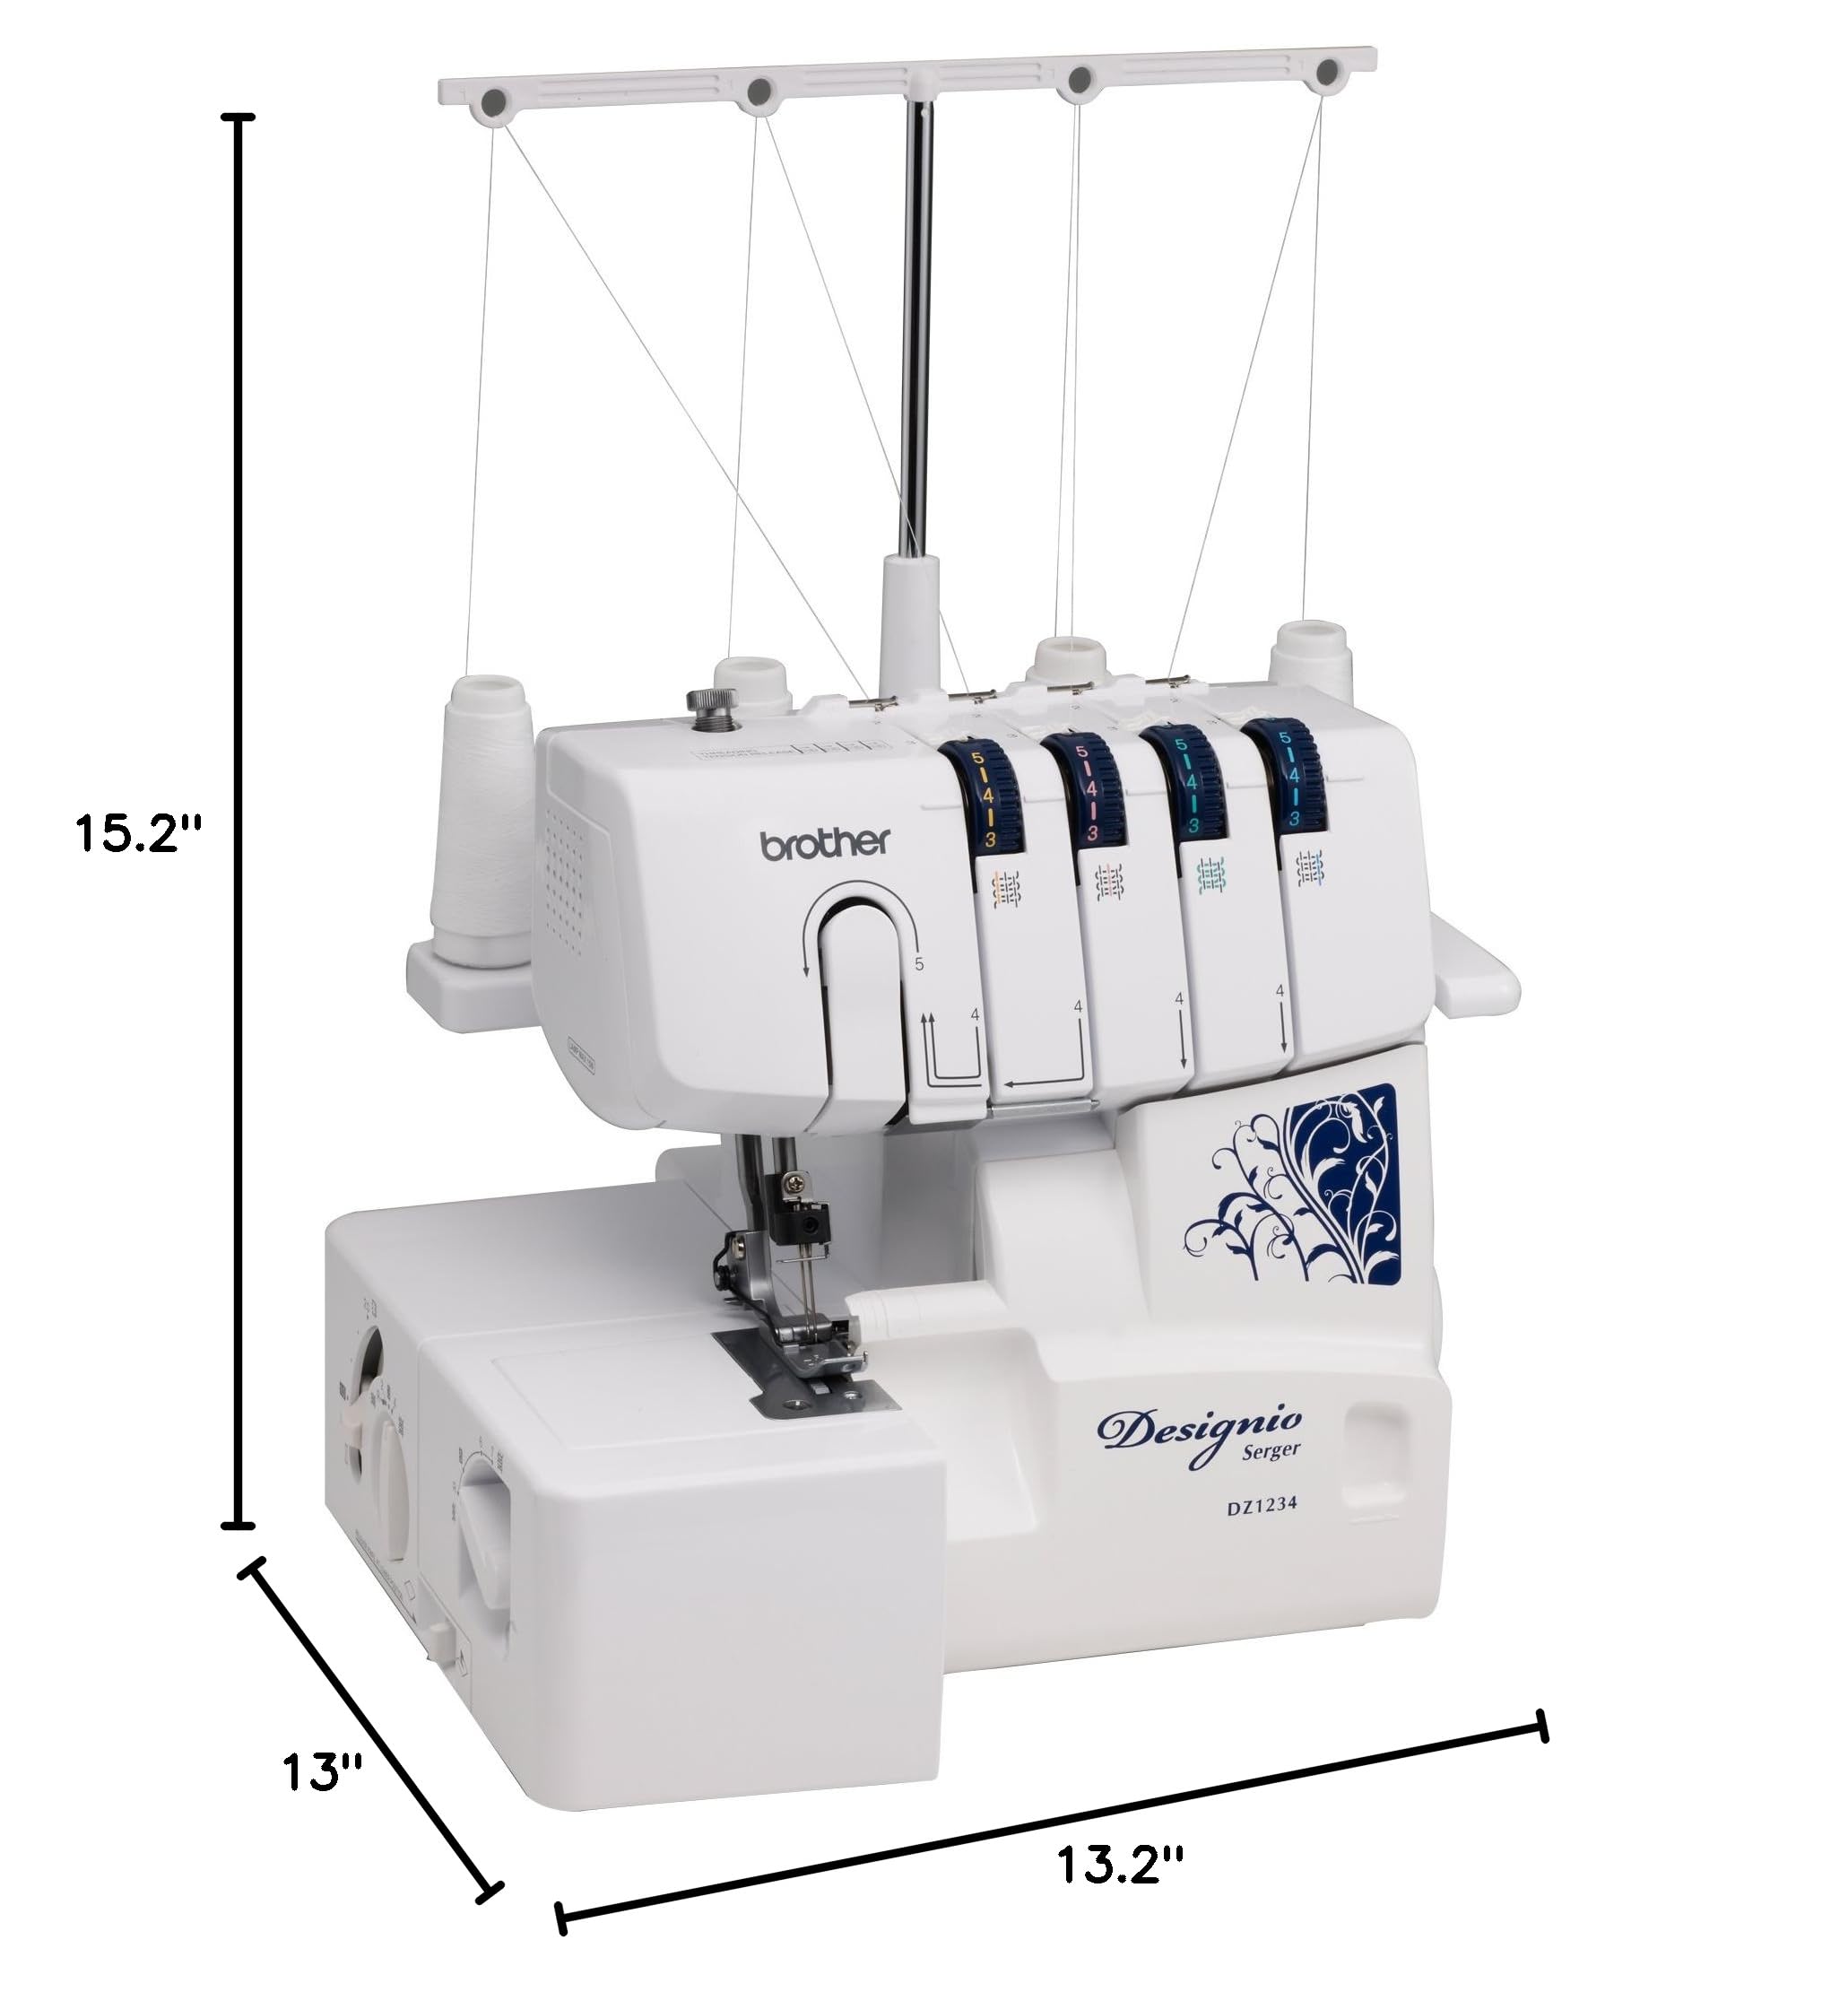
The Brother Designio DZ1234 is a robust 3-4 thread serger featuring a durable metal frame, capable of stitching up to 1,300 stitches per minute. It offers adjustable stitch widths, user-friendly threading guides, and comes with essential accessories, making it perfect for both beginners and seasoned sewists.

A**T
Much easier to use than I thought, seems like a good value for money
Finally found the time to unbox and sit down to figure this thing out. I am a beginner sewer and have never serged before. I took up sewing 2 months ago and was comfortable using this guy. I have to admit the reviews scared me a little, I almost didn't buy it because this thing seemed so intimidating. I am relieved to report that it took me about 30 minutes from unboxing to serging my first sample, and that was me distracted with the TV going. The manual is not nearly as comprehensive as the one for my Brother SE425, but it does the job. It helps if you flip through the entire threading section (just a few pages) before attempting to thread. For those who are too lazy:1) The upper looper (3rd position/ green) thread goes first.2) The lower looper (4th position/ blue) thread goes second. You have to pull out a metal tab to finish threading, the directions are on the machine and there is an arrow to indicate where the tab is.3) The right needle (2nd position/ red) goes next, followed by4) The left needle (1st position/ yellow)Once everything is threaded, make sure the threads are to the right of the needle gizmo and start threading a chain. Once you have your chain, you are ready to stitch your first sample (see pictures attached for the 4 thread overlock stitch sample)!If you are looking for fun projects to do, Craftsy has a few serging classes that will guide you through making fun things with your serger (like a scarf and a bag). I am currently taking a fun with knits class- the whole purpose of this class is to be able to sew knits without a serger, but I'm totally going to use my serger to sew my fleece hoodie! I will update with results.A few things that annoyed me about this:The machine came pre-threaded with 4 white threads. The 4 threads were all knotted up when I opened the box, and it took a few minutes to untangle everything. I also don't like the fact that it has an old fashioned light bulb in there....the light is not very bright and it gets hot a few minutes after turning the machine on. I still gave this 5 stars because I can easily change to an LED bulb when this light goes out....and the knotty thread problem was fixed in a few minutes.Edit (1/18/2016): I had a lot of fun making pillowcases for Christmas presents with this baby. It made the process so much faster and the finished product looked really good. I still used my sewing machine to hem the edge to give it a nicer look, but 90% of the work was done on the serger. Ironing the fabric after pre-shrinking it took longer than serging the 3 sides, so it's a great way to make a lot of presents really fast. All you need is 1 yard of fabric, fold it in half on the fat side (rather than the long side), and serge two sides of it together (don't forget you have 1 fold and 1 opening). This is really great for straight lines, but I found it pretty tough to work with for L-shaped edges...almost impossible to have a completely closed seam with this kind of edges. I tried to make a knit dress the easy way but the arms got really tricky. I'm fairly new to sewing and serging, so there's probably ways to get around this.Also, I made a stitch binder- this helps A TON. Every time I try a new type of stitch, I will make a sample and stick it on a piece of paper. I will write what type of stitch it is, what my thread tensions are, stitch length, etc. It REALLY helped me get to know the serger quite a bit more, I'm now much more comfortable with this tool.Update (9/2/2016): This is awesome for serging straight edges (e.g. pillowcases, napkins, table linens). I still consider myself a beginner sewer/serger and I am able to troubleshoot most of the problems by myself on this. I've not really had any issues with the settings, mostly when my stitches look bad it's because I'm using the wrong needle and/or thread. I am having a lot of difficulty moving on to other kinds of edges- there is no proper way to control/ vary the speed other than via the presser foot. Right now, it is either too fast or too slow, and I find it pretty much impossible for knit clothes because of tricky angles. If you go too slow, things start to go wrong. Hemming is OK, but only for larger hems (ie not cuffs/sleeves). I think it is something that comes with practice, as there are tons of videos out there of people making shirts with just a serger.
H**R
Absolutely No Regrets
Allow me to preface this review with: I've never, ever used nor owned a Serger - I've never even watched someone else use a Serger... so if I can do it, anyone can. I primarily sew clothing, and finally, after 30 years, have decided it's time to take my sewing up a notch. I'm thrilled with the results! I absolutely love this Brother Serger. I spent much time reading reviews and searching Craig's List for an amazing deal on a high dollar Bernina or Juki, which could not be found. So I opted for this Brother within my price range, and could not possibly be happier with my choice. I selected this 1234 over the 1034 because I prefer the more sophisticated look of the Navy Blue dials over the 1034's colored dials - and because this model came with 3 additional feet, well worth the added expense to me.Threading is simple and each step clearly marked and color coded; Inside the looper area, they have little numbered pictures - making threading essentially foolproof - the only thing you need the manual for is to tell you the proper order to follow. As long as you thread in order, you will have no trouble at all. My final comment on threading is to immediately take the thread spools provided with the Brother machine and THROW THEM IN THE TRASH - and thread the machine with quality thread purchased elsewhere. The "complimentary" threads kept breaking and made my first 2 hours on the machine more frustrating than needed. Save yourself the headache! Once I put some decent thread on the Serger, it was smooth sailing from then on.Another advantage to this machine is that it uses standard sewing machine needles, so you don't have to buy special needles for it; you can interchange with your regular sewing machine, which is a cost savings.Overlocking is a breeze. I've tested out denim, super-light stretch fabric, and swim suit fabric; and I've also stitched through 4 layers of Polar Fleece without any trouble (made my son a fleece bathrobe/PJ pants for Christmas). Love the differential feed which prevents stretching!! With only minor adjustments to stitch widths, lengths and tension dials, I have successfully serged flat seams on every fabric I've tried so far. I cannot gush and rave about this Serger enough. I haven't yet tried to do a rolled hem. But a flatlock seam was easy enough. Simply keep the manual open when trying new things and everything seems to work exactly as described.The fabric cutting knives can be disengaged with the flip of a switch, and the upper knife can be easily moved out of the way by simply pressing it down inside the machine. Move it back into position when needed again. No danger of cutting yourself the way it's set up.This machine has helped me make quick work of some pretty big projects that would have taken 3 times longer on my sewing machine. I couldn't be happier with it!! I love this Serger so much, I just had a second one shipped to my Mother... she's pretty excited to start sewing knits again. I highly suggest you save yourself the money and give this Brother a try... my experience has been high dollar results and amazing finished looks at an incredible price.
Trustpilot
1 week ago
4 days ago