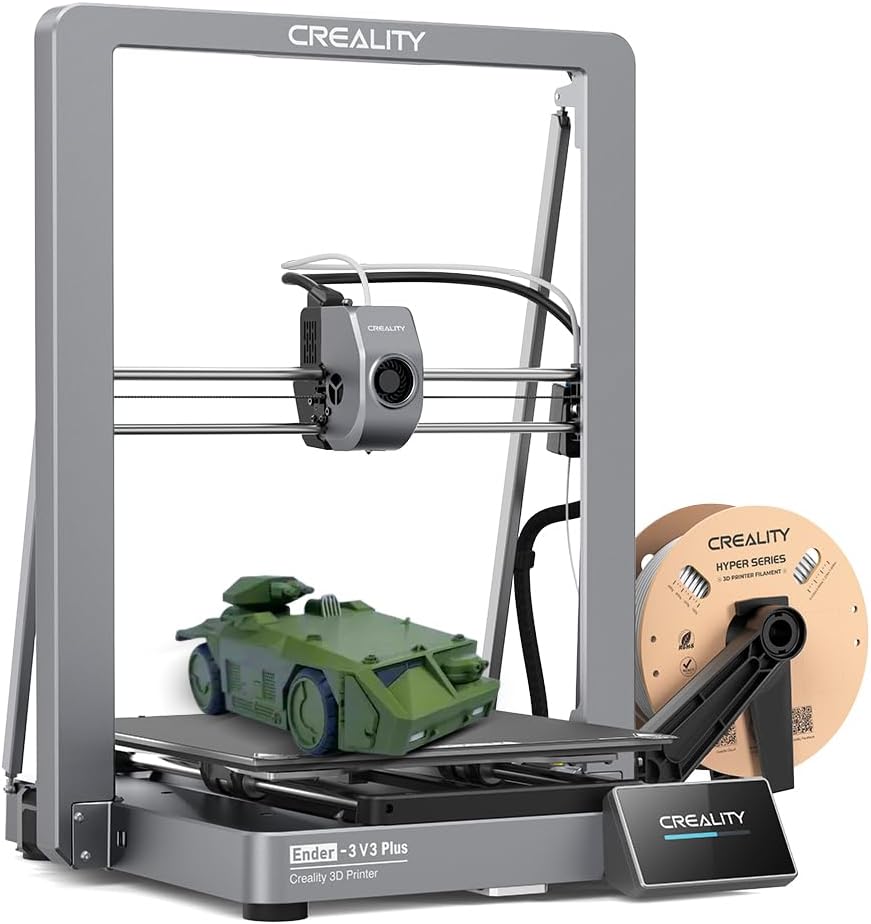

🚀 Print Faster, Bigger, Smarter — Own the Future of 3D Creation!
The Creality Ender 3 V3 Plus is a high-speed CoreXZ 3D printer boasting a 600mm/s max print speed and a spacious 300x300x330mm build volume. Featuring a 300°C tri-metal direct drive extruder and dual Y & Z axis motors, it delivers precise, stable prints with minimal vibration. Its fully automatic one-tap leveling and modular 80% pre-assembled design make setup quick and beginner-friendly, while supporting a wide range of filaments for versatile professional and creative applications.


| ASIN | B0FKMKCJ2Q |
| Best Sellers Rank | #24,890 in Industrial & Scientific ( See Top 100 in Industrial & Scientific ) #42 in 3D Printers |
| Brand | Creality |
| Built-In Media | Blu-ray |
| Color | Grey |
| Compatible Devices | Personal Computer |
| Compatible Material | PLA, TPU, PETG, ABS, PLA-CF, PETG-CF, CR-carbon |
| Connectivity Technology | USB, Wi-Fi |
| Customer Reviews | 4.1 out of 5 stars 3,008 Reviews |
| Enclosure Material | Metal |
| File Format | GCODE |
| Global Trade Identification Number | 00198549081014 |
| Item Dimensions D x W x H | 10"D x 10"W x 10"H |
| Item Height | 10 inches |
| Item Weight | 14.5 Kilograms |
| Manufacturer | Creality 3D |
| Material | Metal |
| Nozzle Primary Material | steel |
| Nozzle Temperature Maximum | 300 Degrees Celsius |
| Nozzle Tip Material | steel |
| Operating System | Windows XP |
| Product Dimensions | 10"D x 10"W x 10"H |
| Warranty Description | 1 Year Warranty |
B**S
Amazing value 3d printer
Super amazing value and super easy operation (I recommend Ultimaker Cura slicer it's way better than their own slicer) print quality is great and I love how upgradeable it is. I used an ender 3 for 4 years (using it pretty consistently for my 3d printing business I run selling 3d artwork and pushed it pretty hard at times and it made the whole cost of the printer back) before I ended up replacing it with an ender 3 s1 pro because I love the ender series so much and wanted an upgrade plus it had some parts needing replacement (I could have replaced the parts for cheep but it was an excuse to upgrade) If you're looking for a basic 3d printer to get started this one is perfect for you
M**X
Easy to build, not for begineers though
Before starting your first print Level the bed (it comes slightly unleveled) Measure the correct amount of Esteps for the extruder. Mine was slightly under-extruding. (Calipers are recommended) After watching plenty of videos on the Ender 3's print quality, I decided to buy one. Out of the box the bed comes a little unleveled so leveling is required (no matter just release steppers, take a piece of a paper and raise/lower the bed until paper catches). My machine came with the newer with the 32 bit board and comes with a bootloader for easy firmware flashing, no Arduino needed just load .bin onto SD and turn on the machine and flash. The first thing you should do upon receiving the printer is checking the bed is level. A nice way of simplifying this process is to flash a brand new Marlin firmware with manual mesh bed leveling enabled (which is a great option if your bed came warped. The wonderful thing about the ender 3 is that it is so common, there are plenty of modifications that can be made since the community for it is huge. A BLtouch is a mod that people put to automate the bed leveling process. Once you get this printer you're gonna feel like purchasing many upgrades for it. The printer does come with a loud stepper driver so if you don't want to hear whirring and beeping for hours on end place the printer into a room or buy Creality's 4.2.7 board with silent stepper drivers or SKR Mini E3. As for overall print quality, it takes a couple of prints to tune in the settings making this printer a great first printer for starters however it does take a decent amount of time to level the bed and get settings right. Finally, buy a raspberry Pi 3 or better and webcam for OctoPrint. Essentially, it allows your printer to have WiFi printing capability among other tools like WiFi monitoring. notifications via Discord and timelapse snapshots. Octoprint is truly an amazing piece of software and if you have this printer, use it!
N**K
Apparent Inconsistent Quality
This was my first 3d printer that I decided to go with due to reviews and successful builds. I was excited to give it a try since I have been using laser and cnc machines for years, it seemed like the obvious next step. While many seem to have luck and positive things to say about this printer, I do not. I settled on this printer due to a bunch of research and forum surfing, to make sure I wasn’t going to buy some piece of garbage. While reviews are helpful, some don’t do things justice. Upon opening the printer and working through the parts, it seemed very straight forward and everything seemed to be of good quality. I had watched and read numerous sources for the assembly so it went quickly and was only a few steps. After getting everything set up, according to multiple sources and Creality, I was excited to get my first print going so I leveled the bed meticulously, got my settings all together, and went to test print a factory provided print. Nothing. Reset settings, trouble shooting from Creality, forum checking. Nothing. I spent two weeks trying to get this printer to work. Not one print the whole time. The printer would not recognize the z axis and would fail to print, even after bed leveling, pre heating and using factory prints. I even disassembled the unit and went through each step again to make sure I didn’t miss anything. Bubkis. I eventually gave up on it and returned it. I bought my runner up on my list of printers, the Flashforge 5m and had it assembled and printing in half an hour with no problems. 20+ prints later and still going. Don’t waste your time with this printer. Go with another brand and save yourself the headache. There are so many out there, I’m sure you will have better luck with a different system.
K**E
Learn how to adjust it and it's fantastic... but noisy.
I'm writing this review after a long first day of printing. I'm pretty happy with it, honestly. This is great value. After having built a larger but remarkably similar printer from scratch, I'm also not convinced they're losing money on it. So at least this isn't a case of Chinese dumping. It's simply a good product at a fair price, for once. My first two prints came out looking fantastic. The provided white PLA wasn't enough to complete the dog model, but my somewhat old and probably wet yellow PETG printed just fine as well. Adhesion was quite good on the provided print surface. Obviously, your results may vary. I don't know how good their quality assurance is, but most Chinese manufacturers seem to struggle with it. It could be that I got one of the good ones. The rails aren't bent, the belts are intact, the steppers all work just fine. The electronics are noisy, though. Given the price, this isn't surprising, but it is something most people will probably want to upgrade. Going with something with TMC2208 or better stepper drivers will almost certainly solve the problem. Overall, I'd say it's a good printer for beginners, but not if you're a buffoon or just not mechanically inclined. Learn how to tune this in, and it'll serve you very well. Ultimately, I gave this four stars instead of 5 because of the noise issue and because the manual doesn't mention the single most important detail for making this printer really shine: adjusting the delrin wheels. Since the manual doesn't mention it at all, I'll give a quick explanation here: the delrin wheels that form the linear bearings for this printer need to be properly tensioned. Do _not_ expect the factory setup to be anywhere near correct. Even if they got it perfect, the shipping process can knock them out of alignment again. The printer comes with little wrenches just for this purpose, so use them! On each set of wheels on the X and Z axes, there is one wheel that is mounted on an eccentric spacer. You can identify it because it has a hex shaft instead of a round one. The larger wrench in the kit should fit this hex. If you turn it, the wheel is pushed slightly inward or outward because it's mounted a little off-center from the bolt hole. This is how you adjust the wheel spacing to make the bearing tighter or looser. You should make it tight enough that you can't feel any play when you try to twist the bearing set, but not so tight that it's difficult to make it roll along the rail. You shouldn't be able to turn the wheels against the rail without the whole thing moving along the rail too. If you still have trouble, take your printer apart again and make sure the ends of the rails weren't damaged in shipping, causing them to not mate up squarely. Since the rails are aluminum, it's relatively easy for the sharp corners to be deformed from minor bumps. If the corners are deformed from impact damage, you should file/sand the deformity off so that the face of the end of the rail can mate flatly against the side of the rails you're bolting them to. If your rails are bent, you'll have to take that up with Creality. There's a warranty for a reason, and that definitely counts. If you aren't sure if your rails are bent, take two of them and place them together lengthwise. Rotate one of them 90 degrees a few times, checking if you can see light coming through between them. If you can, at least one of them is bent. Get a replacement. You spent money on the damn thing, make sure you get what you pay for!
B**D
Verdict is in, 2 thumbs up.... was: (verdict is still out)
Update: Creality was very quick to respond to my issue with a warped build plate and took care of the problem. I'm happy to report now that bed leveling is a breeze and I don't have issues with my prints sticking in the center anymore. I've come to expect QC issues with these 'inexpensive' Chinese, shall I say gadgets. So having something out of the box that isn't perfect is OK with me as long as the seller/company takes care of the issue, in this case Creality did so pronto.. so thank you. Overall this is probably the best bang per print volume out there and I wouldn't hesitate to buy from creality again. This isn't my first 3d printer (does anyone buy just 1?) Ordered a few weeks ago and just now having some time to get it setup. A couple notes that may help others during the build/setup. Out of the box, the pre-assembled lower portion was not built straight/square. This is a pretty easy fix, loosen all the bolts that hold the extrusion together and set it on a level surface and re-tighten all bolts. The Z stepper mounting didn't line up nice and square, you need to loosen all those mounting bolts, get the Z screw running and then tighten down when straight/square. I think I even saw some shims or mounts on thingiverse to address this. My build plate is warped/bent. If I level in the corners the print wont adhere in the center. If I level the center, the nozzle digs into the corners. Scratched my build mat all to hell trying to get that workable (which I can't). I did email creality and we'll see how they respond and I'll adjust my rating based on that. I would just buy a glass bed for it, but that's another $30, and it's warped enough that that glass wont sit flat enuf to heat properly.. then I need a thermal pad.. grrr.. there's more $$.. just get me solid level bed and build mat and I'll be happy. Overall this is a good solid printer and great value for the $ that I would give 4.5 stars if my warped bed is addressed, until then I'd have to say it's a 3
U**S
Very nice!
I had (better still have) a CR-10 V2 for quite a few years and really like it ... but I wanted a 'direct drive' feeder and a higher temperature hotend ... refitting my old printer seemed too tedious, so I ordered this one (Ender-3 V3 KE) ... WOW! what an upgrade ... yes the built is smaller but the speed is phenomenal and it processes TPU with ease ... I am very satisfied !!
J**.
Watch YouTube On-line Beginner Videos BEFORE Building - Assembly Sheet Is VERY Confusing
Watch the third-party free YouTube on-line beginner videos BEFORE building. The included assembly sheet is VERY confusing … and I’m an engineer! The videos make good points about how extremely important it is to make sure the printer’s frame is absolutely square in all three dimensions. Just gradually tightening the bolts in a rotation (like when tightening the bolts/nuts on a vehicle wheel) isn’t good enough. The Z limit switch mounting bracket has a nub on the left front corner (looking from the front of the printer). Some videos say to clip it off (e.g., with diagonal wire cutters or heavy-duty shears), which is the only way that I could get to perform the bed “leveling” process. The process actually positions the bed parallel to the X-Y plane of the printer’s frame (left-to-right, and front-to-back). Some people mistakenly try to use a carpenter’s level to “level” the bed, but if the printer isn’t sitting on a perfectly level table/bench surface, and the bottom of the printer frame isn’t exactly parallel to the supporting table/bench surface (not likely), a carpenter’s level won’t be of any use. Threading the printing filament past the gripping feed rollers and into the white feed tube to the print head is very tricky. Some videos show that it helps to unscrew the brass fitting attached to the feed tube and get the filament to protrude out of the right side of the feed mechanism about an inch (25 mm), then screw the brass fitting back into the mechanism after pushing the fitting over the protruding filament. That makes it possible to get the filament into the feed tube - I couldn’t have accomplished that step without that hint. Getting the end of the filament into the hole beyond the gripping feed rollers was extremely frustrating, as the hole is impossible to see, even with bright lighting, as the hole passes through a black plastic housing behind the very close rollers. The menu items are somewhat different on my printer from any of the manual versions (included on the USB thumb drive, on the Creality.com site, elsewhere on-line, or what’s shown in the videos. I was able to guess that the Motion menu item was what had to be selected from the main menu in order to get to the Auto Home and Disable Steppers menu items, needed to perform the “leveling” steps. Once I had stumbled through the assembly sheet, then discovered the YouTube videos and done things right, printing was pretty straightforward using the built-in micro-SD card reader. I haven’t been able to scale a model down in the included Creality subset of the free, open-source Cura “slicing” software. The provided gcode files print just fine, but not the .stl files after scaling and saving as gcode files. The printer only displays and prints from gcode files that the slicing software generates from .stl (3D Object) files. I’m trying to resolve this issue via on-line searches and forums.
F**G
Motherboard issues within the first couple prints
I had a qidi print I-mates, but it was so huge and fixing clogs was always a hassle so I wanted to go with something smaller and easier to maintain, so I got this ender. Right away the very first test print was amazing. Came out perfect (even though they sent a strip of filament to test with that wasn’t even enough to make a full print, which qidi print gave an entire spool but I digress). I went ahead and put my filament on and gave it a go and right off the bat there was an issue, the bed was completely off level despite it being leveled with the first print. Fine, whatever I fixed it. My first attempt it just kept bunching up and didn’t stick, so I used some glue (which it also didn’t come with and qidi print came with its own glue too but again I digress). Started to print and it got clogged halfway through. I went to take my print off and it was stuck to the bed. With the qidi print bed all I had to do was scrape it off or use alcohol so I went ahead and tried to scrape with their spatula but it wasn’t budging, used alcohol and it ruined the bed. So I had to buy a new bed, this time I got their glass bed (love glass beds!) started the print and half way through it clogged again. So I did a bit of fiddling around, settings aren’t like the qidi but that’s to be expected. Started the print again and again halfway through it was bunching and I can tell it’s going to get clogged so i stopped it and restarted the print and messed with the settings a bit. Nope! Did it again. It was silk PLA and it’s expensive so I didn’t want to keep trying, it’s for an order and I don’t have the time for this, so I went ahead and tossed on a different filament. Started off great but then it started to lift/curl on an edge. Stopped it and restarted the print after cleaning the bed. Nope it curled again. At this point I was very flustered, I’ve spent hours trouble shooting and I have a life outside of this and I can’t hang any longer so I just move the print to the side of the bed instead of center and it’s going great. Suddenly I hear a loud BEEEP so I run to check it out and the dreaded “tempature runaway” error popped up (basically it can’t control the temp aka very dangerous fire hazard to keep on) so I turn it off and restart it. Nope it does it again. The nozzle is now leaking out PLA and so I use the controls to lift the z axis and stop it from clogging, again, but nope. Z axis isn’t even working. The bed and arm are loose and nothing is being controlled, the motherboard is fried. I have NEVER had this many problems right off the bat. Amazon is sending a replacement, hopefully it’s just the one I got! Will update with replacement
Trustpilot
1 day ago
2 weeks ago