🚗 Seal the deal with style and silence!
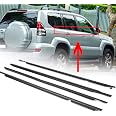
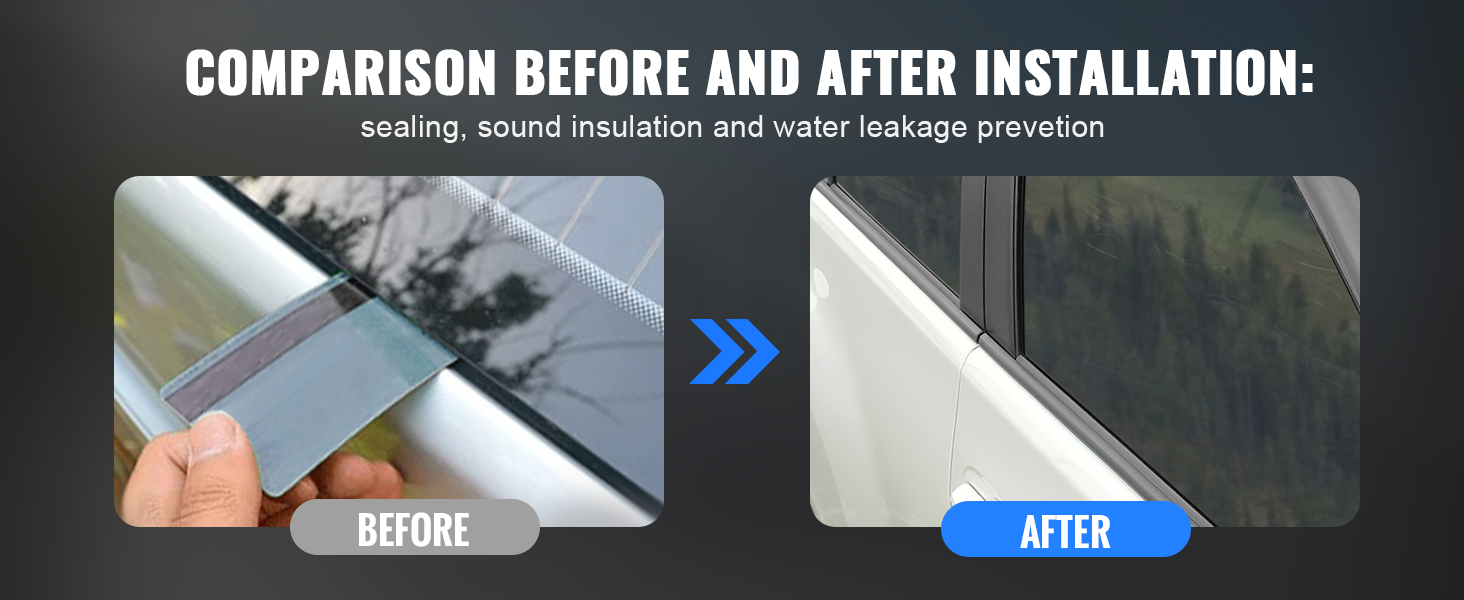
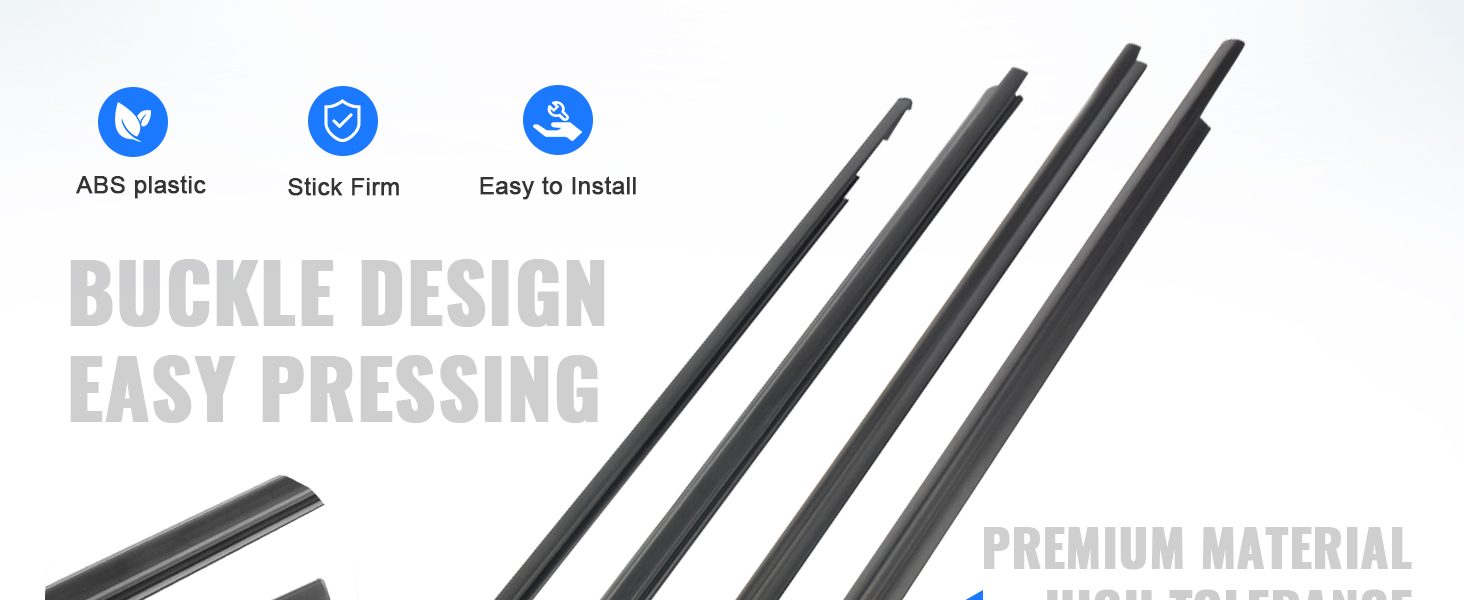
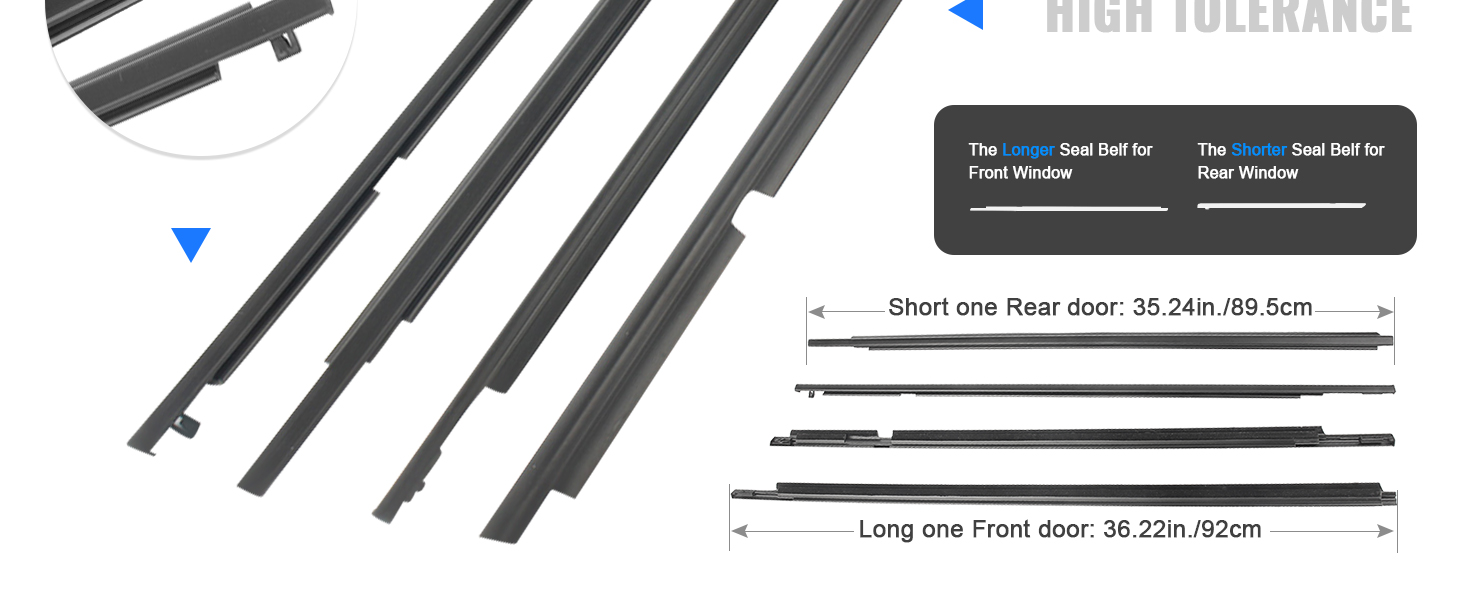
The Newsmarts 4pcs Automotive Weatherstrip Window Seal is a high-quality, UV-coated rubber trim designed specifically for Toyota Land Cruiser Prado 120 and Lexus GX470 models from 2003 to 2009. Engineered for durability and flexibility, it offers superior noise reduction, waterproofing, and a perfect fit to eliminate leaks and rattles, enhancing your vehicle’s comfort and longevity with eco-friendly materials.


| Brand | Newsmarts |
| Material | Rubber |
| Color | For Cruiser Prado 2003-2009 |
| Recommended Uses For Product | Car,Window |
| UPC | 619821511482 |
| Number of Items | 1 |
| Manufacturer | Newsmarts |
| Unit Count | 4 Count |
| Part Number | 2050FY350-N |
| Item Weight | 2.84 pounds |
| Package Dimensions | 47 x 2.8 x 2.75 inches |
| Size | For Toyota |
| Style | for Toyota Land Cruiser 2003-2009 |
| Item Package Quantity | 1 |
| Special Features | Please confirm the auto accessories fit your vehicle before placing order |
| Batteries Included? | No |
| Batteries Required? | No |
M**.
Fit fine
Maybe a tiny bit off on the ends but no bid deal at all considering the price and age of the vehicle. Looks and fits great. You just have to remember to tap them in with a rubber mallet or equivalent (like all self clamping press fitsimilar trim pieces) require. If you don’t do this properly the pieces may not affix properly and fall off or leak with use. I think some negative reviews maybe come from not doing this correctly.
J**E
Listen for the Snaps!
Installed on my 2011 Toyota Tundra. At first, I thought there was an issue. I was the issue.If this is your first time installing, there will be a physical "snap into place sound" as you put it in the groove and push down. I'd recommend turning them 30 degrees towards yourself and pushing down to get the snap going all the way down. If for some reason you have it seated but its not snapping flush, that is likely the issue.Would buy again.
L**H
Absolutely worthless.
These go on pretty easy. The problem is they don’t stay on the little latches don’t match up properly so that’s why they don’t stay on. This was a waste of money. Do not purchase this product pay the difference don’t make the mistake I did. I’m constantly fixing them making sure they’re not flying off and they do not snug up to the window at all. I should’ve gone with the reviews that were stated but I didn’t. I thought maybe I’ll try him the heat in Vegas maybe that’ll make a difference with the seal being next to window but no they don’t snug up to the window and they don’t stay on.
M**B
Hard to Find Aftermarket Product.
It seems as though the rear strips fit better than the forward strips. Some click into place and some do not using the same exact procedure. I also needed to return the first set I ordered for another, as the end of one of the front strips snapped right off when installing.You must perform the installation very carefully. Just completely remove the old original strip, position this one and gently bang into place with a mallet. Overall, a fairly good product that works when it works.
M**R
Practicas
Muy buenas y fácil de colocar recomendadas
Z**E
Decent but delicate
Decent fit, but very delicate. One of the seals did not go in very well and I had to adjust it; it broke when doing so and I will now have to order another replacement.
S**L
Well worth it.
Before I purchased these, I read a few of the responses so I wasn't really sure what to expect. I had to trim the 2 front moldings. (about 3/8 inch). All in all it took me less than 1 hour to install the four moldings. They fit great and look even better. There is a video on Youtube that really helps.
D**B
OEM like, easy to install
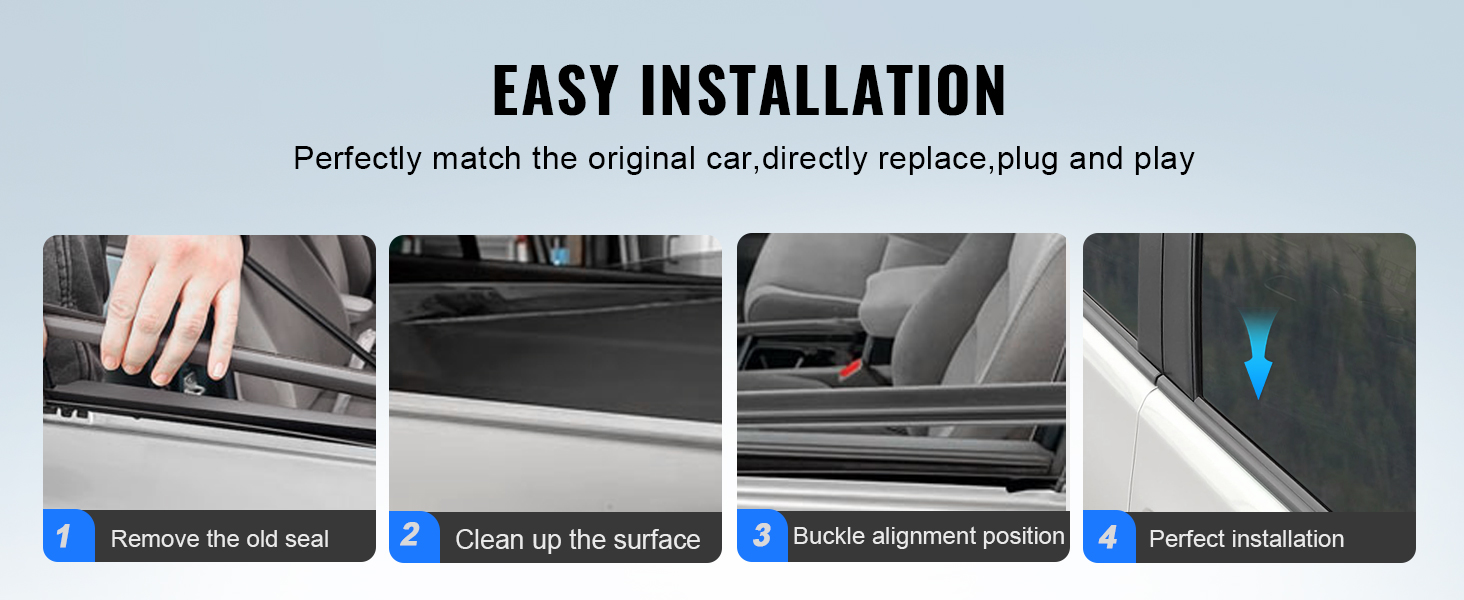
I have a 2007 Toyota Crewmax and my drivers side window weather stripping was getting torn up and needed replacing. Ordered these and they were packaged well with a box within a box to protect them. Upon opening the package each window element didn't have any indication which side and front or rear indicator on them, well there was a Chinese label or something but nothing I could understand. But it's not rocket science so took couple minutes to figure out which one went where. Took off the old weatherstripping and cleaned the area really good and you install the clip end first and then seat the rest of the strip. It was a little hard to seat the whole thing but using your forearm to press down or bang it a little worked well so no big deal. On the back one, they might be slightly short so when you push in the clip into the hole pull backwards on it a little so it fits a little better. All in all they look good and were pretty easy to install. and guess it took maybe 30-40min at most to install all of them. Highly recommend and hope they last.
Trustpilot
2 months ago
2 weeks ago